Pruning
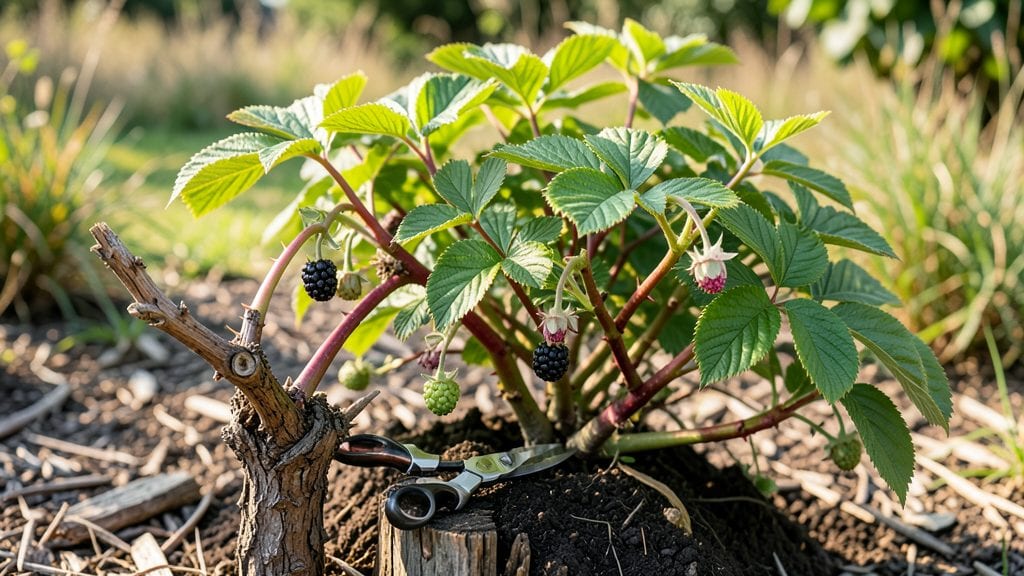
Mastering blackberry plant pruning isn’t just cutting—it’s unlocking next year’s harvest right now. ✨ I’ve turned my tangled blackberry patch into a well-behaved, fruit-loaded machine by following just three strategic cuts each season, and the difference in yield is shocking.
The key is timing: summer-bearing types need a hard prune in winter, while fall-bearing varieties get two cuts—one in late winter and another after harvest. You'll need sharp loppers, gloves (thorns are no joke), and a clear day to see the canes properly.
Most people over-prune or under-prune, both of which lead to fewer berries.
After pruning, you'll see thicker, more productive canes emerging by spring, with better air flow that fights disease. The berries themselves grow larger and sweeter because the plant focuses its energy on fewer, stronger stems. It's the difference between handfuls of fruit and buckets of it.
Works for thornless varieties too—just adjust your gloves and approach. The method scales from backyard patches to commercial plantings. Let's get those canes shaped for maximum harvest next year.
📚 In This Guide
- What you need
- Instructions
- Tips and common mistakes
- Wrapping up and next steps
What you need
- ● Pruning shears: Bypass pruners (sharp, 5–8" blades) for clean cuts on small stems. Quantity: 1 pair.
- ● Loppers: Heavy-duty (20–24" blades) for thicker branches (½"–1½" diameter). Quantity: 1 pair.
- ● Pruning saw: Curved-tooth for large, woody stems (>1½" diameter). Quantity: 1.
- ● Gloves: Heavy-duty, thorn-proof (leather or reinforced fabric). Quantity: 1 pair.
- ● Disinfectant: 70% isopropyl alcohol or bleach solution (1 part bleach : 9 parts water) to sterilize tools between cuts. Quantity: Small spray bottle.
- ● Long sleeves/pants: Protect against scratches and sun exposure.
- ● Safety glasses: Shield eyes from debris.
- ○ Marking twine or flags: Label canes for future reference (optional but handy!).
- ● Wheelbarrow or bucket: Collect pruned branches for compost or disposal.
- ● Hose or spray bottle: Rinse tools post-pruning to remove sap.
- ● ✅ Know your blackberry type: Erect (upright canes) vs. trailing (sprawling). Pruning methods vary!
- ● ✅ Check the weather: Prune on a dry, overcast day to reduce stress on the plant.
- ● ✅ Identify last year’s fruit: Look for mature canes (2+ years old) vs. primocanes (current year’s growth).
- ● ✅ Clear the area: Remove weeds and debris around the plant for easier access.
How to prune blackberry plants for maximum fruit production
Blackberries reward precise pruning with heavier harvests and healthier canes. Here's the seasonal rhythm I follow to keep my bushes thriving.
✂️ Step 1: Late Winter Pruning (Before Bud Break)
Timing is everything here—wait until late winter when the ground is workable but before buds swell (typically February-March in most climates). Start by removing last year's fruiting canes—these are the thick, brown stems that produced berries last season. They're woody at the base and won't fruit again, so cut them to the ground with clean, sharp pruners. I make a 45-degree cut just above the soil line to prevent water from pooling.
Next, identify the strongest 6-8 canes remaining. These are the thin, green, flexible stems that emerged last summer. Thin the rest—even if they look healthy, overcrowding reduces air circulation and invites disease. I leave the strongest canes evenly spaced around the plant's center. This ensures sunlight reaches all canes, which is critical for fruit development.
✂️ Step 2: Summer Pruning (After Harvest)
Once you've picked the last berries, it's time for light maintenance pruning. Focus on removing any canes that produced fruit this season—they'll be woody and brown at the base. Cut them back completely. This might seem harsh, but it's essential for next year's production. I also trim any damaged or diseased canes immediately, using 70% isopropyl alcohol to sterilize my pruners between cuts to prevent spreading pathogens.
Look for suckers—those thin, green shoots growing from the base or outside the plant's main structure. These divert energy from fruit production. Snip them off at the base with clean shears. I do this every 2-3 weeks during summer to stay ahead of the growth. Healthy blackberries need to focus their energy on the main fruiting canes, not these aggressive side shoots.
✂️ Step 3: Fall Cleanup (After Leaf Drop)
After leaves fall but before hard frosts, do a final inspection. Remove any remaining dead or weak canes—they're just taking up space. I also trim any canes that have flowered but didn't produce fruit (these are called "blind canes"). Cut them back to encourage next year's growth. This is also the time to thin any remaining canes if you didn't get to it in spring—aim for 6-8 strong canes total.
Rake up and dispose of all plant debris from around the base. This prevents blackberry rosette virus and other soil-borne diseases from overwintering. I use a heavy-duty trash bag and seal it tightly. While you're at it, mulch the base with 2-3 inches of organic mulch (like wood chips) to protect roots from winter temperature swings. This keeps the soil 40-50°F even in cold snaps, which is ideal for blackberry roots.
⏰ Step 4: Year-Round Maintenance Checks
Between seasonal prunings, do weekly inspections during growing season. Watch for canes growing at odd angles—these often indicate poor support structure. Install T-posts or sturdy wire trellis if needed (I use 6-foot posts spaced 6 feet apart). Tie canes to the support with soft plant ties to prevent damage. You'll see healthier canes and larger berries when they're properly supported.
Finally, fertilize lightly in early spring with 10-10-10 fertilizer (about 1 pound per 100 square feet). Blackberries are heavy feeders, but too much nitrogen leads to leafy growth at the expense of fruit. I always water deeply after fertilizing to help nutrients reach the roots. This keeps the soil moist but not soggy—blackberries hate wet feet.
Tips & tricks for perfect blackberry plant pruning
Blackberry pruning might seem intimidating, but these game-changing tips will help you master the seasonal rhythm for bountiful harvests every year.
The Timing Factor: In Step 1, don't rush the late winter pruning—wait until buds are still tight but ground is workable. I've learned the hard way that pruning too early (when buds swell) can stimulate new growth that won't survive winter freezes. Use your finger to gently press a bud—if it feels firm, you're ready. For northern climates, aim for late February to early March, while southern regions can start slightly earlier. This precise timing ensures your plant enters dormancy properly.
Cane Identification: When selecting your strongest 6-8 canes in Step 1, look for stems that are straight, flexible, and show no signs of damage. I always run my hand along the length—healthy canes feel smooth with a slight springiness. The key is to maintain that even spacing around the plant's center. I visualize a clock face when arranging them, ensuring each cane has equal access to sunlight. This spatial arrangement dramatically improves fruit quality and yield.
Disease Prevention: Step 2's summer pruning is your chance to protect your investment. After cutting any diseased canes, I don't just wipe my pruners—I sterilize them with 70% isopropyl alcohol between each cut. This might seem excessive, but blackberry rosette virus can spread through contaminated tools. I also keep a small spray bottle of diluted bleach (1 part bleach to 9 parts water) nearby for quick disinfection if I don't have alcohol on hand. Healthy canes are your best insurance against disease.
Mulching Strategy: In Step 3, that 2-3 inches of organic mulch isn't just decoration—it's insulation. I use wood chips because they break down slowly, providing long-term protection. The mulch helps maintain that ideal 40-50°F soil temperature even during winter temperature swings. Pro tip: Apply mulch after your final inspection but before hard frosts. This creates a protective barrier that prevents soil temperature fluctuations, which can stress blackberry roots and reduce next year's fruit production.
Pro Tips for Blackberry Plant Pruning
- Blackberry pruning might seem intimidating, but these game-changing tips will help you master the seasonal rhythm for bountiful harvests every year.
- The Timing Factor: In Step 1, don't rush the late winter pruning—wait until buds are still tight but ground is workable.
- Cane Identification: When selecting your strongest 6-8 canes in Step 1, look for stems that are straight, flexible, and show no signs of damage.
Frequently asked questions
Got questions about keeping your blackberry bushes happy and productive? Here are some of the most common ones—plus expert answers to help you prune like a pro!
When is the best time to prune blackberry plants?
Prune blackberries three times a year for maximum yield: late winter (before new growth starts), summer (after harvest), and fall (to remove dead canes). Ever-bearing varieties may need a fourth trim in early spring to encourage fruit production. Always prune after the last frost in your zone to avoid damaging tender new growth.
How do I tell the difference between old and new canes?
Old canes are brown, woody, and hollow—they’ve already produced fruit and should be cut down. New canes are green, flexible, and solid (tap them—they’ll sound hollow if they’re old). Pro tip: Thin out old canes first to make room for the new ones, which will bear fruit next season!
Can I prune blackberries too much? What are the signs?
Yes! Over-pruning removes too many canes, stressing the plant and reducing fruit. Signs of over-pruning:
- Fewer than 5-6 strong new canes emerging in spring
- Stunted growth or yellowing leaves
- No fruit (or very little) in the following season
What should I do if my blackberry plant isn’t fruiting after pruning?
If your bush is pruned correctly but still skips fruiting, check these fixes:
- Check the variety: Some types (like Thornless Evergreen) need both old and new canes to fruit.
- Soil & sunlight: Blackberries need 6+ hours of sun and well-draining soil. Amend clay soil with compost.
- Fertilizer: Apply a balanced 10-10-10 fertilizer in early spring and after harvest.
- Patience: New plants may take 1-2 years to fruit heavily after transplanting.
Do I need to sterilize my pruners between cuts?
Absolutely!
Sterilizing pruners prevents the spread of bacterial canker or fungal diseases (like anthracnose). Wipe blades with rubbing alcohol (70%+) or a 10% bleach solution between cuts, especially when moving from dead/diseased canes to healthy ones. For heavy infestations, soak pruners in bleach for 30 seconds and rinse.
Wrapping up and next steps
Pruning your blackberry plants might seem like a big task, but with the right tools, timing, and technique, you’ll unlock a bountiful harvest year after year! 🌱 Remember, spring, summer, and fall trims are your keys to healthier canes, better fruit production, and easier maintenance.
Start small, stay consistent, and soon you’ll enjoy juicy berries in every season—plus, you’ll save time and frustration in the long run.
Ready to take the next step? Grab your pruners and schedule your first trim—whether it’s clearing out old canes or shaping new growth. Your future blackberry patches (and your taste buds!) will thank you. Happy pruning! 🍇✂️