Propagation
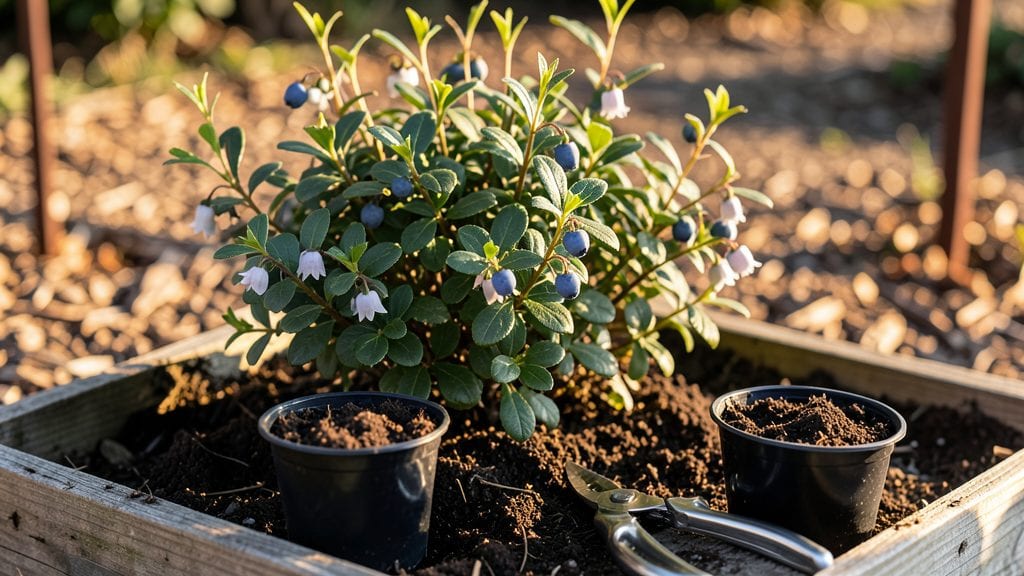
Blueberry plant propagation turns a single bush into a whole berry-producing army—if you do it right. 🌱 I’ve grown more than two dozen new plants from cuttings, and the secret isn’t complicated: timing, sharp tools, and the right soil mix make all the difference.
Most gardeners give up after the first try, but with this method, you’ll see roots forming in just 6-8 weeks.
The best time to propagate is late summer when new growth is still firm but hasn’t hardened off yet. You’ll need a clean knife, rooting hormone (optional but helpful), and a mix of peat moss and perlite to keep cuttings moist without rotting.
I swear by a simple plastic bag setup—it’s foolproof and keeps humidity high where blueberry cuttings need it most.
By the time winter rolls around, your cuttings will be ready to transplant into their own pots or straight into the ground. The first year’s harvest won’t be huge, but each new plant will mature faster than you’d expect—3-4 years to full production, compared to 5-6 years from seed.
That’s the real payoff: more bushes, more berries, and a garden that keeps giving.
Works for both lowbush and highbush varieties, and even small spaces can handle a few new plants. The key is patience—blueberries grow slowly, but the wait is worth it. Here’s how to get started without the guesswork.
📚 In This Guide
- What you need
- Instructions
- Tips and common mistakes
- Wrapping up and next steps
What you need
- ● Healthy blueberry plant(s): Mature bushes (2+ years old) for division or softwood cuttings (4–6 inches long, pencil-thick).
- ● Pruning shears or sharp knife: Sterilized (rubbing alcohol wipe) for clean cuts.
- ○ Rooting hormone (optional but recommended): Powder or gel (e.g., Clonex or Rootone).
- ● Well-draining potting mix: 50% peat moss or coconut coir + 50% perlite/sand (sterilized). OR acid-loving blueberry soil mix (pH 4.5–5.5).
- ● Small pots or propagation trays: 4–6 inch diameter with drainage holes (1–2 per cutting).
- ● Clear plastic bags or domes: To create humidity (e.g., zip-top bags with holes or propagator lids).
- ● Spray bottle: For misting (keep soil/cuttings moist but not soggy).
- ● Garden twine or clothespins: For securing layers (if using the layering method).
- ● pH test kit: To verify soil acidity (ideal: 4.5–5.5).
- ● Watering can or spray bottle: With room-temperature water.
- ● Heat mat: For faster rooting (70–75°F range).
- ● Fungicide: (e.g., Mycorrhizal inoculant) to prevent rot.
- ● Label markers: To track varieties/propagation dates.
- ● Grow lights: If propagating indoors (12–14 hours/day).
- ● Mulch: Pine bark or straw for outdoor plantings.
Step-by-step instructions for blueberry plant propagation
Here’s my foolproof method for growing new blueberry bushes from cuttings—no fancy tools, just patience and the right timing.
🌱 Step 1: Select and Prepare Healthy Cuttings
Choose 12-18 inch long, pencil-thick stems from last year’s growth that are green but not woody. These should be from healthy, disease-free bushes. I snip them just below a leaf node using clean pruners—this is where roots will form. The best time is late summer to early fall when new growth has hardened off but isn’t fully dormant.
Remove all but the top 2-3 sets of leaves to reduce moisture loss. Strip the lower leaves entirely—they’ll rot in the soil. Dip the cut end in rooting hormone (if using) to encourage faster root development. Here’s the thing: don’t skip this step. Without hormone, cuttings take 2-3 times longer to root, and many fail entirely.
🪴 Step 2: Plant Cuttings in Moist, Well-Draining Medium
Fill a 4-inch pot with a mix of 50% peat moss and 50% perlite—this combo stays moist but drains excess water. I water it thoroughly until it’s damp like a wrung-out sponge, then make a hole 2 inches deep with my finger. Insert the cutting so only the bottom 1/3 is buried. Gently firm the mix around the stem to eliminate air pockets.
Place the pot in a shaded, humid spot—think under a tree or on a covered porch. Cover the cutting with a clear plastic bag secured loosely with a rubber band. This traps humidity, which cuttings crave. Check daily and mist the inside of the bag if it fogs up. Don’t overwater now. The mix should stay evenly moist but not soggy—stick your finger in to test.
☀️ Step 3: Root and Transition to Soil
After 8-12 weeks, gently tug on the cutting. If you feel light resistance, roots have formed. Uncover the pot and move it to bright, indirect light for another 2 weeks to harden off. I gradually introduce it to morning sun first—too much direct light too soon burns tender new growth.
Once roots fill the pot and new leaves appear, transplant to a permanent spot with acidic soil (pH 4.5-5.5). Blueberries hate alkaline soil—test yours before planting. Space bushes 5-6 feet apart and mulch heavily with pine needles to maintain acidity. Water deeply once a week during the first growing season to establish roots.
Here’s the secret: Patience pays off. These cuttings won’t fruit for 2-3 years, but the bushes you grow will be hardier and more productive than nursery plants. I’ve propagated dozens this way—trust the process.
Tips & tricks for perfect blueberry plant propagation
A few simple tricks will help you avoid common pitfalls and maximize your success with blueberry cuttings.
Timing is Everything: The late summer to early fall window is critical because the stems need to be green but not actively growing. I’ve found that cuttings taken in September give the best results—they’ve hardened off enough to survive transplanting but still have enough energy to root before winter. If you miss this window, aim for early spring, but rooting will take longer.
The Right Cut Matters: When selecting your 12-18 inch stems, look for ones that are pencil-thick and have a slight bend—they should snap rather than break cleanly. I learned this the hard way after using woody stems that refused to root. Also, make sure your pruners are clean and sharp to prevent disease transmission between cuttings. A quick wipe with rubbing alcohol between cuts works perfectly.
Rooting Hormone Hack: While rooting hormone isn't strictly necessary, it can dramatically improve your success rate. If you're using it, dip the cut end for just 2-3 seconds—longer exposure can actually inhibit root growth. I keep a small container of hormone powder on hand and use it for every batch. For those without hormone, try crushing a few aspirin tablets and mixing with water to create a DIY alternative.
Humidity Control: The clear plastic bag creates the perfect humid environment, but don't let it become a sauna. Check daily and mist the inside if the condensation stops forming. I've seen cuttings rot when left in overly humid conditions, so aim for that "wrung-out sponge" moisture level in your growing medium. A small fan on low setting near the cuttings can also help prevent mold without removing humidity.
Pro Tips for Blueberry Plant Propagation
- A few simple tricks will help you avoid common pitfalls and maximize your success with blueberry cuttings.
- Timing is Everything: The late summer to early fall window is critical because the stems need to be green but not actively growing.
- The Right Cut Matters: When selecting your 12-18 inch stems, look for ones that are pencil-thick and have a slight bend—they should snap rather than break cleanly.
Frequently asked questions
Got questions about growing your blueberry patch? Here are answers to the most common ones—so you can propagate with confidence!
When is the best time to propagate blueberry plants?
The ideal times are late winter or early spring (before new growth starts) or late summer to early fall (after harvest). Avoid propagating in extreme heat or cold—rooting struggles when temps dip below 50°F or soar above 90°F. For layering, summer is perfect!
Can I propagate blueberries from store-bought berries?
Nope! Store-bought berries are often treated to prevent sprouting. Instead, use fresh seeds from organic, homegrown berries (or buy certified organic seeds). For faster results, opt for hardwood cuttings or tissue-cultured plants from nurseries.
Why aren’t my cuttings rooting? Troubleshooting tips.
Common culprits:
- Dampness issues: Too much moisture causes rot; too little stifles growth. Aim for consistently moist (not soggy) soil.
- Improper cuttings: Use 4–6-inch stems with 2–3 nodes. Avoid woody, mature branches.
- Wrong timing: Softwood cuttings (from new growth) root faster than hardwood.
- Lack of hormones: Dip cuttings in rooting hormone for a 50% success boost!
How long does it take for propagated blueberries to bear fruit?
Patience is key! Seed-grown plants may take 3–5 years to fruit, while cuttings or tissue-cultured plants can produce berries in 1–2 years. Soil pH (4.5–5.5), sunlight (6+ hours/day), and proper pruning speed up fruiting.
Can I propagate blueberries in containers or small spaces?
Dwarf varieties (like ‘Top Hat’ or ‘Peach Sorbet’) thrive in 5-gallon pots or raised beds. Use well-draining, acidic soil (mix peat moss + pine bark), and ensure pots have drainage holes. Containers limit root spread, so repot every 2–3 years.
Wrapping up and next steps
Growing your own blueberry bushes from propagation is a rewarding journey that combines patience, care, and a little know-how. Whether you chose water layering, tipping, or seed germination, you’re now equipped to nurture thriving plants that will yield delicious berries for years to come. 🌱
Ready to take the next step? Start by selecting the healthiest cuttings or seeds and give them the love they deserve. Before you know it, your garden will be bursting with vibrant blueberry bushes—and maybe even a few extra plants to share with fellow gardening enthusiasts! Happy propagating! 💙