
Diseases
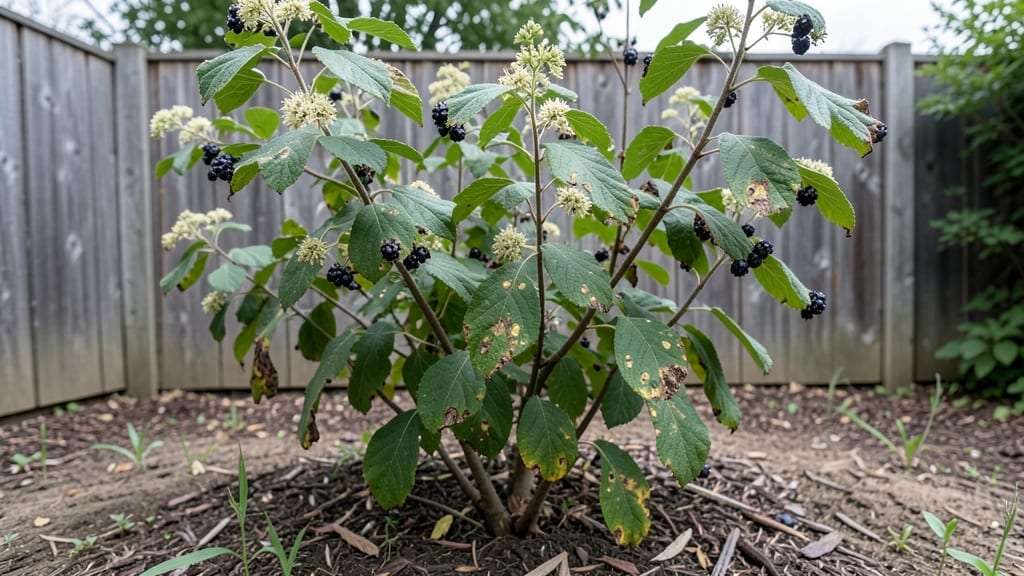
Elderberry plants fighting fungal diseases can mean the difference between a bountiful harvest and struggling bushes. 🌿 I’ve watched powdery mildew turn my berries bitter and leaf spot turn my plants into a skeleton of themselves—until I learned to spot these threats early.
The key is knowing what to look for and acting fast before the whole plant gives up.
You’ll need a sharp eye for the first signs—white powder on leaves for mildew, dark spots with yellow halos for leaf spot, or wilting that won’t quit for verticillium wilt.
Once you recognize these, the fixes are simple: prune affected branches in dry weather, apply organic sprays like neem oil or copper fungicide, and keep your bushes well-spaced for airflow. Prevention is easier than cleanup, and a few tweaks now save you from losing your whole crop later.
📚 In This Guide
- What you need
- Instructions
- Tips and common mistakes
- Wrapping up and next steps
What you need
- ● Gloves (nitrile or rubber) – 2 pairs (one for handling plants, one for cleaning tools).
- ● Pruning shears or sharp bypass pruners – 1 set (sterilized with 70% isopropyl alcohol).
- ● Handheld magnifying glass (10x magnification) – 1 (for inspecting tiny symptoms).
- ● Spray bottle (16 oz) – 1 (for applying fungicides or water).
- ● Fungicide (copper-based or neem oil-based) – 1 quart (e.g., Copper Fungicide or Neem Oil).
- ○ Baking soda solution (optional for mild fungal issues) – 1 tbsp baking soda + 1 gallon water + a few drops of dish soap.
- ● Disposable sprayers or plastic bags – 5-10 (for collecting infected leaves/berries).
- ● Labeling tags & marker – 1 pack (to track treated vs. untreated plants).
- ● Garden hose with adjustable nozzle – 1 (for rinsing tools/plants).
- ● Disinfectant (bleach or rubbing alcohol) – 1 bottle (for sterilizing tools between uses).
- ● Digital camera or smartphone – 1 (to document symptoms for later reference).
- ● pH testing kit – 1 (to check soil acidity, ideal range: 5.0–6.5).
- ● Compost bin or sealed trash bag – 1 (for disposing of heavily infected plant debris).
- ● Beneficial bacteria (e.g., Bacillus subtilis) – 1 bottle (to boost plant immunity).
- ● Earplugs (if pruning large bushes) – 1 pair (for noise protection).
How to identify and manage elderberry plant diseases
Elderberries are tough, but these 7 common diseases can weaken them fast. Here's how to spot and stop them before they spread.
🌿 Step 1: Learn the Visual Signs of Common Elderberry Diseases
Start by inspecting leaves, stems, and berries regularly. Powdery mildew appears as white, powdery patches on leaves—it thrives in shady, humid conditions. Leaf spot diseases show up as brown or black spots with yellow halos, often causing leaves to drop prematurely. Rust diseases create orange pustules on undersides of leaves, weakening the plant over time.
Look for dark, sunken cankers on stems—this is often signs of bacterial leaf scorch or stem canker. If you see berries that are shriveled, discolored, or oozing, it could be fruit rot or bacterial blight. I always check the oldest leaves first—they often show symptoms before younger growth.
💧 Step 2: Adjust Watering and Airflow to Prevent Spread
Elderberries need moisture, but soggy soil invites fungal diseases. Water at the base in the morning so leaves dry quickly. Avoid overhead sprinkling—it spreads spores like powdery mildew and leaf spot. I use soaker hoses to deliver water directly to roots, keeping foliage dry. Space plants 6-8 feet apart to improve airflow and reduce humidity around leaves.
Mulch with 2-3 inches of organic mulch (like shredded bark) to retain moisture without suffocating roots. Keep mulch 6 inches away from stems to prevent rot. If you notice yellowing leaves or wilting, it might be overwatering—let the top 2 inches of soil dry between waterings.
✂️ Step 3: Prune Infected Areas Immediately
Remove and destroy any infected leaves, stems, or berries you find. Use sterilized pruners (wipe with rubbing alcohol between cuts) to avoid spreading pathogens. Cut back to healthy green tissue, not brown or discolored areas. Bag infected debris in sealed plastic and toss it in the trash—not the compost—where it could reinfect your garden.
Thin out crowded branches to improve airflow. Elderberries naturally grow in clumps, but overgrowth traps moisture. After pruning, apply copper fungicide (if needed) to open wounds to prevent bacterial entry. I prune in late winter or early spring before new growth starts, giving the plant a clean slate.
☀️ Step 4: Apply Preventative Fungicides at Critical Times
Prevent disease before it starts by spraying neem oil or copper fungicide in early spring and again after harvest. These natural treatments create a protective barrier on leaves. Mix 1 tablespoon neem oil per gallon of water with a drop of dish soap as an emulsifier. Spray in the early morning or evening when temperatures are below 85°F to avoid burning foliage.
For bacterial diseases, use copper-based sprays (like copper sulfate) every 10-14 days during wet seasons. Always follow label instructions—overuse can harm beneficial insects. I also rotate treatments to prevent resistance. If you see signs of powdery mildew, a baking soda spray (1 teaspoon baking soda + 1 quart water + a drop of soap) works well as a preventive.
🪴 Step 5: Strengthen Plants for Long-Term Resilience
Healthy elderberries resist diseases better. Feed plants in early spring with balanced fertilizer (10-10-10) to encourage strong growth. I also side-dress with compost in late summer to boost root health. Avoid heavy nitrogen fertilizers—they promote lush foliage but weaken disease resistance.
Monitor soil pH—elderberries prefer slightly acidic to neutral soil (pH 6.0-7.0). Test your soil and amend with lime (to raise pH) or sulfur (to lower pH) if needed. Strong roots and foliage mean fewer disease entry points. I also rotate planting locations every 3-5 years to break disease cycles in the soil.
Tips & tricks for managing elderberry plant diseases
Elderberries are hardy, but these practical tips will help you catch and control diseases before they take over your plants.
Early Detection is Key: I can't stress enough how important it is to inspect your elderberries weekly, especially the oldest leaves. Many diseases like powdery mildew and leaf spot start on lower leaves first. Grab a magnifying glass—you'll spot those tiny yellow halos around spots that indicate leaf spot diseases before they spread to new growth. The earlier you catch these, the easier they are to manage without harsh chemicals.
Watering Wisdom: The 2-inch soil dry rule between waterings is crucial—it prevents the soggy soil conditions that fungal diseases love. I've seen powdery mildew spread like wildfire after just 3 days of consistent overhead watering. For best results, water at the base in the morning and avoid getting leaves wet. If you must water overhead, do it early in the day so leaves have plenty of time to dry completely before evening humidity sets in.
Pruning Like a Pro: When you're pruning infected areas in Step 3, don't just cut off the visibly diseased parts—go back another 1-2 inches to healthy green tissue. I learned this the hard way when I missed some hidden infections, and the disease came roaring back. Also, sterilize your pruners between cuts with rubbing alcohol to prevent cross-contamination. This simple step can save your entire plant from reinfection.
Timing Your Treatments: Those early spring and post-harvest fungicide applications are your best defense, but timing matters. I've found that applying neem oil right after a rain shower (when temperatures are below 85°F) gives it the best chance to stick to leaves. For baking soda sprays, I mix mine the night before and let it sit—this gives the ingredients time to fully combine and prevents clumping when sprayed.
Pro Tips for Elderberry Plant Diseases
- Elderberries are hardy, but these practical tips will help you catch and control diseases before they take over your plants.
- Early Detection is Key: I can't stress enough how important it is to inspect your elderberries weekly, especially the oldest leaves.
- Watering Wisdom: The 2-inch soil dry rule between waterings is crucial—it prevents the soggy soil conditions that fungal diseases love.
Frequently asked questions
Got questions about keeping your elderberry plants healthy? You’re not alone! Here are some of the most common concerns—and expert answers to help you grow strong, disease-free bushes.
What are the first signs of elderberry plant diseases?
Watch for yellowing leaves, black or brown spots, mushy stems, or unusual powdery coatings. Fungal issues like powdery mildew or leaf spot often start with small, discolored patches, while bacterial infections may cause oozing lesions. Act fast—early detection prevents spread!
When is the best time to treat elderberry diseases?
Treat at the first sign of trouble, but timing matters! For fungal diseases, apply fungicides preventively in spring (before buds swell) and after rain (when spores spread). Bacterial infections? Prune infected stems in dry weather and sterilize tools with rubbing alcohol.
Can I save a severely diseased elderberry plant?
It depends! If less than 30% of the plant is affected, prune infected parts down to healthy wood, improve airflow, and treat with copper-based sprays. For advanced cases (e.g., canker or root rot), removal may be kinder—disease can linger in soil. Replace with disease-resistant varieties like 'York' or 'Concorde'.
Are there natural remedies for elderberry plant diseases?
Yes! Try these DIY fixes:
- Neem oil spray (1 tsp per quart of water) for powdery mildew and leaf spots.
- Baking soda mix (1 tbsp baking soda + 1 tsp soap + gallon of water) for fungal prevention.
- Compost tea to boost soil microbes and plant immunity.
For bacterial issues, copper fungicide is your best bet—natural options are less effective.
Why do my elderberries keep getting the same disease every year?
Repeat infections often mean poor growing conditions. Check for:
- Overcrowding (thin plants for airflow).
- Overhead watering (water at the base).
- Old mulch or debris (clean up fallen leaves yearly).
- Weak plants (fertilize with low-nitrogen options like compost).
Rotate treatments annually to avoid resistance.
Wrapping up and next steps
Identifying and treating elderberry plant diseases early can save your harvest—and your sanity! 🌱 From powdery mildew to bacterial leaf spot, staying vigilant with proper cultural practices, fungicides, and sanitation is key. Remember, prevention is your best defense, but quick action keeps your berries thriving.
Ready to protect your elderberries? Start by inspecting your plants weekly and act at the first sign of trouble. With the right knowledge, you’ll keep your garden healthy and bountiful—one berry at a time! 🍇