
How To
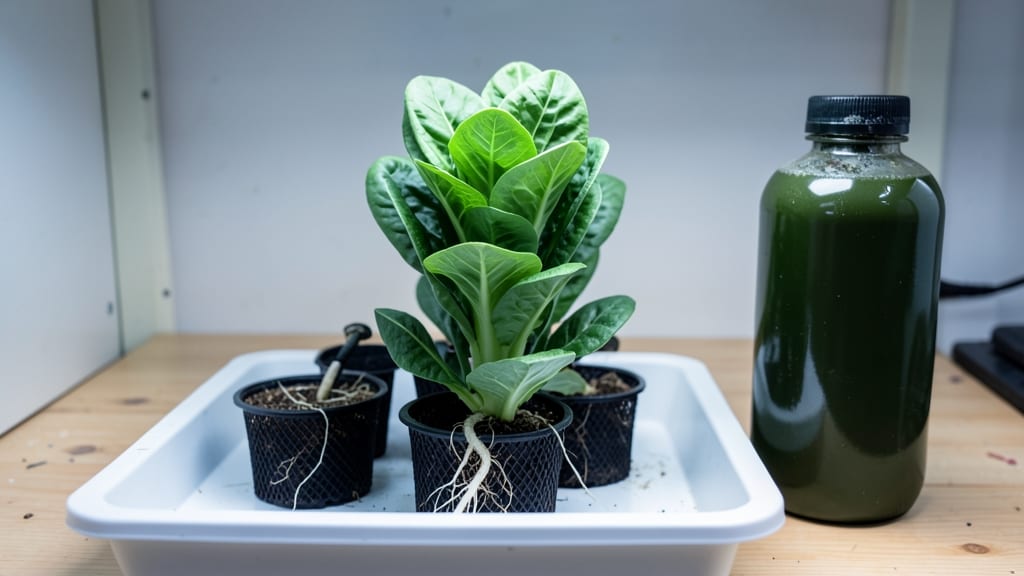
Transplanting hydroponic plants without wrecking their roots is easier than you think—especially when you follow the right timing and technique. 🌱 I’ve moved plants between systems more times than I can count, and the difference between success and failure often comes down to how gently you handle those delicate roots.
The key is preparation: match the new system’s nutrient levels to what the plant already knows, and never let roots dry out between setups. Most beginners rush this step, but taking an extra 10 minutes to rinse roots in fresh water makes all the difference.
Once transplanted, keep an eye on the first few days—droopy leaves mean shock, not failure.
📚 In This Guide
- What you need
- Instructions
- Tips and common mistakes
- Wrapping up and next steps
What you need
- ● New hydroponic system (matching the size of your plants’ current system—e.g., 5-gallon bucket, Kratky method, or DWC (Deep Water Culture) setup)
- ● Net pots (1–2 inches larger than the current pots; quantity = number of plants)
- ● Hydroponic growing medium (clay pebbles, rockwool, or coco coir—sterilized and pre-moistened)
- ● pH test kit & adjusters (to maintain 5.5–6.5 pH range)
- ● Nutrient solution (balanced hydroponic formula, pre-diluted as per label)
- ● Scissors or pruning shears (for trimming roots if needed)
- ● Watering can or spray bottle (for gentle hydration post-transplant)
- ● Support structures (if needed: stakes, trellises, or clips for vining plants)
- ● Rooting hormone (to boost recovery for sensitive plants like lettuce or herbs)
- ● LED grow lights (if moving plants to a new light setup)
- ● Air stone or pump (for oxygen-rich water in DWC systems)
- ● Labeling tags (to track plant varieties and transplant dates)
- ● Hydroponic timer (for automated nutrient dosing)
Step-by-Step instructions for transplanting hydroponic plants
Here's how I move hydroponic plants without shocking their roots or losing growth.
🌱 Step 1: Prepare the New System
Turn off and drain the current hydroponic system completely. I always rinse the reservoir with clean water to remove any nutrient buildup that could stress the plants during transition. For a 4-plant system, use the same type of nutrient solution you've been using—just make sure it's at the correct strength (200-400 ppm depending on plant stage). Fill the new reservoir halfway and let it circulate for 10 minutes before adding plants.
Check that all pumps, air stones, and tubing are working properly. A clogged air stone means poor oxygenation, and that's how roots suffocate. Test the water temperature—it should stay between 65-75°F. If your new system has a different pH level than the old one, adjust it gradually over 24 hours to avoid pH shock.
💧 Step 2: Handle Plants Gently During Transfer
Remove plants one at a time, holding them by their stems only—never grab the leaves. I like to dip the roots in room-temperature water for 30 seconds before placing them in the new system. This removes any old nutrient film and prevents nutrient burn from concentrated solutions. For deep water culture (DWC) systems, simply lower the plant into the reservoir until the net pot sits just above the waterline.
If you're moving to a nutrient film technique (NFT) or ebb-and-flow system, place the plants in their new net pots and secure them firmly. Make sure the roots aren't tangled or folded—straight, spread-out roots recover fastest. Avoid touching the root tips, as they're the most sensitive to damage. Once all plants are in, let the system run for 30 minutes before checking for any signs of stress like wilting or yellowing.
☀️ Step 3: Monitor and Adjust for Recovery
Keep the new system in a stable environment for the first 48 hours. I avoid moving it or changing light conditions, as plants need time to adjust to their new surroundings. Watch for leaf turgor—healthy leaves should bounce back when gently pressed. If you see any drooping, check the water level and oxygenation immediately. A simple fix is to increase airflow with a small aquarium pump if your system allows it.
After 72 hours, gradually reintroduce any adjustments like light changes or nutrient strength increases. I like to take a small water sample from the reservoir and test it for EC (electrical conductivity)—it should match your original solution's reading. If the plants show signs of nutrient deficiency (like yellowing between veins), reduce the nutrient strength by 25% for a few days while they recover.
Tips & tricks for stress-free hydroponic transplanting
Moving hydroponic plants doesn't have to be stressful—these insider tips will help you avoid common pitfalls and keep your plants thriving.
The 10-Minute Circulation Rule: That 10-minute circulation time in Step 1 isn't just about mixing nutrients—it's about oxygenating the water. Poor oxygenation is the #1 cause of root stress during transplanting. I like to give it an extra 2-3 minutes if the water looks cloudy, as this indicates higher organic buildup that could suffocate new roots.
Root Care During Transfer: Here's what nobody tells you—the 30-second root dip in room-temperature water isn't just about cleaning. I actually use a small mesh strainer to gently swirl the roots while dipping, which helps remove old nutrient crystals without damaging delicate root hairs. For sensitive plants like lettuce, I extend this to 45 seconds (still optional) to ensure complete removal of old solution.
System Stability Secret: The 48-hour stable environment rule in Step 3 is non-negotiable, but I've found that placing a small fan about 6 inches away from the system during this period actually helps prevent humidity buildup that can lead to fungal issues. Just keep airflow gentle—you don't want to create drafts that could stress the plants.
Nutrient Transition Strategy: When adjusting pH over 24 hours, I recommend changing it by no more than 0.5 pH units per day. For example, if you're moving from pH 5.8 to 6.2, split it into two 0.2 adjustments over the full 24 hours. This gradual approach prevents root burn that can occur with sudden pH shifts, especially for young plants still establishing new roots.
Pro Tips for Transplant Hydroponic Plants
- Moving hydroponic plants doesn't have to be stressful—these insider tips will help you avoid common pitfalls and keep your plants thriving.
- The 10-Minute Circulation Rule: That 10-minute circulation time in Step 1 isn't just about mixing nutrients—it's about oxygenating the water.
- Root Care During Transfer: Here's what nobody tells you—the 30-second root dip in room-temperature water isn't just about cleaning.
Frequently asked questions
Got questions about transplanting hydroponic plants? You’re not alone! Here are answers to the most common concerns—so you can move your greens with confidence and keep those roots thriving.
Can I transplant hydroponic plants at any time, or is there a best season?
Transplanting hydroponic plants works best during their active growth phase—typically spring or early summer. Avoid transplanting during extreme heat, cold snaps, or when plants are flowering (unless it’s a flowering hydroponic crop like tomatoes). Pro tip: Morning or evening transplanting reduces stress from direct sunlight.
How long does it take for hydroponic plants to recover after transplanting?
Most hydroponic plants show signs of recovery within 3–7 days, depending on the species. Leaf drop or wilting may occur initially, but consistent nutrient flow and stable conditions speed up healing. Monitor pH and nutrient levels closely during this period—fluctuations can delay recovery.
Do I need to adjust nutrients after transplanting hydroponic plants?
Yes! After transplanting, reduce nutrient strength by 25–50% for the first 2–3 days to avoid shocking the roots. Gradually return to full strength over a week. Flushing the system (using plain water) can also help remove old nutrient buildup before replanting.
What if my hydroponic plant looks stressed after transplanting? What’s the fix?
Stressed plants may show yellowing leaves, slow growth, or wilting. Check these first:
- pH levels (should be 5.5–6.5 for most plants)
- Nutrient solution (too strong or weak?)
- Root health (damaged roots? Trim any mushy or blackened sections)
- Light and temperature (consistent conditions are key!)
Can I reuse the old hydroponic medium after transplanting?
It’s not recommended to reuse old hydroponic medium (like rockwool or clay pebbles) unless you’ve sterilized it (e.g., baking rockwool at 200°F for 30+ minutes). Old medium can harbor pathogens or algae, risking root rot or infections. When in doubt, replace it—your plants will thank you!
Wrapping up and next steps
Transplanting hydroponic plants doesn’t have to be stressful—with the right tools, techniques, and patience, you can give your greens a fresh start while keeping them thriving! 🌱 The key is minimizing root disturbance, ensuring proper support, and monitoring their recovery closely.
Whether you’re upgrading systems or troubleshooting issues, confidence comes with practice.
Ready to level up your hydroponic garden? Start small—pick one plant to transplant this week and observe its progress. Soon, you’ll be a pro at giving your hydroponic babies the perfect new home!
For extra tips, check out our FAQ section or explore advanced techniques like root pruning for even healthier growth.