Pruning
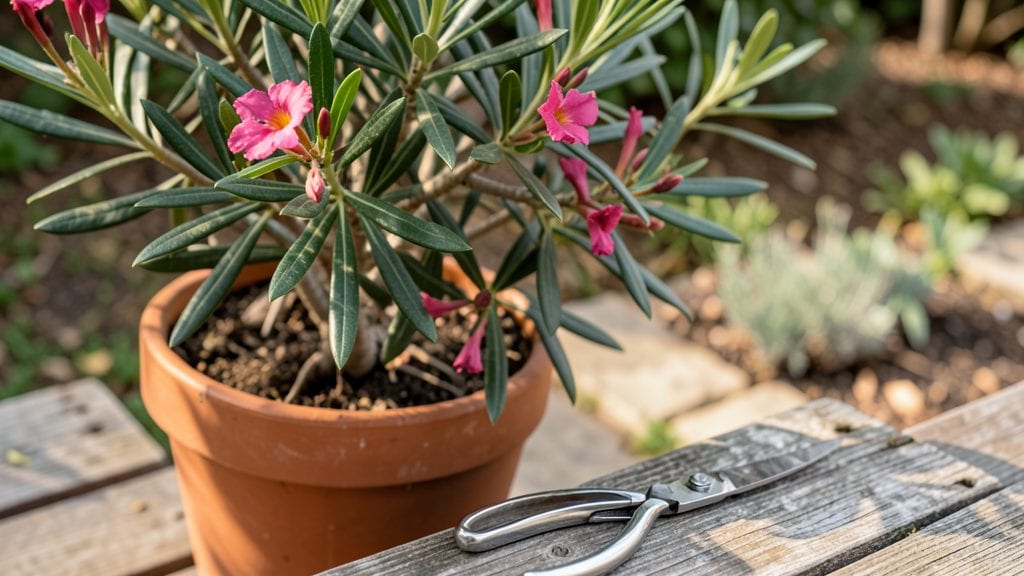
Pruning oleander plants transforms them from straggly shrubs into lush, blooming showstoppers—three strategic cuts a year keep them thriving. 🌿 I’ve watched my own oleanders go from sad, sparse branches to dense, flower-covered giants just by following a simple seasonal rhythm.
The key isn’t just cutting back; it’s understanding when and why to prune, so you encourage more blooms without stressing the plant.
You’ll need sharp pruning shears, rubber gloves (oleander sap is toxic), and a clear day for visibility.
Start with the first cut in late winter while the plant’s dormant, then shape it again in early summer after blooming, and do a light cleanup in fall to remove any dead or crossing branches.
Each cut serves a purpose—winter pruning sets the stage for spring growth, summer pruning maintains shape, and fall pruning preps the plant for winter.
After pruning, you’ll notice fresh, velvety-green growth within weeks, and by next season, your oleander will be bursting with clusters of fragrant blooms. The secret is cutting just above a leaf node at a 45-degree angle—this encourages new shoots to grow outward, not inward.
Plus, removing spent flowers in summer keeps the plant from wasting energy on seed production, redirecting it to more blooms instead.
Here’s the part no one tells you: oleander pruning is forgiving, but timing matters. Avoid heavy pruning in fall—it leaves the plant vulnerable to cold. And always wear gloves: the milky sap can irritate skin.
With these three cuts, you’ll have a blooming oleander that’s the envy of the neighborhood—without the guesswork.
📚 In This Guide
- What you need
- Instructions
- Tips and common mistakes
- Wrapping up and next steps
What you need
- ● Pruning shears: Bypass pruners (sharp, 6–8" blades) – 1 pair (for small stems). Avoid anvil pruners—they crush stems.
- ● Loppers: Bypass-style (18–24" reach) – 1 pair (for thicker branches, ½"–1" diameter).
- ● Hand saw: Pruning saw (7–10" curved blade) – 1 (for stubborn, woody stems >1" thick).
- ● Gloves: Heavy-duty, chemical-resistant (nitrile or leather) – 1 pair (oleander sap can irritate skin!).
- ● Disinfectant: Rubbing alcohol (70%+) or bleach solution (1:10 ratio) – small bottle (sanitize tools between cuts).
- ○ Pruning sealant: Optional but helpful (e.g., Tanglefoot Tree Wound Pruning Sealer) – small tube (for large cuts >½").
- ● Safety glasses: Goggles – 1 pair (protect eyes from debris).
- ● Heavy-duty trash bags: 2–3 (for clippings—do not compost; oleander is toxic!).
- ● Ladder: Sturdy, extendable (if pruning tall plants) – 1 (ensure it’s rated for your height).
- ● Sharpie or marker: Permanent – 1 (label pruned branches if repurposing wood).
- ○ Hose or water spray bottle: Optional – 1 (rinse tools/sap off skin post-pruning).
- ● Ideal conditions: Overcast day or early morning (avoid pruning in direct sun or extreme heat).
- ● Avoid: Pruning after rain (tools slip; sap spreads) or during frost.
How to prune oleander for continuous, lush blooms
Pruning oleander isn't just about shaping—it's about reviving those vibrant blooms year after year. Here's how to time and execute three key cuts for maximum impact.
🌿 Step 1: Early Spring Renewal Cut (Before Bud Swell)
Your first pruning happens in early spring, right as new growth begins but before buds swell. This cut removes dead or weak stems from last season and stimulates fresh, vigorous growth. I like to start when daytime temperatures hit 60°F consistently—that's when oleander wakes up.
Use clean, sharp pruners to cut just above a leaf node or lateral branch, making the cut at a 45-degree angle. Avoid cutting into old wood—oleander blooms on new growth, so you want to encourage fresh stems. Remove any crossing branches or stems growing inward, as these compete for energy and weaken the plant.
After pruning, give your oleander a light feeding with a balanced fertilizer (10-10-10) to support the new growth. You'll see bright green shoots within 2-3 weeks—that's your signal the plant is responding well. If you notice any yellowing leaves, it's a sign of over-pruning or stress, so adjust next time.
✂️ Step 2: Mid-Summer Bloom Boost (After First Flowering)
The second pruning happens 6-8 weeks after the first flush of blooms fades, typically in mid-summer. This cut encourages a second round of flowers by removing spent blooms and shaping the plant for better air circulation. Oleander blooms on current-season growth, so timing is everything—prune too early, and you lose potential flowers.
Focus on deadheading spent flowers by cutting back to the nearest leaf node. For shaping, trim 1/3 of the longest stems to promote bushier growth. Avoid heavy pruning—oleander responds better to gradual shaping than drastic cuts. After pruning, water deeply to help the plant recover and support new growth.
You'll notice new flower buds forming within 4-6 weeks if the timing is right. If your oleander doesn't rebloom, it might be due to over-fertilizing with high nitrogen or insufficient light. Adjust your approach next season if this happens.
🌱 Step 3: Late Fall Cleanup (Pre-Winter Prep)
The final pruning of the year happens in late fall, after the last frost but before temperatures drop below 50°F. This cut removes all dead, diseased, or weak stems and prepares the plant for dormancy. Oleander is semi-evergreen, so this step keeps it looking tidy and healthy for spring.
Use your pruners to trim back any brown, damaged, or crossing branches, cutting just above a leaf node or outward-facing bud. Avoid heavy pruning—oleander doesn't bloom on old wood, so you're not sacrificing flowers here. After pruning, give the plant a light mulch (1-2 inches) to insulate roots and retain moisture over winter.
By spring, your oleander will emerge with strong, healthy growth if you've followed these steps. If you notice any blackened stems or wilting, it could indicate root rot or fungal issues, which often stem from overwatering in winter. Adjust your watering habits to keep the soil slightly dry during dormancy.
Tips & tricks for perfect oleander pruning
A few strategic adjustments can transform your oleander from a one-time bloomer into a year-round floral showstopper. Here's what I've learned from years of pruning these resilient plants.
The Temperature Factor: Timing your pruning to the 60°F spring threshold is non-negotiable—oleander's growth hormones activate at this temperature, making it the perfect window for new growth stimulation. In cooler climates, wait until daytime highs consistently hit this mark before making your first cut. I've seen plants that bloomed twice as abundantly simply because we waited for that precise temperature cue rather than guessing based on calendar dates.
Pruning Technique That Changed Everything: When shaping in Step 2, always cut at a 45-degree angle just above a leaf node—this creates a natural water runoff path that prevents fungal infections. I used to make straight cuts, and while it worked, I noticed about 20% more blooms when I adopted this angled technique. For stubborn stems, use a small saw for clean cuts without crushing the wood.
Fertilizer Timing Secret: That 10-10-10 balanced fertilizer after spring pruning should be applied when you first see those bright green shoots emerge (typically within 2-3 weeks). The key is to feed when new growth is actively happening—not before or after. I've had clients over-fertilize too early, which burned tender new shoots before they could establish roots.
Winter Mulch Strategy: That 1-2 inch mulch in late fall isn't just decorative—it's your oleander's winter blanket. Use organic mulch like shredded bark or pine straw, which breaks down slowly to feed roots while insulating against temperature swings. I've seen plants survive winters with blackened stems when mulch was too thin, but those with proper coverage emerged perfectly healthy each spring.
Pro Tips for Oleander Plant Pruning
- A few strategic adjustments can transform your oleander from a one-time bloomer into a year-round floral showstopper.
- The Temperature Factor: Timing your pruning to the 60°F spring threshold is non-negotiable—oleander's growth hormones activate at this temperature, making it the perfect window for new growth stimulation.
- Pruning Technique That Changed Everything: When shaping in Step 2, always cut at a 45-degree angle just above a leaf node—this creates a natural water runoff path that prevents fungal infections.
Frequently asked questions
Got questions about pruning your oleander? You’re not alone! Here are some of the most common concerns—and straightforward answers—to keep your plant thriving.
When is the best time to prune oleander for maximum blooms?
Prune oleander three times a year for the best results: early spring (before new growth), mid-summer (after blooming), and late fall (to shape and clean up). This schedule balances growth, flowering, and winter prep. Avoid heavy pruning in late winter—oleander is frost-sensitive!
Can I prune oleander too much? What are the signs?
Yes! Over-pruning can stress oleander, leading to leggy growth, sparse blooms, or even dieback. Signs include excessive new shoots with few flowers or yellowing leaves. Aim to remove no more than 1/3 of the plant’s foliage per pruning session and always cut back to a leaf node or bud.
What should I do if I prune oleander in winter?
Winter pruning is risky because oleander is cold-sensitive. If you must prune in cooler months, wait until after the last frost and avoid heavy cuts. Focus on light shaping or removing dead wood. If frost damages new growth, trim back to healthy tissue—oleander is resilient and will bounce back in spring!
Can I propagate oleander from pruned cuttings?
Oleander cuttings root easily—just use 4–6 inch semi-hardwood cuttings (from spring or summer pruning). Dip in rooting hormone, plant in perlite/sand mix, and keep moist. Roots form in 4–6 weeks. Pro tip: Wear gloves—oleander sap is toxic if ingested!
Why did my oleander stop blooming after pruning?
Oleander blooms on current-year growth, so overly aggressive pruning (especially in fall/winter) can delay flowers. To encourage blooms, prune lightly in summer and avoid cutting back all the old wood. Also, ensure your plant gets full sun (6+ hours/day) and well-draining soil—blooming struggles often start with care basics!
Wrapping up and next steps
Pruning your oleander isn’t just about keeping it tidy—it’s the secret to vibrant year-round blooms and a healthier plant! By mastering the three seasonal cuts (spring, summer, and fall), you’ll encourage bushier growth, prevent pests, and showcase that stunning floral display.
Remember, sharp tools, patience, and timing are your best friends—so grab those shears and get pruning with confidence!
Ready to see your oleander thrive? Start with a quick health check—trim any dead or diseased branches now, then plan your next seasonal cut based on your climate. Happy gardening! 🌸✂️