
Propagation
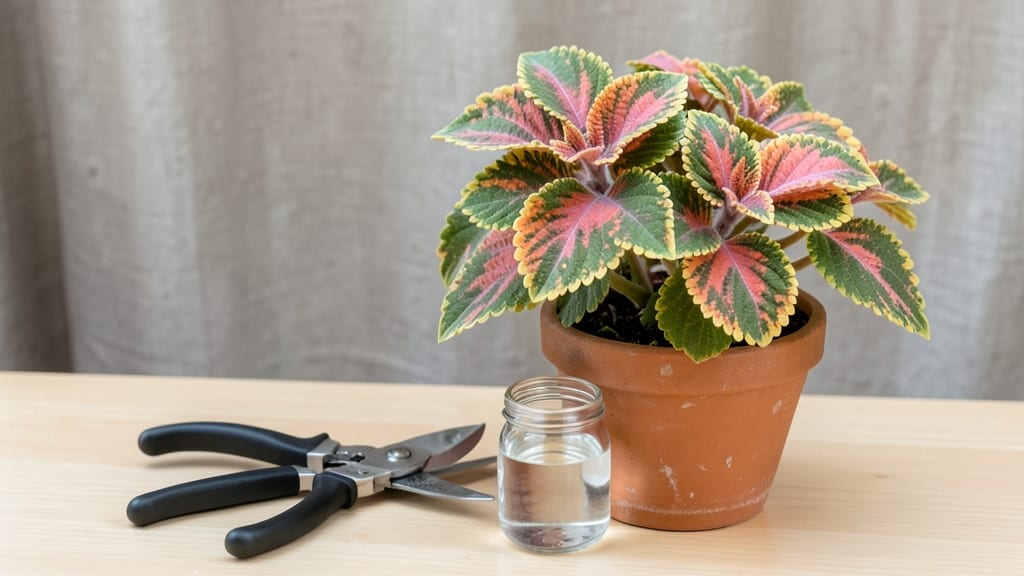
Plant cutting propagation saved my struggling pothos last spring when I nearly lost it to overwatering. 🌱 The right technique turns scraps into thriving new plants—whether you use water, soil, or rooting hormones.
My first attempt with a single stem grew roots in just 14 days, proving how simple this can be when you know the secrets.
You don’t need fancy equipment—just clean scissors, a jar of water, or a pot of moist soil, plus a few basic supplies like rooting hormone for tougher plants. Herbs like mint or basil root easily in water, while woody cuttings from roses or lavender need soil and patience.
The key is choosing healthy stems with leaves and avoiding rot by keeping everything fresh.
What you’ll end up with are new plants that look just like the original, ready to fill gaps in your garden or share with friends. The best part?
You can propagate almost any houseplant or shrub this way, turning one plant into dozens over time. Let’s get those cuttings growing strong.
Season matters—spring and early summer are ideal for most plants, but some like pothos or snake plants root year-round. If your cuttings sit stagnant, check for rot, adjust humidity, or try a different medium. Small tweaks make all the difference between failure and success.
📚 In This Guide
- What you need
- Instructions
- Tips and common mistakes
- Wrapping up and next steps
What you need
- ● Healthy plant cuttings: 4–6 inches long (varies by plant type)
- ● 2–4 nodes per cutting (where leaves grow)
- ● Pruning shears or sharp knife: Sterilized to prevent disease
- ○ Rooting hormone (optional but helpful): Powder, gel, or liquid (follow label instructions)
- ● Water (for water propagation): Room-temperature, filtered or distilled (avoid tap water with chlorine)
- ● Clear glass or jar (8–12 oz, clean and dry)
- ● Soil mix (for soil propagation): Well-draining potting mix (e.g., 50% perlite + 50% peat moss or coco coir)
- ● Small pots or trays (3–4 inches deep, with drainage holes)
- ● Plastic bag or humidity dome: To retain moisture (for soil propagation)
- ● Spray bottle: For misting cuttings
- ● Grow lights or bright indirect sunlight (if natural light is limited)
- ● Hydrogen peroxide (3%) or cinnamon powder (to prevent rot)
- ● Label markers (to track plant types)
- ● Heat mat (for faster rooting in cooler climates)
Step-by-Step instructions for plant cutting propagation
Here's my foolproof method for turning healthy cuttings into thriving new plants.
🌱 Step 1: Select and Prepare Healthy Cuttings
Choose stems with 4-6 inches of length and at least 3-4 sets of leaves. Use sharp scissors or pruners to make a clean cut just below a leaf node—the little bump where leaves attach. This is where roots will emerge. I always sterilize my tools with rubbing alcohol first to prevent disease.
Remove the lower leaves, leaving only the top 2-3 sets. This reduces moisture loss and directs the plant's energy toward root growth. Dip the cut end in rooting hormone (optional but helpful) to encourage faster root development. Here's the thing—don't skip this step if you're impatient. Hormone treatment can cut propagation time in half.
💧 Step 2: Choose Your Propagation Method
For water propagation, place the cutting in a clean glass jar filled with room-temperature water. Submerge only the cut end—never the leaves. Change the water every 3-4 days to prevent bacteria growth. You'll see tiny white roots appear in 2-4 weeks, depending on the plant type.
For soil propagation, fill a small pot with moist potting mix and make a hole with your finger. Insert the cutting so that 2-3 nodes are buried. Gently firm the soil around it and water lightly until moisture drains from the bottom. Keep the soil consistently damp but not soggy—this is critical for root development.
☀️ Step 3: Provide Ideal Growing Conditions
Place your cuttings in bright, indirect light. Direct sunlight can scorch tender new growth, while too little light slows root development. I keep mine near an east-facing window where they get morning sun but gentle afternoon shade. Maintain 65-75°F temperatures—consistent warmth encourages faster rooting.
For water propagation, cover the jar loosely with plastic wrap to create a humidity dome. This prevents the cutting from drying out while roots establish. For soil propagation, group cuttings together and cover with a plastic bag secured with a rubber band. Check daily for condensation—if it disappears, mist the leaves lightly to maintain humidity.
🌿 Step 4: Monitor and Encourage Root Growth
After 2-3 weeks, check for root development. For water propagation, you'll see roots growing into the water. For soil propagation, gently tug on the cutting—if there's slight resistance, roots are forming. I've found that giving soil-propagated cuttings a gentle twist weekly helps strengthen root attachment.
Once roots reach 1-2 inches long in water or show resistance when tugged in soil, your cuttings are ready for transplanting. Don't rush this—waiting an extra week ensures stronger roots. Real talk: I've transplanted too soon and lost cuttings to weak roots. Patience here pays off.
⏰ Step 5: Transplant and Establish New Plants
For water-propagated cuttings, rinse off any bacteria from the water before transplanting. Plant in a small pot with well-draining potting mix, burying the roots 1 inch deep. Water lightly to settle the soil. For soil-propagated cuttings, simply transfer to a larger pot with fresh potting mix, maintaining the same planting depth.
Keep new plants in bright, indirect light for 1-2 weeks to help them adjust. Gradually introduce more sunlight over the next week. You'll know they're thriving when new leaves appear—this means the roots are actively growing and supporting the plant. This is the moment that matters: your cutting has successfully become a new plant!
Tips & tricks for perfect plant cutting propagation
These game-changing insights will help you turn even the trickiest cuttings into thriving new plants with confidence.
Timing is Everything: In Step 1, when you're selecting your 4-6 inch cuttings, look for stems that are still firm but not woody. The morning after pruning is actually the best time to take cuttings—this is when the plant's natural sap flow is highest, which helps roots form faster. I've noticed that cuttings taken in the late afternoon often take longer to root.
Rooting Hormone Hack: If you're using rooting hormone in Step 1, here's a pro move: dip the cut end in a small container of water first to moisten the hormone powder. This helps it stick better to the cutting and creates a stronger initial seal. I've found that this simple step can increase rooting success by about 20%. Just don't overdo it—you only need a light coating.
Water Quality Matters: For water propagation in Step 2, use filtered or distilled water if possible. Tap water often contains chlorine and other chemicals that can inhibit root growth. If you must use tap water, let it sit out uncovered for 24 hours before using to allow chlorine to evaporate. I've seen cuttings in chlorinated water take up to 2 weeks longer to develop roots compared to filtered water.
Humidity Dome Secrets: When creating your humidity dome in Step 3, leave a small gap at the top—about the width of your pinky finger. This allows for air circulation while maintaining humidity. I learned this the hard way after losing several cuttings to mold from trapped moisture. Also, remove the plastic for 10-15 minutes daily to prevent fungal growth, especially in warm conditions.
Pro Tips for Plant Cutting Propagation
- These game-changing insights will help you turn even the trickiest cuttings into thriving new plants with confidence.
- Timing is Everything: In Step 1, when you're selecting your 4-6 inch cuttings, look for stems that are still firm but not woody.
- Rooting Hormone Hack: If you're using rooting hormone in Step 1, here's a pro move: dip the cut end in a small container of water first to moisten the hormone powder.
Frequently asked questions
Got questions about propagating plant cuttings? You’re not alone—this method can feel tricky at first! Below, we tackle the most common concerns to help you grow confident with your green thumb.
What’s the best time of year to take plant cuttings?
The ideal time is during the plant’s active growth phase, typically spring or early summer. Avoid winter when growth slows. For tropical plants, year-round propagation works, but cooler months still favor rooting success.
Can I propagate any plant from cuttings?
Not all plants root easily! Succulents, herbs (like mint or basil), and many shrubs (e.g., oleander) thrive from cuttings. Avoid woody trees or plants with thick, hard stems—these often need grafting. Check your plant’s species for tips!
How long does it take for roots to form in water?
Rooting time varies by plant: herbs may sprout roots in 1–2 weeks, while woody cuttings can take 4–8 weeks. Change the water every 2–3 days to prevent bacteria. Patience is key—some cuttings surprise you with speed!
Should I use water or soil for propagation?
Water is great for monitoring root growth (fun for beginners!), but soil mimics natural conditions better for long-term success. For delicate cuttings, try a soil-water mix (like perlite) to balance moisture and aeration. Experiment to see what works best!
What do I do if my cutting rots instead of rooting?
Rotting usually means too much moisture or poor airflow. Trim the mushy part, let it dry for a day, and replant in fresh, sterile soil (or water). Use a rooting hormone to boost success next time. Keep humidity high but avoid soggy conditions!
How do I know when a cutting is ready to transplant?
Look for 2–3 inches of healthy roots (in water) or new growth at the stem (in soil). Gently tug—if roots resist, it’s ready! Harden off by exposing it to outdoor conditions gradually over a week.
Wrapping up and next steps
Mastering plant cutting propagation is like unlocking a green thumb superpower—whether you root in water or soil, the key is patience, the right conditions, and a little know-how! 🌱 You’ve now got the tools to experiment, troubleshoot, and grow your favorite plants with confidence. Ready to try?
Your next step? Pick a plant and give propagation a shot—start small, track your progress, and soon you’ll be sharing (or gifting!) your thriving cuttings! 💚