
Size
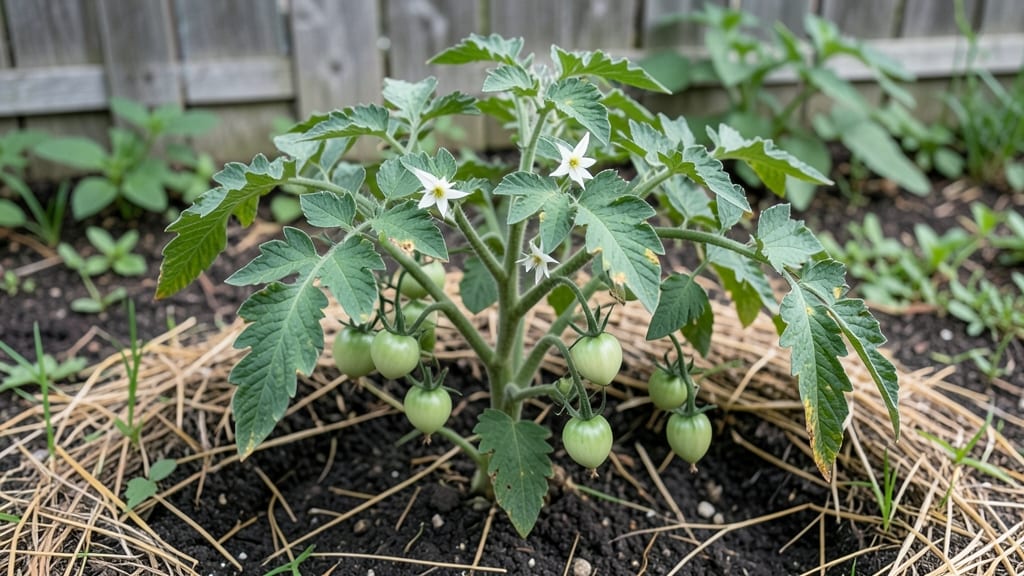
Growing food from plants isn't just about summer harvests—it's about year-round freshness with the right strategies. 🌱 I learned the hard way that skipping winter prep meant wilted greens by February, but now my kitchen garden stays productive through all four seasons.
The secret lies in matching plants to microclimates, extending growing periods, and choosing varieties that defy the calendar.
You don’t need acres or fancy setups—just sunlight, soil, and smart timing. My setup includes cold-hardy greens in winter, heat-tolerant tomatoes in summer, and container herbs that thrive on my balcony.
Even in small spaces, you can grow lettuce in January and peppers in August using simple techniques like row covers, succession planting, and proper watering schedules.
What you’ll end up with is a consistent harvest that cuts grocery bills and boosts flavor. Picture crisp lettuce in winter, juicy tomatoes in summer, and fresh basil year-round—all grown with minimal fuss. The key is starting small, learning from mistakes, and adapting as you go.
This works for backyard plots, balconies, or even windowsills—no matter your space. Let’s turn those seeds into meals, one season at a time.
📚 In This Guide
- What you need
- Instructions
- Tips and common mistakes
- Wrapping up and next steps
What you need
- ● Containers or Garden Beds: 5–10 10–12 inch deep pots (for herbs/leafy greens) or 18+ inch deep containers (for root veggies like carrots or potatoes).
- ○ Self-watering planters (optional but highly recommended for busy schedules!).
- ● 1–2 raised garden beds (4’x8’ ideal for larger crops like tomatoes or peppers).
- ● Growing Medium: High-quality potting mix (sterilized, peat-free if possible). 2–3 cubic feet per container.
- ● Compost (1 part compost to 3 parts soil for nutrient boost).
- ● Perlite or vermiculite (for drainage—10% of soil mix).
- ● Seeds or Seedlings: Choose fast-growing varieties (e.g., lettuce, radishes, green onions) for quick wins.
- ● Start with 5–10 seeds per container (thin to 2–3 strongest plants).
- ○ Seedling starters (optional—save time with pre-sprouted plants!).
- ● Basic Tools: 1 hand trowel (for planting/seeding).
- ● 1 pruners (clean, sharp—sterilize with rubbing alcohol!).
- ● 1 watering can (with rose nozzle for gentle watering).
- ○ Optional Upgrades: Soil pH tester (aim for 6.0–7.0 for most veggies).
- ● Grow lights (LED, 12–16 hours/day for indoor setups).
- ● Trellis or cage (for vining plants like cucumbers or beans).
- ● ✅ Sunlight: 6+ hours/day (south-facing window or balcony for containers).
- ● ✅ Water Source: Easy access to filtered or rainwater (avoid tap water with high chlorine).
- ● ✅ Time Commitment: 10–15 minutes daily (watering, checking soil moisture).
- ● 💡 Pro Tip: Label seeds/containers with plant names + dates to track growth!
Instructions: how to plan a year-round food-producing garden
Here's how I design gardens that keep producing fresh food even when seasons shift.
🌱 Step 1: Map Your Microclimates and Seasonal Layers
Start by walking your space at different times of day. Notice where sunlight lingers longest in winter and where afternoon shade appears in summer. I sketch a simple diagram marking these zones—this becomes your foundation. For example, my south-facing wall stays warm enough for cold-hardy greens in winter, while the north side needs shade-loving herbs.
Layer your planting plan vertically and horizontally. Tall plants like pole beans or sunflowers go in the north end to avoid shading shorter crops. In containers, I use stacked shelves to create multiple growing levels—each with its own microclimate. This ensures every square foot works year-round without competition.
☀️ Step 2: Select Plants for Staggered Harvest Windows
Choose varieties with different maturity rates and seasonal preferences. For example, I pair fast-maturing radishes (30 days) with slower lettuce (60 days) in spring. In summer, I rotate heat-tolerant Swiss chard with cool-season kale for fall harvests. The key is succession planting—when one crop finishes, another is ready to take its place.
Don't forget winter options. Cold-hardy kale, spinach, and carrots thrive in 30-40°F temperatures. I extend their season by covering them with floating row covers or mini hoop tunnels. This creates a continuous harvest cycle that never leaves your kitchen empty.
💧 Step 3: Implement a Drip Irrigation System with Timers
Consistent moisture is critical for year-round production. I install drip irrigation lines along planting beds, spaced 12-18 inches apart to reach all plants evenly. The system delivers water directly to roots, reducing evaporation and disease risk. Connect it to a smart timer set for early morning watering—this mimics natural rainfall patterns.
For containers, I use self-watering planters with 1-gallon capacity each. These maintain steady moisture while preventing root rot. The timer ensures even watering whether I'm home or away. I always check soil moisture by feeling the top 1 inch—if it's dry, it's time to water.
✂️ Step 4: Prune and Harvest Strategically
Regular harvesting encourages continuous production. For leafy greens, I cut outer leaves while leaving the center intact. This prevents bolting and gives you fresh greens for weeks. With herbs like basil, I pinch back the top sets of leaves when they reach 3-4 inches—this promotes bushier growth and prevents flowering.
For fruiting plants, I remove spent blooms and overripe produce immediately. This redirects energy to new growth. I also rotate crops every 3-4 months to prevent soil depletion. The key is to harvest before plants put all their energy into seed production—this keeps them productive longer.
🪴 Step 5: Extend Seasons with Seasonal Tools
Use row covers in early spring and fall to protect tender plants from frost. I also install cold frames over high-value crops like lettuce and herbs. These simple structures raise temperatures by 10-15°F, allowing harvests well into winter. For extreme cold, I move potted plants to an unheated garage or basement with grow lights for 12-14 hours daily.
In summer, I provide shade cloth (30-50% shade) for heat-sensitive plants like spinach and peas. This prevents bolting and keeps them producing through hot spells. The goal is to create conditions where every plant has its ideal growing environment, no matter the season.
Tips & tricks for year-round garden success
Creating a garden that produces food continuously takes thoughtful planning—and these practical tips will help you maximize every square foot while keeping maintenance manageable.
Microclimate Mapping: Pay special attention to Step 1 when mapping your microclimates. Use a small thermometer to record temperatures throughout the day in different zones. I've found that south-facing areas can be 15°F warmer than north-facing ones, which explains why cold-hardy greens thrive there in winter. Mark these variations on your diagram—they'll dictate where to place heat-loving vs. shade-tolerant plants.
Succession Planting Strategy: In Step 2, when selecting plants with staggered harvest windows, consider planting fast-maturing radishes (30 days) every 2 weeks throughout the season. This creates a continuous supply while keeping the soil productive. For lettuce (60 days), I plant two batches in spring—one for early summer harvests and another for fall production under row covers.
Irrigation Efficiency: For Step 3's drip irrigation system, position emitters at the base of each plant rather than along the row. This prevents water from pooling between plants, which can lead to fungal issues. I also add a rain sensor to my smart timer to pause watering during natural rainfall, saving both water and time.
Season Extension Hacks: When using cold frames in Step 5, place them on the south side of your garden to maximize sunlight exposure. For extreme cold (15°F), I've found that adding a clear plastic bubble over the cold frame raises temperatures by an additional 10°F. This simple modification extends the growing season by 4-6 weeks in both spring and fall.
Pro Tips for Plant Grow Food
- Creating a garden that produces food continuously takes thoughtful planning—and these practical tips will help you maximize every square foot while keeping maintenance manageable.
- Microclimate Mapping: Pay special attention to Step 1 when mapping your microclimates.
- Succession Planting Strategy: In Step 2, when selecting plants with staggered harvest windows, consider planting fast-maturing radishes (30 days) every 2 weeks throughout the season.
Frequently asked questions
Got questions about growing your own food year-round? You’re not alone! Here are some of the most common concerns—and practical answers—to help you succeed as a busy gardener.
Can I grow food indoors if I don’t have a yard?
Indoor gardening is perfect for small spaces. Use grow lights, containers, and herbs like basil, mint, or leafy greens (spinach, kale) in sunny windowsills. For veggies, try dwarf tomatoes or peppers in hydroponic setups. Just ensure proper drainage and 6–8 hours of light daily.
How long does it take to harvest food from seeds?
Harvest times vary by plant. Fast growers like radishes (3–4 weeks) or green onions (3–4 weeks) are great for quick wins. Medium crops (lettuce, beans) take 6–8 weeks, while tomatoes or peppers may need 2–3 months. Check seed packets for exact timelines—patience pays off with fresh, homegrown flavor!
Is growing my own food cheaper than buying from stores?
Yes, but it depends on scale. Seeds and soil are upfront costs, but long-term savings add up. A single tomato plant yields 10+ fruits, while store-bought tomatoes cost $3–$5 per pound. Repurpose containers (old buckets, jars) to cut costs further. Track expenses to see your ROI—it’s often worth the effort!
What do I do if pests or diseases attack my plants?
Stay proactive! Start with prevention: rotate crops, use row covers, and water at the base (not leaves) to deter pests. For mild issues, try neem oil or insecticidal soap. Remove affected leaves promptly. If problems persist, research organic solutions or consult local gardening groups for tailored advice.
Can I grow food in winter, or is it a lost season?
Not at all! Extend your harvest with cold-hardy crops like kale, carrots, or garlic in containers. Use row covers, cold frames, or a greenhouse to protect tender plants. Even indoors, microgreens or sprouts thrive under grow lights. Plan ahead: winter gardening is all about strategy and layering!
Wrapping up and next steps
Growing your own food year-round isn’t just a dream—it’s a rewarding reality with the right strategies! Whether you’re a seasoned gardener or just starting, these hacks make it easier to plant, grow, and enjoy fresh food no matter the season.
You’ve got the tools, the know-how, and now the confidence to keep your kitchen stocked with homegrown goodness.
Ready to take the next step? Start small—pick one or two crops to experiment with this week, and let your green thumb grow! 🌱 Before you know it, you’ll be savoring the taste of success (and maybe even sharing your harvest with friends). Happy growing!