
Vegetables
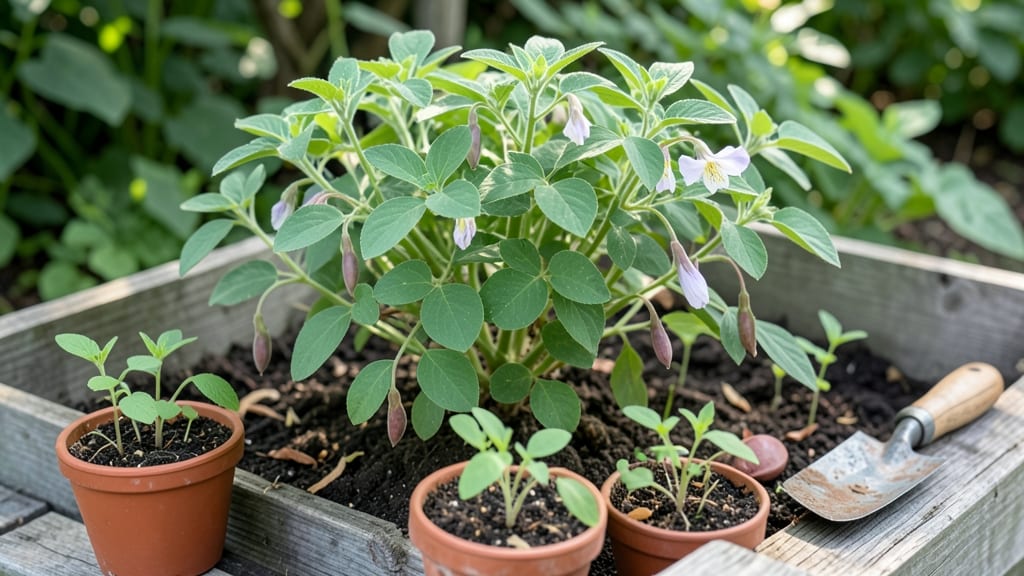
Planting adzuki beans starts with soil that feels like a warm bath—these beans won’t germinate until the dirt reaches 75°F, and that’s the secret to fast, reliable sprouts. I learned this the hard way after waiting weeks for seeds that never broke through cool spring soil.
The good news? With the right prep, you’ll see tiny green hooks pushing through the soil in 5-7 days—not the weeks other beans take.
You’ll need a spot with full sun (at least 6-8 hours daily) and well-draining soil mixed with compost. Adzuki beans aren’t picky about soil pH but hate soggy roots, so raised beds or mounds work best in wet climates.
Plant seeds 1 inch deep and 3-4 inches apart—they’ll spread into bushy plants 12-18 inches wide by harvest time. These aren’t just for edible beans, either; their delicate pink flowers make them a garden double-duty plant.
Water them gently after planting, keeping the soil moist but never soggy—overwatering drowns those tiny sprouts before they start. Once established, adzuki beans are drought-tolerant, but consistent moisture during flowering ensures the best harvest.
The payoff? Sweet, nutty beans ready to pick in 70-80 days, plus a pretty display that hummingbirds can’t resist.
Pair them with cucumbers or corn to improve yields, but keep them away from onions or garlic—they’ll stunt growth. If you’re in a short season, opt for early-maturing varieties like ‘Scarlet O’Hara’ or ‘Tiger Eye’ to beat the frost.
The key to success? Warm soil, patience, and a little shade cloth if your summers get scorching.
📚 In This Guide
- What you need
- Instructions
- Tips and common mistakes
- Wrapping up and next steps
What you need
- ● Adzuki bean seeds: 1–2 lbs (or ~100–200 seeds) of certified organic, non-GMO seeds (e.g., Phaseolus angularis). Choose heirloom varieties like ‘Kurodane’ or ‘Tadayutaka’ for best flavor.
- ● Soil: Well-draining, loamy soil with a pH of 6.0–7.0. Mix in compost (2–3 cups per sq ft) for nutrients.
- ● Warmth source: Black plastic mulch (4x8 ft sheets) to trap heat.
- ○ Grow lights (optional but helpful for early starts; 12–16 hrs/day at 75–85°F).
- ● Watering can or hose with a gentle spray nozzle.
- ● Stakes or trellis (5–6 ft tall) if growing pole varieties (e.g., ‘Scarlet Runner’ hybrids).
- ● Garden trowel or small shovel for planting.
- ● Seedling trays (if starting indoors; 72-cell trays work well).
- ● Balanced fertilizer (5-5-5 or 10-10-10) for side-dressing (1 tbsp per plant every 3–4 weeks).
- ○ Row cover fabric (optional; protects young plants from pests like beetles).
- ● Thermometer (soil probe type) to monitor warmth (aim for 70–85°F for germination).
- ● Pruning shears for trimming vines (if needed).
Instructions for planting adzuki beans with soil-warmth tricks
Here’s how to get your adzuki beans sprouting in just days—not weeks—using heat and moisture hacks.
Prepare the Planting Site for Warmth
Adzuki beans need soil temperatures of at least 65°F to germinate quickly. If your spring soil is still chilly, create a warm microclimate by planting in a black plastic mulch or directly over a black landscape fabric spread on the ground. The dark surface absorbs heat from the sun and warms the soil beneath it.
Loosen the top 6 inches of soil with a garden fork to break up compaction. Work in 1 cup of compost per planting spot—this improves drainage while retaining moisture. Avoid garden soil that’s still damp from winter; you want it warm and dry enough to crumble easily when squeezed.
Plant Seeds at the Right Depth and Spacing
Drop 4-5 seeds per spot, spacing them 2-3 inches apart in rows 18 inches apart. Adzuki beans are small but need room to grow strong roots. Plant them 1 inch deep—burying them too shallow risks drying out, while going deeper delays germination. Use your finger to make small holes, then place seeds inside and cover lightly with soil.
Here’s the trick for fast germination: After planting, water the area deeply until moisture reaches 4 inches down. Then, cover the entire row with a clear plastic tunnel (or even a cut-open plastic bottle) to trap heat and humidity. This creates a mini greenhouse effect, pushing soil temperatures up to 75-80°F—perfect for quick sprouting.
Monitor Soil Moisture and Heat Daily
Check the soil every morning—it should feel moist but not soggy to the touch. Adzuki beans need consistent moisture to germinate, but standing water can rot seeds. If the surface dries out, water lightly again, focusing on the base of the plants. You’ll see tiny sprouts in 5-7 days if conditions are ideal.
Remove the plastic cover as soon as you spot the first green tips breaking through the soil. This prevents the seedlings from becoming too dependent on high humidity. Watch for true leaves (the second set after the initial seed leaves)—this signals the plants are ready to toughen up for life without cover.
Thin Seedlings for Stronger Plants
Once seedlings reach 3-4 inches tall, thin them to 1 plant every 6 inches. Use scissors to snip unwanted stems at soil level—this avoids disturbing the roots of nearby plants. Keep the strongest, straightest seedling in each spot, as crowded beans compete for nutrients and weakens growth.
After thinning, water at the base again to settle the soil. Now’s the time to remove any remaining plastic mulch or fabric, as the plants can handle normal air circulation. Within 3-4 weeks, you’ll have bushy adzuki plants ready for trellising or bush support—just in time for summer harvests.
Tips & tricks for planting adzuki beans
Fast germination is all about creating the perfect conditions—and these tricks will help you achieve it in record time.
Soil Temperature Matters: The instructions mention maintaining soil temperatures of at least 65°F, but here's what I've learned: If your soil is still chilly in spring, use a soil thermometer to check before planting. Morning sunlight is most effective for warming the soil, so plant on a sunny day when the ground has already absorbed heat. If you're planting in cooler climates, consider using a solar-powered heating mat under the black plastic mulch to push temperatures closer to 80°F for even faster results.
Compost Quality Tip: In Step 1, you'll add 1 cup of compost per planting spot, but not all compost is created equal. For best results, use well-aged compost that has broken down into dark, crumbly soil. Fresh compost can be too hot and may actually inhibit germination. If you're unsure, mix your compost with some garden soil first to moderate its temperature and moisture levels.
Watering Strategy: The deep watering technique in Step 2 is crucial, but timing matters just as much. Water the area thoroughly in the morning so the soil has time to warm up during the day. Avoid watering in the evening, as cooler night temperatures can slow down germination. A simple way to check if you've watered enough is to dig down 4 inches—if the soil feels damp but not soggy, you're golden.
Plastic Covering Hack: When you cover the planted seeds with clear plastic to trap heat and humidity, don't just throw it on randomly. Secure the edges tightly to prevent air from circulating underneath. If you're using a plastic bottle as a mini greenhouse, cut the bottom off and place it over the seeds with the opening facing up. This creates a more controlled environment that mimics the ideal 75-80°F range for quick sprouting.
Pro Tips for Planting Adzuki Beans
- Fast germination is all about creating the perfect conditions—and these tricks will help you achieve it in record time.
- Soil Temperature Matters: The instructions mention maintaining soil temperatures of at least 65°F, but here's what I've learned: If your soil is still chilly in spring, use a soil thermometer to check before planting.
- Compost Quality Tip: In Step 1, you'll add 1 cup of compost per planting spot, but not all compost is created equal.
Frequently asked questions
about planting adzuki beans—because even the best gardeners need a little extra guidance! Here are answers to the most common questions to help you grow these sweet, versatile beans with confidence.When is the best time to plant adzuki beans?
Adzuki beans thrive in warm soil—aim to plant them 2–3 weeks after your last frost date when soil temperatures reach at least 65°F (18°C). In cooler climates, use black plastic mulch or a cold frame to warm the soil faster. If you’re in a hot region, plant in early spring or late summer to avoid summer heat stress.
How long does it take for adzuki beans to germinate?
With the right soil warmth (70–85°F / 21–29°C), adzuki beans typically sprout in 7–14 days. If germination takes longer, check for cold soil (use a soil thermometer) or damp seeds (let them dry slightly before planting). Pro tip: Soak seeds overnight to speed up the process!
Can I grow adzuki beans in containers or small spaces?
Adzuki beans are compact plants (3–4 feet tall) and do well in 5-gallon containers or raised beds. Use a trellis or sturdy stakes to support vines and ensure well-draining soil. Just avoid planting too closely—they need 6–8 inches of space between plants for airflow.
What should I do if my adzuki beans develop yellow leaves?
Yellow leaves often signal overwatering, nutrient deficiency, or pests. First, check the soil—adzuki beans prefer moderate moisture (water when the top inch is dry). If leaves are pale or curled, add a balanced fertilizer (like 10-10-10). For pests (like aphids), spray with neem oil or introduce ladybugs!
Are adzuki beans easy to grow in cooler climates?
Yes, but with a trick! Adzuki beans struggle in cold soil, so use these hacks:
- Black plastic mulch to raise soil temps by 5–10°F.
- Plant in microclimates (near walls or fences).
- Start seeds indoors 4–6 weeks early in biodegradable pots, then transplant.
Wrapping up and next steps
Planting adzuki beans is a rewarding journey that combines patience with the magic of soil warmth! By mastering these soil-warmth secrets, you’ll unlock faster germination and a bountiful harvest.
Whether you’re a seasoned gardener or just starting, every seed you plant is a step toward delicious, nutrient-packed beans—and you’ve got this!
Ready to grow? Start small—try a few pots or a dedicated garden bed—and track your progress. Soon, you’ll be sharing your harvest with friends or savoring homemade mochi or stews! 🌱💚