Propagation
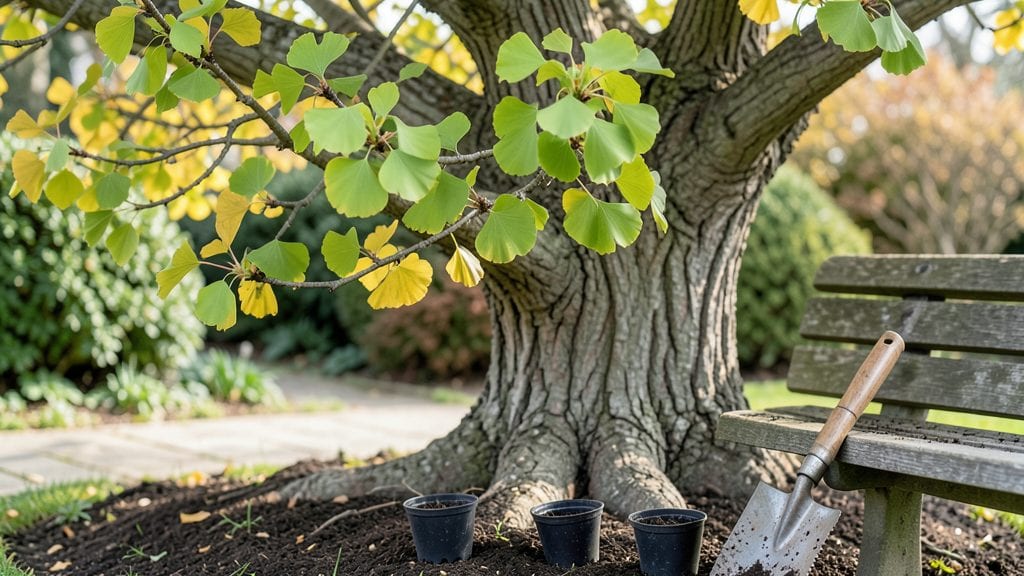
Planting ginkgo seeds starts with a single moment of patience—those hard, fleshy seeds need cold stratification to break dormancy. 🌱 I’ve tried planting them fresh, and nothing happens for months.
But after a winter in the fridge, they wake up ready to grow, and that first tiny shoot feels like magic. The key is mimicking nature’s timing, and I’ll show you exactly how to do it without waiting years for results.
You’ll need just a few things: a container with drainage, well-draining soil mix, and a little fridge space for the cold treatment. The process takes about 6 months from start to sprout, but the payoff—a ginkgo tree—is worth every week.
Ginkgos are slow starters, so don’t rush them. I’ve seen seeds take 3-6 months to crack open, but once they do, they grow fast.
By the time spring rolls around, you’ll have a tiny seedling pushing through the soil, with glossy leaves that smell faintly of buttery popcorn. It’s a reward for patience, though you’ll need to wait 10-20 years before any tree produces fruit.
Most gardeners grow ginkgos for their striking foliage and ancient charm, not the seeds—so enjoy the journey.
The best part? You can plant these anywhere ginkgos thrive—city sidewalks, rural yards, or even large containers. Just remember: male trees (the ones without smelly fruit) are far easier to grow. Here’s how to get those first sprouts without the guesswork.
📚 In This Guide
- What you need
- Instructions
- Tips and common mistakes
- Wrapping up and next steps
What you need
- ● Fresh ginkgo seeds (1–5 seeds per attempt; collect from ripe, yellow ginkgo fruits in fall)
- ● Cold-stratification setup: Small paper towels or dampened peat moss (enough to wrap seeds snugly)
- ● Sealed plastic bag or airtight container (quart-sized or larger)
- ● Potting mix: Well-draining blend (e.g., 50% peat moss, 30% perlite, 20% sand)
- ● Small pots or seed trays (3–4 inches deep, with drainage holes)
- ● Spray bottle (for gentle watering)
- ● Gloves (to handle seeds—ginkgo flesh can stain!)
- ● Scissors or knife (for cutting seeds open if needed)
- ● Plant labels & marker (track seed sources and dates!)
- ● Grow lights or sunny windowsill (10–12 hours of light/day after sprouting)
- ● Humidity dome or plastic wrap (to retain moisture during germination)
- ● Fertilizer (balanced 10-10-10 or organic option, only after 2–3 true leaves appear)
Step-by-step instructions for planting ginkgo seeds
Here's my foolproof method for breaking the ginkgo seed's dormancy and getting those first green shoots.
🌱 Step 1: Harvest and Clean the Seeds
Collect fresh ginkgo seeds when they turn golden-brown and open naturally on the tree. The fleshy outer layer contains butyric acid, which must be removed immediately to prevent rot. Wear gloves—this stuff smells like rancid butter! Rinse the seeds thoroughly under cool water to wash away all residue, then let them air-dry completely on a paper towel for 24 hours.
I like to soak the cleaned seeds in 1% hydrogen peroxide solution for 10 minutes to disinfect the surface. This step prevents fungal infections that can kill seeds during stratification. After soaking, rinse again and let them dry completely before moving to the next stage.
💧 Step 2: Perform Cold Stratification
Ginkgo seeds require 60-90 days of cold stratification to break dormancy. Fill a plastic bag with 2 inches of moistened peat moss (keep it damp but not soggy) and add your seeds. Seal the bag loosely—you want airflow but not drying. Place it in your refrigerator's crisper drawer where temperatures stay 35-45°F.
Check the seeds every 2 weeks—they should feel firm but not mushy. If mold appears, discard those seeds immediately. After 60 days, transfer the bag to a warmer spot (65-75°F) to simulate spring conditions. This temperature shift triggers germination.
☀️ Step 3: Plant in Germination Medium
Fill small pots with a mix of 50% peat moss and 50% perlite—this ensures excellent drainage while retaining enough moisture. Plant each seed 1 inch deep in its own pot, leaving the tip slightly exposed. Ginkgo seeds are large, so don't crowd them. Water gently until moisture seeps from the bottom drainage holes.
Place the pots in bright, indirect light (6-8 hours daily)—direct sun will overheat the soil. You'll see the first signs of germination in 4-8 weeks as a small white root emerges. Once the root reaches 1 inch long, you can transplant to larger containers if needed.
⏰ Step 4: Provide Consistent Moisture and Light
Keep the soil evenly moist but never waterlogged—ginkgo seedlings rot quickly if their roots sit in wet conditions. I use a spray bottle to mist the soil daily rather than pouring water, which prevents disturbing the delicate root system. Place a humidity dome over the pots to maintain 70-80% humidity until true leaves appear.
When the first true leaves emerge (they'll look like tiny fans), remove the dome gradually over 3-5 days to acclimate the seedlings. This is when you'll need to move them to full sun for 4-6 hours daily. Too much shade now will create weak, leggy seedlings that struggle to support their own weight.
🌿 Step 5: Transplant to Permanent Containers
After 3-4 months, when seedlings reach 6-8 inches tall with multiple sets of leaves, it's time to transplant. Choose containers with 10-12 inches of depth and fill them with a mix of 60% potting soil and 40% compost. Dig a hole twice as wide as the root ball and place the seedling at the same depth it was growing before.
Water thoroughly after transplanting to settle the soil around the roots. Ginkgo seedlings establish slowly, so avoid moving them again for at least 1 year. During their first year, focus on keeping the soil consistently moist and providing full sun exposure. You'll know they're thriving when new leaves emerge every 2-3 weeks.
✂️ Step 6: Prune and Maintain Growth
Ginkgo seedlings benefit from light pruning to encourage bushier growth. After the first growing season, trim back any leggy stems by one-third their length just above a leaf node. This encourages branching and creates a stronger structure. Remove any dead or yellowing leaves immediately—they drain energy from the young plant.
Fertilize lightly in spring with a balanced 10-10-10 formula at half strength. Ginkgo trees are slow growers, so over-fertilizing will burn their delicate roots. Watch for signs of stress like yellowing leaves or stunted growth—these usually indicate either overwatering or insufficient light. With patience, your seedlings will develop into majestic trees with distinctive fan-shaped leaves.
Tips & tricks for planting ginkgo seeds
Here's what I've learned after trying (and failing) to sprout ginkgo seeds a few times—these tricks make all the difference.
Harvest Timing: Those golden-brown seeds you see in fall are your best bet, but don't wait too long! Ginkgo seeds lose viability quickly once they hit the ground. I've found that seeds collected within 24 hours of falling have the highest germination rates. If you can't harvest fresh, store them in a cool, dry place for up to 2 weeks before cleaning—just don't let them dry out completely.
Stratification Setup: The 60-90 days of cold stratification is non-negotiable, but how you set it up matters. I use a clear plastic bag with small holes poked in the top—this lets me check progress without disturbing the seeds. Keep the peat moss consistently damp (not wet) by misting every 2 weeks. If you notice condensation inside the bag, that's a good sign—it means the humidity is just right for dormancy breaking.
Light Transition: That shift from bright indirect light to full sun in Step 4 is crucial. I've seen seedlings get sunburned when moved too quickly, so I gradually increase sun exposure over 3-5 days. Start with 2 hours of morning sun and slowly build to 4-6 hours. Watch for pale leaves—they're begging for more light, but don't go from shade to full sun overnight!
Transplanting Secret: When you're ready to transplant after 3-4 months, here's my trick: soak the root ball for 10 minutes before removing it from the pot. This keeps the delicate roots intact and makes the transition easier. After planting, give the soil a good soak to eliminate air pockets around the roots—this prevents transplant shock.
Pro Tips for Planting Ginkgo Seeds
- Here's what I've learned after trying (and failing) to sprout ginkgo seeds a few times—these tricks make all the difference.
- Harvest Timing: Those golden-brown seeds you see in fall are your best bet, but don't wait too long!
- Stratification Setup: The 60-90 days of cold stratification is non-negotiable, but how you set it up matters.
Frequently asked questions
Got questions about growing ginkgo trees from seeds? You’re not alone—this ancient tree has a few quirks! Here are answers to the most common queries to help you succeed.
How long does cold stratification take for ginkgo seeds?
Cold stratification typically takes 60–90 days in the fridge (34–40°F). Ginkgo seeds are slow to germinate, so patience is key! Start this process in late fall for spring planting. If your seeds don’t sprout within 6 months, they may need another round of stratification or could be non-viable.
When is the best time to plant ginkgo seeds after stratification?
The ideal window is late winter to early spring (February–March in most climates). Plant them as soon as they show signs of sprouting (a tiny root or crack in the seed coat). Avoid planting in fall—ginkgo seeds hate frost and won’t survive outdoor planting until soil temperatures stabilize.
Can I plant ginkgo seeds directly outside without cold stratification?
Nope! Cold stratification is non-negotiable for ginkgo seeds. Skipping this step means they’ll likely rot or remain dormant forever. If you’re in a warm climate, mimic winter by refrigerating seeds for 2–3 months before planting. Pro tip: Sow them in pots first to monitor progress before transplanting outdoors.
Why aren’t my ginkgo seeds sprouting after stratification?
Several factors could be at play:
- Old seeds: Ginkgo seeds lose viability quickly (plant them within 1–2 years of harvest).
- Improper moisture: Keep soil consistently damp (not soggy) during stratification.
- Temperature issues: If your fridge is too warm (>45°F), stratification fails. Use a seed-starting mat for extra warmth after planting.
- Seed damage: Check for mold, cracks, or pests before stratifying.
If all else fails, try soaking seeds in lukewarm water for 24 hours before restarting stratification.
How long does it take for a ginkgo seedling to grow into a mature tree?
Ginkgo trees are patient growers! Seedlings take 5–10 years to reach 10 feet tall, with full maturity (30–50 feet) in 20–30 years. Embrace the wait—they’re worth it! For faster results, consider grafted trees from nurseries, though they’re pricier.
Wrapping up and next steps
Planting ginkgo seeds is a rewarding journey that unlocks the beauty of these ancient trees—right from your backyard! 🌱 With patience and the right techniques, like cold stratification, you’re well on your way to nurturing a living piece of history. Now’s the time to take that next step: gather your supplies, follow the steps, and watch those first green shoots break through the soil.
Ready to grow your own ginkgo? Start today—your future tree is waiting! 🌿