
Container Gardens
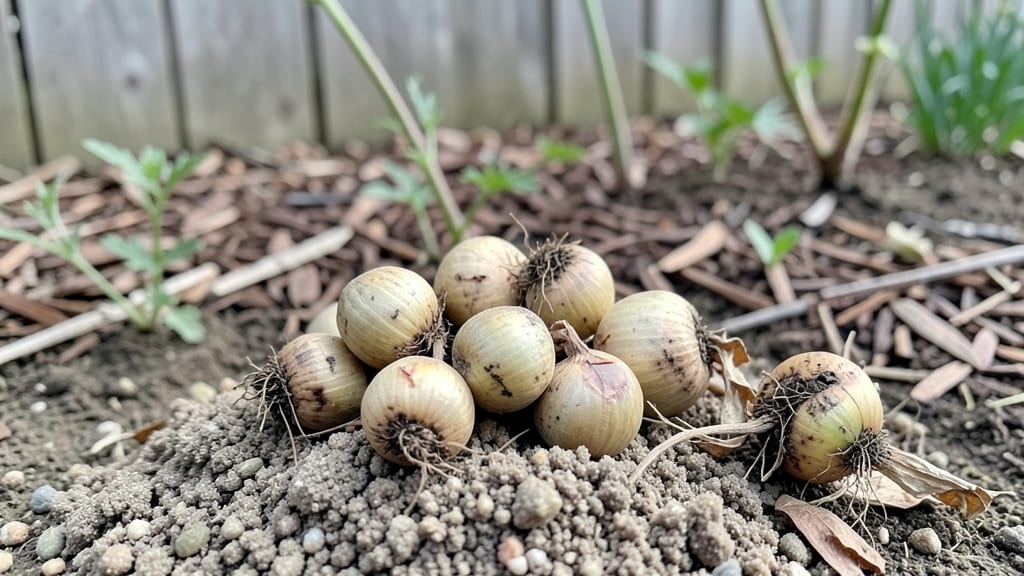
Planting ranunculus corms turns your spring garden into a burst of papery blooms that last for weeks. 🌸 I’ve planted these delicate-looking corms for years, and the secret to their success isn’t complicated—just the right timing, soil, and a little patience.
Most people overthink it, but once you get the basics down, they’re shockingly easy to grow.
The key is starting in late fall when temperatures drop below 50°F, giving the corms time to root before spring.
You’ll need well-draining soil (mix in sand or perlite if your soil is heavy), a sunny spot with at least 6 hours of light, and corms planted 2-3 inches deep, spaced 3-4 inches apart. No fancy tools—just a trowel and a little elbow grease.
By early spring, you’ll see lush, feathery foliage emerging, followed by clusters of vibrant blooms in shades of pink, red, or white. The flowers last 2-3 weeks in the garden or even longer as cut stems.
The best part? They’re perennial in warm climates, so you’ll get more blooms each year with no extra work.
If your corms rot or fail to sprout, it’s usually from too much moisture or planting too deep. Keep the soil slightly damp but never soggy, and you’ll avoid most problems.
Once you’ve got the hang of it, ranunculus becomes a foolproof way to add drama to containers, borders, or even indoor arrangements.
📚 In This Guide
- What you need
- Instructions
- Tips and common mistakes
- Wrapping up and next steps
What you need
- ● Ranunculus corms: 10–20 corms per container (depending on desired fullness; larger pots = more corms). Choose fresh, plump corms (no soft spots or mold).
- ● Well-draining potting mix: 1–2 bags (1–2 cubic feet) of a lightweight blend (e.g., 60% potting soil + 40% perlite/pumice/sand). Avoid heavy garden soil.
- ● Containers: Minimum 6-inch depth (shallower for smaller varieties).
- ● Drainage holes mandatory (use a drill if repurposing pots).
- ● Material: Terracotta (breathable) or plastic (retains moisture longer).
- ● Slow-release fertilizer: 1–2 tbsp (per container) of 10-10-10 or 5-10-5 granules (blend into soil).
- ● Watering can or spray bottle: With a gentle rose nozzle to avoid displacing corms.
- ● Epsom salt: 1 tsp dissolved in water (monthly feed for extra-pink blooms).
- ● Mulch: Pea gravel or decorative stones (keeps soil moist and adds flair).
- ● Cactus/succulent mix: For ultra-dry climates (amend with 20% extra perlite).
- ● Plant labels: Waterproof markers to track varieties (ranunculus come in stunning colors!).
Step-by-step instructions for planting ranunculus corms
Here’s how to plant these delicate corms for stunning spring blooms—no fuss, just reliable results.
🌱 Step 1: Prep the Corms and Soil
Ranunculus corms are unlike bulbs—they’re flat and papery, with a single growing point. Gently separate any clusters, but don’t force them apart if they’re tightly fused. Soak the corms in lukewarm water for 1-2 hours to soften the outer coating and encourage faster sprouting. This is the moment that matters: if the water turns cloudy, drain and rinse them immediately to prevent rot.
Choose a well-draining container or garden bed with loose, sandy soil. Ranunculus hates soggy roots, so amend heavy soil with 1 part perlite to 3 parts potting mix (use the 5 gallons of potting mix you’ve prepped). Work in a handful of slow-release fertilizer—ranunculus are heavy feeders and need nutrients to produce those lush blooms.
🪴 Step 2: Plant at the Right Depth and Spacing
Place each corm with the growing point facing upward—it’s the side with a small dimple or the flatter surface. Bury them 2-3 inches deep, spacing them 3-4 inches apart in containers or 6-8 inches apart in garden beds. Pack the soil lightly around them but don’t tamp it down; you want air pockets to minimize rot risk.
Here’s the thing—if you plant them too shallow, they’ll flop later. If too deep, they’ll struggle to push through. A good rule: your corms should sit 1 inch below the soil surface after pressing in gently. Water lightly after planting to settle the soil, but don’t drown them.
☀️ Step 3: Provide Light and Patience for Blooms
Ranunculus thrive in full sun to partial shade, with at least 6 hours of direct light daily. In containers, rotate them weekly so they grow straight, not toward the light source. Keep the soil evenly moist but never soggy—water when the top 1 inch feels dry. Overwatering is the fastest way to lose these corms to rot.
You’ll see first green shoots in 4-6 weeks, but don’t rush to fertilize yet. Once the foliage reaches 4-6 inches tall, add a balanced liquid fertilizer every 2 weeks to fuel those iconic, layered blooms. Real talk: the blooms will arrive later than other spring flowers, but they’re worth the wait.
Tips & tricks for perfect ranunculus planting
A few simple secrets that'll help you avoid common pitfalls and get those stunning blooms every time.
Soaking Secret: That 1-2 hour soak in lukewarm water isn't just about softening the corms—it's a critical step for breaking dormancy. I've found that using a shallow dish with just enough water to cover the corms prevents them from floating away. If you're short on time, the minimum effective soak is 30 minutes, but don't exceed 2 hours or you risk overhydrating them.
Soil Science: The 1 part perlite to 3 parts potting mix ratio is non-negotiable for ranunculus. Between us, I've learned this the hard way after watching corms rot in heavy clay soil. If you're planting in garden beds, consider creating a raised bed specifically for these delicate plants. The key is that water should drain through within 15 minutes after watering—any longer and you're flirting with root rot.
Planting Precision: When burying those corms 2-3 inches deep, think of it this way: the top of the corm should be about 1 inch below the soil surface after pressing in. I use a small ruler to measure this—it's shocking how many gardeners eyeball it and end up with uneven depths. For containers, use a pencil to mark planting depth on the sides to maintain consistency.
Light Strategy: Those 6 hours of direct light don't have to be consecutive. In fact, early morning sun is gentler on the emerging shoots. If you're growing in containers, place them where they'll receive morning light and afternoon shade during the hottest part of summer. I've seen ranunculus scorch when exposed to intense afternoon sun, even when they're established.
Pro Tips for Planting Ranunculus Corms
- A few simple secrets that'll help you avoid common pitfalls and get those stunning blooms every time.
- Soaking Secret: That 1-2 hour soak in lukewarm water isn't just about softening the corms—it's a critical step for breaking dormancy.
- Soil Science: The 1 part perlite to 3 parts potting mix ratio is non-negotiable for ranunculus.
Frequently asked questions
Got questions about planting ranunculus corms? You’re not alone—these delicate blooms spark curiosity! Here are answers to the most common queries to help you grow stunning, long-stemmed flowers with confidence.
When is the best time to plant ranunculus corms?
Plant your corms 8–10 weeks before your last expected frost in fall (for spring blooms) or early spring (if you live in a mild climate). In colder regions, aim for October or November—this gives roots time to establish before winter. For container gardens, you can even start indoors 4–6 weeks before transplanting outside.
Can I plant ranunculus corms in winter?
It depends! In USDA Zones 7–10, you can plant as late as December (with frost protection). In colder zones (3–6), wait until spring—corms need consistent soil temps above 40°F (4°C) to sprout. If you must plant in winter, use a cold frame or greenhouse to shield them from freezing.
What if my ranunculus corms rot or mold?
Rotting or mold (often gray fuzzy mold) usually means too much moisture or poor drainage. To fix it:
- Ensure soil is well-draining (mix in perlite or sand if needed).
- Space corms 3–4 inches apart for airflow.
- Avoid overhead watering—use a drip irrigation system instead.
- If mold appears, remove affected corms and treat with a fungicide like neem oil.
How deep should I plant ranunculus corms?
Plant corms 2–3 inches deep in soil, with the pointy end up (like a teardrop). In containers, use a well-draining mix (like 60% potting soil, 30% perlite, 10% compost). Pro tip: If planting in heavy clay, add a 1-inch layer of gravel at the bottom to prevent rot.
Can I reuse ranunculus corms after they bloom?
Yes! After blooming, let the foliage die back naturally (don’t cut it). Once the leaves turn yellow (6–8 weeks post-bloom), dig up the corms, let them dry for 1–2 weeks, and store them in a cool, dry place (35–40°F / 2–4°C) until fall replanting. Note: Corms may produce fewer blooms the second year—refresh with new ones every 2–3 years.
What’s a good alternative if ranunculus is hard to find?
If ranunculus corms are unavailable, try these long-stemmed, spring-blooming alternatives:
- Tulips (easier to grow, classic blooms).
- Anemones (delicate, dark-centered flowers).
- Daffodils (hardy, pest-resistant).
- Hyacinths (fragrant, compact corms).
Wrapping up and next steps
Planting ranunculus corms is a rewarding way to bring vibrant, papery blooms to your container gardens—just follow these simple steps! With the right timing, soil prep, and care, you’ll enjoy stunning spring displays that’ll make your neighbors green with envy. 🌸
Now that you’re ready to plant, why not share your progress on social media or tag us? And for even more container garden inspiration, check out our guide on layering plants for year-round color!