
Vegetables
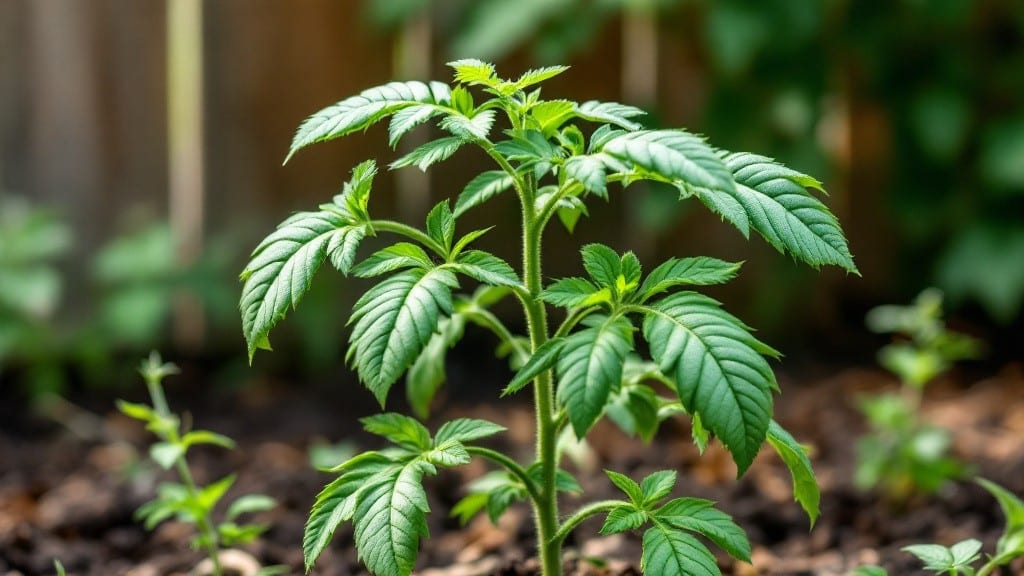
Planting tomatoes outdoors is all about timing, soil, and a little patience—because those first ripe, sun-warmed slices taste like victory. I remember my first attempt: too early, too cold, and the plants just sat there looking miserable for weeks.
Now, I know the right window transforms weak seedlings into robust plants that produce pounds of fruit by summer’s end.
You’ll need well-draining soil rich in compost, stakes or cages for support, and a spot that gets at least 6-8 hours of sunlight daily. Most beginners overlook hardening off seedlings—skipping this step means shocked plants that struggle to adapt.
Start your seedlings indoors 6-8 weeks before your last frost date, then move them outside gradually over 7-10 days to toughen them up.
By mid-summer, you’ll be harvesting tomatoes that burst with flavor, their vines heavy with fruit. The key is consistency: water deeply at the base, not overhead, and prune suckers regularly to focus energy on fruit production. Even if you’ve failed before, this method works—guaranteed—if you follow the steps.
Works in most climates, though southern gardeners may need shade cloth during peak heat. Here’s how to set it up without the usual headaches—so you can enjoy that first homegrown tomato before you know it.
📚 In This Guide
- What you need
- Instructions
- Tips and common mistakes
- Wrapping up and next steps
What you need
- ● Tomato seeds or seedlings: 3–6 plants (depending on your family’s appetite! 😄). Choose disease-resistant varieties like Early Girl, Cherry Roma, or Beefsteak.
- ● Containers or garden bed: For containers: 5-gallon pots (1 per plant) with drainage holes.
- ● For in-ground planting: Loose, well-draining soil (pH 6.0–6.8). Amend with compost if needed.
- ● Potting mix: 1–2 bags of high-quality, sterile mix (e.g., Miracle-Gro or coconut coir-based).
- ● Fertilizer: Balanced fertilizer (10-10-10) or tomato-specific formula (e.g., Espoma Tomato-Tone).
- ● Slow-release granules (follow package rates).
- ● Stakes or cages: 6–8 ft tall (for indeterminate varieties) or 4–5 ft (for determinate). Bamboo or metal works great!
- ● Watering can or hose with nozzle: For gentle, deep watering (aim for 1–2 inches per week).
- ● Mulch: Straw or shredded leaves (2–3 inches thick) to retain moisture and suppress weeds.
- ● Pruning shears: Sharp, clean pair for trimming suckers and dead leaves.
- ● Grow lights: If starting seeds indoors 6–8 weeks before last frost.
- ● Row covers: Lightweight fabric to protect seedlings from pests or frost.
- ● Drip irrigation kit: For consistent moisture (especially in hot climates).
- ● Epsom salt: 1 tbsp per plant every 2–3 weeks for magnesium boost.
- ● Compost tea: Homemade or store-bought to enrich soil with microbes.
- ● Garden gloves: To keep hands clean while handling soil and plants.
Step-by-step instructions for planting tomatoes outdoors
Here’s how to get your tomato plants thriving in the garden with minimal fuss.
Prepare the Soil for Optimal Growth
Tomatoes crave loose, fertile soil with excellent drainage. Work the 3 gallons of compost into the top 12 inches of soil in each planting spot. This improves aeration and provides the nutrients young roots need to establish quickly. I like to mix in a handful of granular tomato fertilizer—about 1 tablespoon per plant—directly into the soil before planting. This gives roots an immediate nutrient boost without burning tender foliage.
Test the soil moisture before planting. It should feel like a damp sponge—not soggy, but not bone-dry either. If your soil drains poorly, add a 2-inch layer of coarse sand or perlite to the bottom of the hole before backfilling. Tomatoes hate wet feet, and standing water invites rot. Amend the soil until it holds moisture without pooling, and you’ll see stronger plants from the start.
Plant Seedlings at the Right Depth and Spacing
Dig a hole twice as wide as the root ball but only as deep as the container the seedling came in. This prevents burying the stem, which can cause disease. Gently remove the seedling from its pot and loosen any circling roots with your fingers—this encourages outward growth instead of strangling the plant. Place it in the hole so the top of the root ball sits just below soil level.
Fill the hole with soil, pressing lightly to eliminate air pockets but avoiding compaction. Space plants 18-24 inches apart in rows 3 feet apart to allow airflow and prevent fungal issues. If you’re planting determinate varieties (bush types), keep them closer to 18 inches apart. For indeterminate (vining) types, the full 24 inches gives them room to sprawl. Water deeply right after planting to settle the soil and eliminate gaps around the roots.
Provide Support and Mulch for Strong Growth
Install cages or stakes immediately after planting—waiting until the plant is established makes it harder to insert supports without damaging roots. For indeterminate varieties, use 6-foot stakes driven 12 inches deep into the soil beside each plant. Secure the main stem loosely with soft plant ties (avoid wire or anything that can cut into the stem as it thickens). This gives the plant stability while allowing it to grow upright naturally.
Spread a 2-inch layer of mulch around each plant, keeping it 2 inches away from the stem to prevent rot. I use straw or shredded leaves because they break down slowly, feeding the soil while suppressing weeds. Mulch also keeps soil temperatures steady, which is especially helpful in hot climates where roots can overheat. Water the mulch lightly after applying to help it settle and make contact with the soil.
Water and Fertilize for Consistent Production
Water deeply once a week for the first 2 weeks, then adjust based on rainfall. Aim for 1-1.5 inches of water per week, delivered directly at the base of the plant. Avoid overhead watering, especially in the morning—wet foliage invites fungal diseases like early blight. You’ll know you’re doing it right when the top 2 inches of soil feel dry before the next watering. Consistency is key; tomatoes respond poorly to drought followed by sudden soaking.
After the first 4 weeks, side-dress each plant with 1 tablespoon of granular tomato fertilizer. Work it into the top 2 inches of soil around the base, then water deeply to activate the nutrients. Repeat every 4-6 weeks through the growing season. You’ll see stronger vines, larger leaves, and more fruit set when the plants get this mid-season boost. Stop fertilizing 6 weeks before your first frost to allow the plant to harden off naturally.
Prune and Maintain for Maximum Yield
Prune suckers—those little shoots that grow in the joint between the main stem and a branch—weekly once the plant reaches 3 feet tall. Use your fingers or clean pruners to pinch them off at the base. Removing suckers directs the plant’s energy into fruit production instead of leaf growth. Leave 2-3 leaves below each fruit cluster to ensure the plant can support the weight. Indeterminate varieties need more aggressive pruning than bush types.
Watch for early signs of pests like hornworms or aphids. I inspect plants every 3 days during peak growing season, focusing on the undersides of leaves where pests hide. If you spot damage, spray with neem oil in the early evening to avoid harming beneficial insects. Tomatoes are heavy feeders, so don’t skip the weekly mulch check—top up if it decomposes below 1 inch thick. A well-maintained plant will reward you with 60 days of sun-kissed harvests.
Tips & tricks for perfect tomato planting success
These practical insights will help you avoid common pitfalls and maximize your tomato harvest from day one.
Soil Preparation Insight: When amending soil with the 3 gallons of compost and 1 tablespoon of granular tomato fertilizer, focus on creating a loose, crumbly texture—almost like cake batter. I find it helpful to mix the compost and fertilizer into the top 12 inches using a broadfork rather than a shovel. This preserves the soil's natural structure while incorporating nutrients evenly. The key is to avoid compacting the soil, which can suffocate young roots and lead to poor establishment.
Planting Depth Technique: The instructions emphasize planting so the top of the root ball sits just below soil level, but here's what I've learned: if your seedlings were growing deep in their pots, you can actually bury them slightly deeper—up to 1 inch below the original soil line. This encourages stronger root growth without risking disease. Just be sure to avoid burying the stem above the first set of leaves, as this can cause rot.
Support System Strategy: For indeterminate varieties using 6-foot stakes, I recommend driving the stake in at a slight angle (about 15 degrees) rather than straight up. This creates a more stable structure that won't topple in windy conditions. When securing the plant with soft ties, leave about 2 inches of slack—the stem will thicken as it grows. I also like to add a second tie halfway up the stake for extra support during heavy fruiting periods.
Watering Consistency: The 1-1.5 inches of water per week guideline works well, but I've found a simple trick for monitoring soil moisture: insert a wooden dowel or chopstick into the soil near each plant. After watering, mark the moisture line with a pencil. When the dry line reaches your mark, it's time to water again. This visual cue helps maintain consistent moisture without over- or under-watering, which is particularly important during the critical first 2 weeks when roots are establishing.
Pro Tips for Planting Tomatoes Outdoors
- These practical insights will help you avoid common pitfalls and maximize your tomato harvest from day one.
- Soil Preparation Insight: When amending soil with the 3 gallons of compost and 1 tablespoon of granular tomato fertilizer, focus on creating a loose, crumbly texture—almost like cake batter.
- This encourages stronger root growth without risking disease.
Frequently asked questions
Got questions about planting tomatoes outdoors? You’re not alone! Here are answers to the most common concerns—so you can grow a thriving garden with confidence.
When is the best time to plant tomatoes outdoors?
Plant after the last frost when soil temps hit at least 60°F (15°C). For most regions, this means late spring (April–June). Use a frost chart for your zone. Pro tip: Harden off seedlings first (acclimate them to outdoor temps over 7–10 days) to avoid transplant shock!
How long does it take for outdoor tomatoes to bear fruit?
With proper care, expect ripe tomatoes in 60–85 days after transplanting (depending on variety). Early varieties like ‘Early Girl’ may fruit in 50–60 days, while heirlooms like ‘Brandywine’ take longer. Key factors: warmth, sunlight (6+ hours/day), and consistent watering. Patience pays off—imagine that first juicy slice!
What are the most common pests/diseases, and how do I prevent them?
Watch for hornworms (stripy caterpillars), aphids, and blight (brown spots on leaves). Prevention tips:
- Rotate crops yearly to break disease cycles.
- Use row covers early in the season to block pests.
- Prune lower leaves for airflow (reduces humidity-related diseases).
- Spray neem oil or introduce beneficial nematodes for organic pest control.
Can I plant tomatoes outdoors in hot climates?
Yes! Heat-loving varieties like ‘Solar Fire’ or ‘Heatmaster’ thrive in temps up to 100°F (38°C). Adjust care:
- Mulch heavily to retain moisture.
- Provide afternoon shade with a shade cloth if temps exceed 90°F (32°C).
- Water deeply early in the morning to prevent sunscald.
What if my outdoor tomatoes aren’t producing fruit?
Check these common culprits:
Issue
Solution
Too little sunlight (<6 hours/day)
Move to a sunnier spot or use grow lights.
Inconsistent watering
Water 1–2 inches weekly (drip irrigation works best).
Over-fertilizing with nitrogen
Switch to a low-nitrogen, high-phosphorus fertilizer (e.g., 5-10-10).
Stress from extreme temps
Use shade cloth or mulch to stabilize temps.
If flowers drop without fruiting, it’s often due to temperature swings (too hot/cold). Try hand-pollinating with a small brush if needed!
Wrapping up and next steps
Planting tomatoes outdoors is a rewarding journey that brings fresh, homegrown flavor straight to your plate! With the right soil prep, sunlight, and care, you’ll be savoring sun-ripened tomatoes in just 60 days—or even sooner. 🌱✨
Ready to dive in? Start by gathering your supplies, then follow the step-by-step guide to give your tomato plants the best possible start. Next up: Pick your favorite variety (cherry, beefsteak, or heirloom?) and get those seeds or seedlings in the ground—your future harvest is waiting!