
Pruning
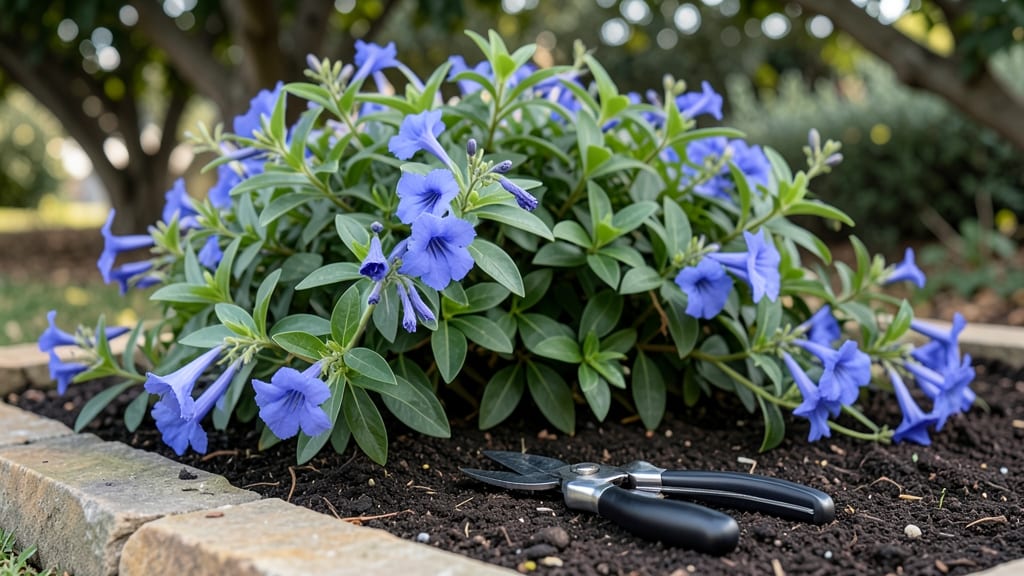
Pruning plumbago plants isn't just about keeping them tidy—it's the secret to nonstop blue blooms from spring through fall. ✨ I learned the hard way that skipping those two seasonal cuts means leggy stems and fewer flowers, but once I mastered the timing, my plumbago became the showstopper of my patio.
The key is working with the plant's natural rhythm, not against it.
You only need three basic tools: sharp pruners, gloves, and a bucket for clippings. The real trick is cutting back right after the first flush of flowers in late spring and again in early summer to encourage new growth.
Most people over-prune in fall, which sends the plant into dormancy too early—don't make that mistake. Aim to trim back about one-third of the plant each time, focusing on the oldest stems first.
What you'll end up with is a bushier, more compact plant that blooms heavier and longer than unpruned varieties. The new growth after pruning is more vigorous, and those tiny blue flowers appear faster.
Plus, you'll avoid the sad, woody stems that make plumbago look tired by mid-summer. This method works for both plumbago auriculatum and the smaller varieties grown in containers.
For those in colder zones, a light trim in early spring helps jumpstart growth before the heat sets in. And if you're growing plumbago in containers, pruning keeps it from becoming top-heavy—just be sure to repot every few years since these plants appreciate fresh soil.
The payoff is worth the few minutes of effort twice a year.
📚 In This Guide
- What you need
- Instructions
- Tips and common mistakes
- Wrapping up and next steps
What you need
- ● Bypass pruners – Sharp, clean bypass pruners (5–7-inch blades) for precise cuts on stems up to ½ inch thick.
- ● Loppers – Heavy-duty loppers (8–10-inch blades) for thicker branches (½–1½ inches).
- ○ Hand pruners (optional) – For delicate trimming of small, new growth (if bypass pruners aren’t available).
- ● Garden gloves – Cut-resistant gloves (size medium or large) to protect your hands from thorns and rough stems.
- ● Disinfectant (70% isopropyl alcohol or bleach solution) – 1 part bleach to 9 parts water to sterilize tools between cuts.
- ● Rubbing alcohol or hand sanitizer – For quick tool and hand disinfection.
- ○ Pruning saw (optional) – Only if dealing with overgrown, woody stems (8–12-inch curved blade recommended).
- ● Choose the right time – Prune in early spring (before new growth) or late summer (after blooming). Avoid pruning during frost or extreme heat.
- ● Clear the workspace – Remove weeds, debris, and any nearby plants to keep your area tidy.
- ○ Water the plant (optional but helpful) – Lightly water the day before pruning to reduce stress on the plant.
- ● Have a disposal plan – A garden bag or compost bin for trimmings (avoid leaving cuttings near the plant to prevent disease).
How to prune plumbago for continuous, lush blooms
Two simple cuts a year keep your plumbago bushy, flowering, and thriving—no fancy tools required.
🌿 Step 1: First Trim in Early Spring for New Growth
Start your pruning in late February or early March, just as new buds begin to swell on your plumbago. This is the moment that matters: you're shaping the plant for the entire season. Using your clean pruning shears, cut back one-third of the oldest stems—these are the woody, brown branches that have stopped producing flowers. I like to make my cuts at a 45-degree angle, about ¼ inch above a leaf node or a side branch.
Here's the thing—plumbago blooms on new wood, so removing the oldest growth encourages fresh, vibrant shoots to take over. You'll see tiny green buds forming within 2-3 weeks of this first trim. If your plant looks leggy or bare, don't panic—this is exactly what you want to fix. Just avoid cutting into the thick, green stems unless they're completely bare and not producing flowers.
✂️ Step 2: Mid-Season Pruning to Encourage More Blooms
About 6-8 weeks after your first trim, usually in late May or early June, it's time for your second cut. This is when you'll notice your plumbago has grown 6-12 inches since spring. Look for any stems that are bare at the bottom or have stopped flowering—they need to go. Using your shears, trim these back to just above a leaf node or a side branch, again at a 45-degree angle for better healing.
Real talk: this is where most people mess up. They either prune too little and miss the leggy stems, or they cut too much and shock the plant. Your goal is to keep the plant compact and full, not strip it bare. After this trim, you should see new shoots and fresh flowers within 3-4 weeks. If you notice any dead or diseased branches, remove those immediately—they'll only spread problems.
🌱 Step 3: Light Cleanup in Fall and Winter
Once frost hits in late fall, your plumbago will go dormant, and its leaves will turn brown. This is the perfect time for a light cleanup. Using your clean pruning shears, simply remove any dead, broken, or diseased branches. You don’t need to do any heavy pruning—just tidy up the plant so it looks neat and healthy for spring. Avoid cutting into green stems unless they're clearly damaged.
I know it seems weird, but you can even leave some of the brown, woody stems standing over winter—they provide structure and protect the plant from harsh winds. Just make sure to remove any debris from the base of the plant to prevent rot. In very cold climates, you might want to wrap the plant in burlap or cover it with mulch to protect it from freezing temperatures. This keeps your plumbago alive and ready to bloom again next year.
☀️ Step 4: Post-Pruning Care for Stronger Growth
After each pruning, your plumbago will need extra care to recover and produce those stunning blue flowers. First, water deeply—soak the soil until it's 2-3 inches wet, but don’t let it sit in standing water. Plumbago thrives in well-draining soil, so if your plant is in a pot, make sure it has drainage holes. Fertilize with a balanced, water-soluble fertilizer (like 10-10-10) every 4-6 weeks during the growing season to encourage strong, healthy growth.
Here’s what you’ll notice after proper pruning: thicker foliage, more flowers, and a neater, fuller shape. If you see any yellowing leaves, it’s usually a sign of overwatering—let the soil dry out a bit before watering again. And if your plumbago starts to flop over, it might need staking or a small support to keep it upright. With the right care, your plumbago will reward you with non-stop blooms from spring through fall.
Tips & tricks for perfect plumbago pruning
These simple tricks will help you keep your plumbago thriving with vibrant blooms all season long.
Timing is Everything: The 2-3 week window after your first spring trim is when those new buds form—don't miss it! If you're in a warmer climate, you might see growth starting as early as February, while cooler areas may need to wait until March. Watch for those tiny green buds pushing through the old growth; that's your cue that the pruning worked. I've seen plants that got pruned too late in spring never fully recover their flowering potential for that season.
Tool Technique: Always use clean pruning shears—rusty or dull blades can damage stems and introduce disease. I like to wipe mine down with rubbing alcohol between cuts to prevent spreading any potential pathogens. For the 45-degree angle cuts, think of it like slicing a pizza—you want that sloped surface to help water run off and prevent rot. If you don't have pruning shears, clean scissors in a pinch will work for small branches, but avoid using them on thick stems.
Visual Cues Matter: When doing your mid-season trim around 6-8 weeks later, look for stems that are bare at the bottom—these are the ones that need cutting. The key is to leave enough foliage that the plant can still photosynthesize while encouraging new growth. I like to run my fingers along the stems—if I feel more leaf nodes on the bottom half than the top, that's a sign it's time to trim. After cutting, you should see fresh green shoots emerging from the leaf nodes within 3-4 weeks if everything's right.
Seasonal Strategy: In fall, don't overthink the cleanup—just remove what's clearly dead or damaged. Those brown woody stems you leave standing act like a natural trellis, protecting tender new growth from winter winds. I've left plants with 50% of their winter stems intact and still gotten beautiful spring blooms. The only exception is if you're in a particularly harsh winter zone—then that burlap wrap can make all the difference between a plant that survives and one that thrives.
Pro Tips for Plumbago Plant Pruning
- These simple tricks will help you keep your plumbago thriving with vibrant blooms all season long.
- Timing is Everything: The 2-3 week window after your first spring trim is when those new buds form—don't miss it!
- Tool Technique: Always use clean pruning shears—rusty or dull blades can damage stems and introduce disease.
Frequently asked questions
Got questions about keeping your plumbago plant lush and blooming? Here are some common concerns—and their answers—to help you prune like a pro!
When is the best time to prune plumbago?
Prune your Plumbago auriculata twice a year: late winter/early spring (just before new growth) and mid-summer (after flowering). This keeps it compact and encourages vibrant blooms. Avoid heavy pruning in fall—it needs time to harden off for winter.
What if I miss the spring pruning window?
Don’t stress! Lightly trim back leggy stems anytime the plant looks overgrown, but aim for before new growth starts. For missed spring pruning, focus on summer maintenance to shape the plant. Just avoid cutting into old wood—new growth is more resilient!
How much should I cut back during summer pruning?
Summer pruning is about light shaping—remove up to 1/3 of the plant’s height to encourage bushier growth and more flowers. Deadhead spent blooms too! Avoid drastic cuts; plumbago responds best to gradual trims. Think of it like a haircut: shape, don’t shear!
My plumbago looks sad after pruning—what went wrong?
If your plant looks too bare or wilted, you may have pruned too aggressively or cut into old wood. Focus on new growth (softer, green stems) and avoid "haircutting" the center. Water well post-prune, and fertilize lightly to support recovery. Patience is key—it’ll bounce back!
Can I prune plumbago for bonsai-style shaping?
Plumbago is highly adaptable to bonsai techniques. Use wire shaping in spring, then prune regularly to maintain compact growth. Keep it in bright, indirect light and reduce water slightly to slow growth. Just remember: smaller pots = slower growth—so plan for frequent trims!
Wrapping up and next steps
Mastering plumbago plant pruning is your ticket to vibrant, long-lasting blooms year after year! 🌸 By following the two seasonal trims—light shaping in early spring and a more thorough cutback in late fall—you’ll encourage healthy growth and maximize those stunning blue flowers.
With the right tools, timing, and techniques, your plumbago will thrive and reward you with a burst of color.
Ready to take the next step? Grab your pruners, pick a sunny day, and give your plumbago the care it deserves! 🌿 For even more gardening tips, explore our guides on seasonal plant care or revitalizing overgrown shrubs.