
Propagation
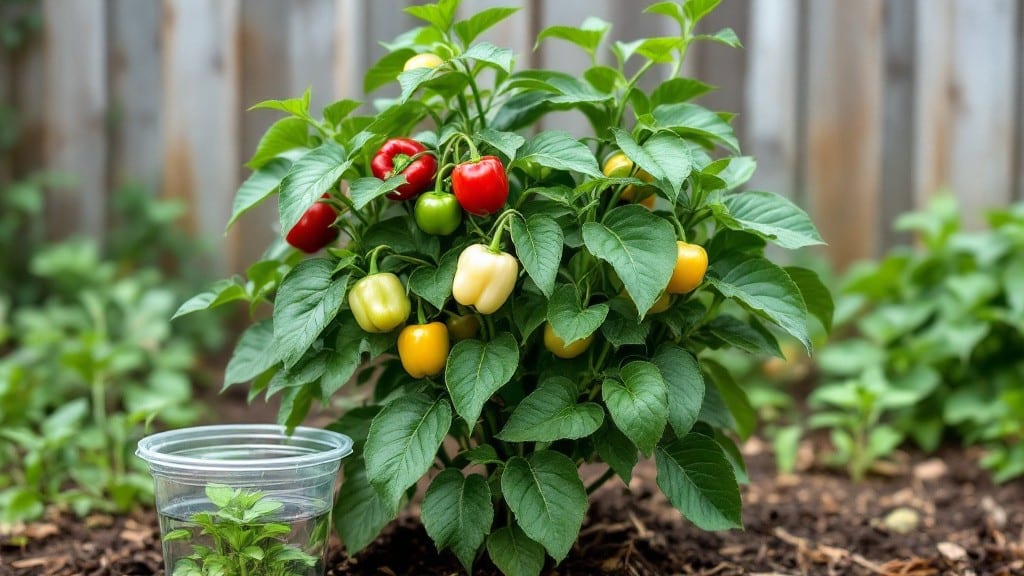
Propagating pepper plants from cuttings is how I turned a single healthy plant into a full garden of identical varieties—no seeds, no guesswork, just reliable growth. 🌱 The first time I saw roots form on a pepper stem in just two weeks, I knew this was the secret weapon for gardeners who want consistent flavors and varieties.
Most people assume you need seeds, but cuttings let you clone your best performers effortlessly, whether you're working with jalapeños, bell peppers, or ghost peppers.
You’ll need sharp pruning shears, rooting hormone (optional but helpful), small pots with drainage, and a mix of perlite and peat moss for lightweight rooting medium. The whole process takes about 3 weeks from cutting to transplanting, and the key is keeping humidity high while the roots establish.
I’ve rooted cuttings in everything from plastic cups under plastic bags to dedicated propagation stations—what matters most is consistency in moisture and warmth.
By the time you’re ready to move your new plants into the garden, they’ll be stocky, dark green, and ready to outperform store-bought seedlings. The best part?
You’ll never have to worry about losing a favorite variety again, and your harvest will taste exactly like the plant you started with. Now let’s get those cuttings growing—this is where the magic happens.
Works for both backyard gardens and container setups, and the same method applies to other heat-loving plants like tomatoes and eggplants. Just adjust the timing for your climate—cooler zones may need a head start indoors.
The first time you harvest peppers from plants you propagated yourself, you’ll understand why this method changes everything.
📚 In This Guide
- What you need
- Instructions
- Tips and common mistakes
- Wrapping up and next steps
What you need
- ● Pepper plant cuttings: 4–6 healthy, non-flowering stems (4–6 inches long) from a mature pepper plant.
- ○ Rooting hormone: (Optional but recommended) A powder or gel to boost root growth (e.g., Clonex or Rootone).
- ● Well-draining potting mix: A blend of perlite, vermiculite, or coconut coir (avoid garden soil—it can harbor diseases!).
- ● Small pots or trays: 4–6-inch containers with drainage holes (or a seedling tray with cells).
- ● Spray bottle: For misting cuttings to maintain humidity.
- ● Clear plastic bag or humidity dome: To create a mini greenhouse effect (e.g., a ziplock bag with holes or a propagation dome).
- ● Watering can or spray bottle: For gentle hydration (avoid soaking the mix!).
- ● Scissors or pruning shears: Sterilized to make clean cuts (sharp blades prevent crushing stems).
- ● Grow lights or sunny windowsill: A south-facing window or LED grow lights (12–16 hours of light daily).
- ● Fertilizer: A diluted seaweed extract or fish emulsion (1:10 ratio) after roots form (4–6 weeks).
- ● Heating mat: (For cooler climates) Keeps soil warm (70–75°F) to speed up rooting.
- ● Label markers: To track pepper varieties (e.g., jalapeño, bell, habanero).
- ● Misting fan: For extra airflow and humidity control (prevents mold!).
Step-by-Step instructions for propagating pepper plants
Here's how to turn a single pepper plant into four thriving bushes in just three weeks.
🌱 Step 1: Select and Prepare Healthy Cuttings
Choose stems from your mother plant that are 4-6 inches long and have 3-4 leaves—young, flexible growth produces the best results. Use clean, sharp scissors to make a 45-degree angle cut just below a leaf node (where leaves meet the stem). This angled cut increases surface area for root development.
Remove the lower leaves, leaving only the top 2-3 leaves on each cutting. Too many leaves compete for the plant's limited energy as it establishes roots. Strip the leaves within 1 inch of the cut end—this section will submerge in water or rooting medium, and leaves here would just rot. I like to dip the cut ends in rooting hormone powder to boost success rates, especially in slower-rooting varieties.
💧 Step 2: Root in Water or Moist Medium
Fill a clean glass or jar with room-temperature water and place the cuttings so only the stripped lower inch is submerged. Use 4-6 cuttings per jar to maximize space. Change the water every 2-3 days to prevent bacterial growth—cloudy water means it's time to refresh. Place the jar in bright, indirect light (no direct sun yet) where temperatures stay between 70-75°F.
Alternatively, dip the cut ends in perlite or vermiculite and place them in a shallow tray of moistened sphagnum moss instead of water. This method reduces rot risk but requires more frequent moisture checks. Roots should appear in 10-14 days—look for tiny white tendrils at the cut end. Once roots reach 1-2 inches long, they're ready for planting.
☀️ Step 3: Transplant to Individual Pots
Fill 4-inch pots with well-draining potting mix (avoid garden soil—it compacts too much). Make a small hole in the center and gently insert each rooted cutting, burying it to the first set of leaves. Press the soil lightly around the stem to eliminate air pockets, then water gently until moisture runs out the drainage holes.
Place the pots in a humid, warm environment (a greenhouse or covered tray works well) for the first week. Pepper plants are sensitive to temperature swings—keep them between 70-80°F during the day and no lower than 60°F at night. You'll see new growth within 7-10 days as the plant focuses energy on establishing its root system in the soil.
🌿 Step 4: Harden Off and Acclimate
After 10-14 days in pots, it's time to harden off your new plants. Move them to a shaded outdoor spot for 2-3 hours the first day, gradually increasing exposure over 7-10 days. Watch for wilting or yellowing leaves—these are signs they're not ready for full sun yet. Pepper plants are sensitive to sudden light changes, so take it slow.
Once they tolerate full sun without stress, transplant them into the garden or larger containers. Space them 18-24 inches apart to allow for airflow and prevent disease. Mulch around the base with 1-2 inches of organic mulch to retain moisture and regulate soil temperature. Your propagated peppers will now grow just like mother plants, producing fruit in 60-90 days.
Tips & tricks for perfect pepper plant propagation
Transforming a single pepper plant into four thriving bushes requires precision—and these insider tricks will help you avoid common pitfalls while maximizing success rates.
Cutting Selection Matters: In Step 1, focus on stems that are 4-6 inches long with 3-4 leaves that are flexible but not brittle. Avoid woody stems—they root poorly. I've found that morning cuttings (when plants are hydrated) root faster than afternoon ones. Also, look for stems with visible leaf nodes—these are the growth points where roots will emerge. The 45-degree angle cut isn't just decorative; it creates more surface area for root development, which is why I always use clean scissors to make precise cuts.
Rooting Environment is Critical: During Step 2, maintaining 70-75°F temperatures is non-negotiable for root development. I've seen roots appear in just 7 days when conditions are perfect, but it can take up to 14 days in cooler conditions. If using water, change it every 2-3 days—cloudy water means bacterial growth is starting. For the moss method, keep it consistently moist (not soggy) by misting lightly every other day. The key is balance: too much moisture causes rot, too little stunts root growth. Watch for those tiny white tendrils—they're your first sign of success!
Transplanting Technique Prevents Shock: When moving to 4-inch pots in Step 3, bury the cutting to the first set of leaves—this stabilizes the plant and encourages deeper root growth. I press the soil gently around the stem to eliminate air pockets, then water until moisture runs out the drainage holes. This prevents transplant shock. The first week in a humid environment (70-80°F days, no lower than 60°F nights) is crucial—pepper plants are particularly sensitive to temperature swings during this vulnerable stage. I've had cuttings fail when night temperatures dipped below 60°F, so I always monitor closely.
Harden Off Gradually: The 2-3 hour shaded exposure in Step 4 is where most beginners rush and cause damage. Increase sunlight exposure slowly—doubling time each day prevents leaf scorch. I watch for wilting or yellowing as warning signs. Once plants tolerate full sun without stress, they're ready for permanent placement. The 18-24 inch spacing isn't just about aesthetics; it's essential for airflow that prevents fungal diseases. Mulching with 1-2 inches of organic material helps maintain even soil temperatures and reduces watering frequency.
Pro Tips for Propagate Pepper Plants
- Transforming a single pepper plant into four thriving bushes requires precision—and these insider tricks will help you avoid common pitfalls while maximizing success rates.
- Cutting Selection Matters: In Step 1, focus on stems that are 4-6 inches long with 3-4 leaves that are flexible but not brittle.
- Rooting Environment is Critical: During Step 2, maintaining 70-75°F temperatures is non-negotiable for root development.
Frequently asked questions
Got questions about propagating pepper plants? You’re not alone! Here are some of the most common concerns—and their straightforward answers—to help you grow like a pro.
How do I know if my pepper cutting is ready to propagate?
A healthy cutting should have at least 3-4 nodes (those little bumps where leaves grow) and 2-3 sets of mature leaves. Avoid using flowered or fruiting stems—they’ll drain energy from root growth. Look for plump, green stems (not woody or dry) for the best success!
Can I propagate peppers from store-bought plants?
Yes! Just skip the roots—gently snip a stem below a node (about 4-6 inches long) and follow your propagation steps. Store-bought peppers are often treated with growth inhibitors, so rooting may take 2-3 weeks longer. For faster results, choose organic or homegrown plants!
Why aren’t my pepper cuttings rooting?
Common culprits:
- Low humidity: Pepper cuttings love 70-80% humidity. Use a plastic bag or humidity dome to trap moisture.
- Poor lighting: Too much sun = stress; too little = weak growth. Aim for bright, indirect light (like a north-facing window).
- Dirty water: Change water every 2-3 days to prevent bacterial growth.
If cuttings turn yellow or mushy, they’re rotting—trim the bad parts and replant in fresh medium.
What’s the fastest way to propagate peppers?
For speed, try water propagation with a rooting hormone (like clonex) and a heat mat (70-75°F). Under ideal conditions, you’ll see roots in 10-14 days! Alternatively, air layering (wrapping a stem in damp moss) can work in 3-4 weeks without removing the plant.
Will propagated peppers taste the same as the parent plant?
Yes! Genetics stay identical when propagating from cuttings, so your jalapeños will still pack heat, and your bell peppers will stay sweet. However, environmental factors (sun, soil, water) can tweak flavor slightly—so give your new plants love and consistency for the best results!
Wrapping up and next steps
Propagating pepper plants from cuttings is a rewarding journey that unlocks a bountiful harvest of homegrown peppers—faster and more cost-effectively than starting from seeds! 🌱 With the right tools, patience, and care, you’ve got everything you need to nurture healthy, thriving bushes in just three weeks.
Now that you’re armed with knowledge, there’s no better time to roll up your sleeves and get growing!
Your next step? Pick a pepper variety you love, gather your supplies, and start propagating! Share your progress with fellow gardeners—your success story might inspire someone else to dig into the fun of pepper propagation too. Happy gardening! 🌶️✨