Pruning
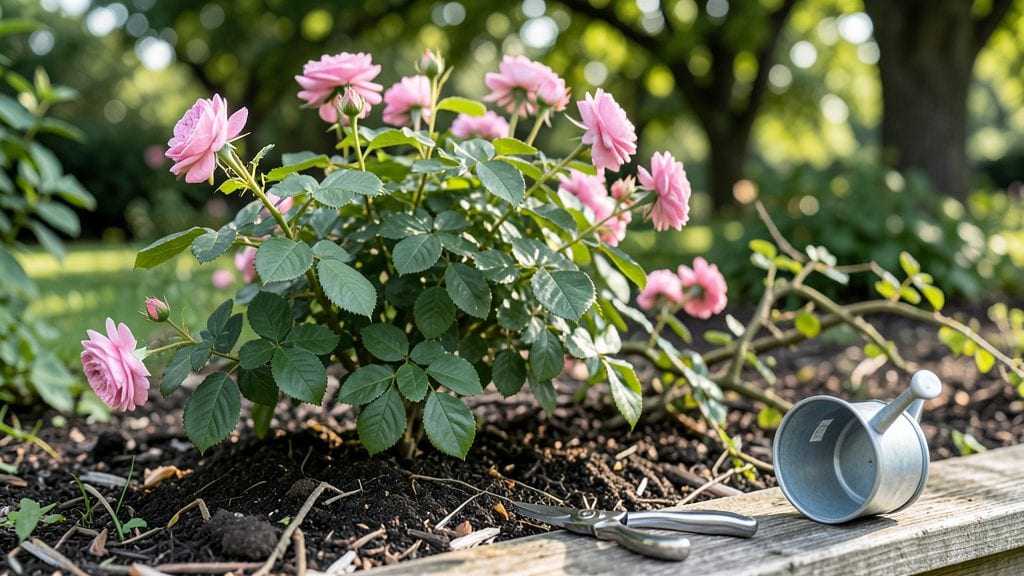
Pruning a plant isn't just about cutting branches—it's the secret to turning leggy shrubs into lush, flowering powerhouses. 🌿 I learned this the hard way when my once-bushy rosebush turned into a twiggy mess after years of neglect, but now I prune with purpose every spring and fall.
The right cuts encourage new growth, improve airflow, and keep plants producing blooms for months instead of just a single flush.
You only need a few basic tools: sharp bypass pruners for clean cuts, loppers for thicker branches, and gloves to protect your hands from thorns or rough bark. Timing matters too—spring pruning boosts summer blooms, while late-winter cuts shape deciduous plants before they leaf out.
Even herbs like rosemary and thyme benefit from occasional trimming to stay dense and flavorful.
What you'll end up with is a plant that looks fuller, flowers more abundantly, and stays healthier year after year. The key is making cuts just above a leaf node or outward-facing bud, never leaving stubs.
For shrubs, aim for an open center to prevent disease, while trees should be pruned to maintain their natural shape and remove deadwood.
This works for everything from container herbs to backyard shrubs, and once you see the difference proper pruning makes, you'll never skip it again. Let's get those shears out and transform your garden!
📚 In This Guide
- What you need
- Instructions
- Tips and common mistakes
- Wrapping up and next steps
What you need
- ● Pruning shears (bypass or anvil type) – Choose bypass (sharp, clean cuts) for flowers/shrubs or anvil (heavier-duty) for thick branches. Size: 5–7 inches for most tasks.
- ● Lopping shears – For branches ½–1.5 inches thick. Look for long handles (20–24 inches) for leverage.
- ● Pruning saw – For branches 1.5+ inches thick. Opt for a curved blade with teeth per inch (TPI) of 8–12 for smooth cuts.
- ● Garden gloves – Heavy-duty, cut-resistant (e.g., nitrile-coated) to protect hands from thorns and sharp tools.
- ● Disinfectant (70% isopropyl alcohol or bleach solution) – Clean tools between cuts to prevent disease spread. Mix: 1 part bleach to 9 parts water.
- ● Tarp or bucket – Collect pruned branches for compost or disposal.
- ● Rubbing alcohol wipes – Quick tool disinfection on the go.
- ● Hand pruners with a magnifying lens – For precision trimming (great for bonsai or detailed work).
- ● Extension pole saw – Reaches high branches safely (ideal for tall trees/hedges).
- ● Sharpener/file – Keeps blades in top condition between uses.
- ● Plant tie or twine – Secure heavy branches post-pruning if needed.
Step-by-Step instructions for pruning a plant
Here's how to trim your plants like a pro—no green thumb required.
✂️ Step 1: Gather the Right Tools
Start with clean, sharp pruning shears—dull blades tear stems and invite disease. I always sterilize mine with rubbing alcohol before use, especially when switching between plants. For thicker branches, grab your bypass pruners; they handle ½-inch diameter stems beautifully without crushing. Keep a small pair of hand pruners for delicate trimming of ¼-inch stems or smaller.
Never use scissors or kitchen knives; they leave jagged cuts that heal poorly. If you're working with large shrubs, a sharp saw with a fine-tooth blade becomes your new best friend for branches over 1 inch thick. Store your tools in a dry place to prevent rust, and oil the blades occasionally to maintain sharpness.
✂️ Step 2: Identify What to Prune
Look for three types of growth to remove: dead, diseased, or crossing branches. Dead wood is easy to spot—it's brown, brittle, and doesn't bend. Snip it away completely at the base. Diseased branches often have black spots, mold, or oozing sap; remove these 6 inches below the affected area to ensure the disease doesn't spread.
Crossing branches compete for sunlight and nutrients, weakening your plant. Choose the smaller of the two to remove, cutting at a 45-degree angle just outside the branch collar (that swollen area where the branch meets the stem). This encourages faster healing. Avoid leaving stubs—always cut cleanly to prevent water from pooling and rotting the wound.
✂️ Step 3: Shape for Bushier Growth
To encourage fuller plants, focus on the tips. Pinch or cut just above a leaf node (the bump where leaves grow) to stimulate branching. For flowering plants, trim back ⅓ of the previous season's growth in early spring—this jumpstarts new blooms. I like to step back and visualize the plant's natural shape, then make cuts that enhance its form.
Never remove more than ⅓ of the plant's foliage at once—this stresses the plant and can lead to shock. If you're pruning a young plant, hold off on heavy shaping until it's at least 2 years old. For mature plants, spread cuts out over 2-3 sessions if needed, giving the plant time to recover between trims.
✂️ Step 4: Clean Up and Maintain Health
After pruning, collect all clippings and dispose of them properly. If your plant has pests or disease, bag the trimmings and throw them in the trash—not the compost! Sterilize your tools again with rubbing alcohol to prevent cross-contamination. I also like to apply a thin layer of wound sealant (like pruning paste) to large cuts on trees or shrubs to speed up healing.
Water your plant deeply after pruning to help it recover. Avoid fertilizing right away—pruning is stressful enough without adding nutrients. Instead, wait 4-6 weeks before feeding, unless your plant is flowering, in which case a light dose of bloom booster can encourage new growth.
⏰ Step 5: Time Your Pruning for Best Results
Most plants benefit from pruning in late winter or early spring, just as new growth begins. This timing gives the plant the entire growing season to recover and thrive. For flowering plants, time your cuts right after they bloom—this ensures next year's flowers get a head start. Evergreens can be pruned in late summer or early fall, but avoid heavy trimming in winter when they're dormant.
If you're pruning for shape (like topiary or hedges), do it gradually over the growing season. You'll see the most dramatic results when you trim just before a growth spurt. For example, if your plant grows rapidly in spring, a light pruning in early April will set it up for lush, full growth by summer.
Tips & tricks for perfect plant pruning
A few simple tricks will help you prune like a seasoned gardener and keep your plants thriving for years to come.
Tool Prep is Non-Negotiable: In Step 1, when gathering your tools, take that extra 2 minutes to sterilize your pruners with rubbing alcohol between cuts—especially if you're switching between diseased and healthy plants. I learned this the hard way after my roses developed a fungal infection from contaminated tools. For larger branches over 1 inch thick, use a fine-tooth saw to avoid crushing the stem, which creates clean cuts that heal faster.
The 6-Inch Rule for Disease Prevention: When removing diseased branches in Step 2, cutting 6 inches below the visible infection is crucial. The disease often spreads invisibly through the stem, so you need that extra length to ensure you've removed all traces. I always double-check by examining the cut surface for any signs of black spots or discoloration before making my final snip.
Shape with Purpose: In Step 3, when shaping your plant, remember the "thirds rule"—never remove more than ⅓ of the foliage at once. This prevents shock and gives your plant time to recover. For young plants under 2 years old, be especially gentle. I like to make small test cuts first to see how the plant responds before committing to larger trims.
Seasonal Timing Matters: The late winter/early spring timing in Step 5 isn't arbitrary—it aligns with when plants naturally begin new growth. For flowering plants, pruning right after they bloom (like your hydrangeas) ensures you don't cut off next year's flower buds. I mark my calendar with these seasonal reminders so I never miss the optimal window.
Pro Tips for Prune A Plant
- A few simple tricks will help you prune like a seasoned gardener and keep your plants thriving for years to come.
- Tool Prep is Non-Negotiable: In Step 1, when gathering your tools, take that extra 2 minutes to sterilize your pruners with rubbing alcohol between cuts—especially if you're switching between diseased and healthy plants.
- The 6-Inch Rule for Disease Prevention: When removing diseased branches in Step 2, cutting 6 inches below the visible infection is crucial.
Frequently asked questions
Got questions about pruning? You’re not alone—even seasoned gardeners need a refresher now and then! Here are answers to the most common queries to help you prune like a pro.
When is the best time of year to prune my plants?
The ideal time depends on your plant type! For spring-blooming shrubs (like lilacs or hydrangeas), prune right after they flower. Summer-bloomers (such as roses or impatiens) should be trimmed in early spring or after blooming. Evergreens and fruit trees often need pruning in late winter or early spring before new growth starts. Always avoid pruning in extreme heat or cold.
What if I cut too much off by accident?
Don’t panic! Over-pruning can stress a plant, but most recover with time. If you’ve removed more than 1/3 of the foliage, focus on watering deeply and fertilizing lightly to support regrowth. For woody plants, new shoots will sprout from buds along the stem—just keep them well-hydrated. If the damage is severe, consider layering or propagation to save cuttings.
Can I prune a plant too little—or is there such a thing as over-trimming?
Yes! Under-pruning can lead to leggy growth, fewer blooms, and weak structure, while over-pruning stresses the plant. Aim for 10–30% of the plant’s total growth per session. For example, a bushy shrub might need light trims twice a year, while a tree could only require annual shaping. Observe your plant’s response—healthy regrowth means you’re on the right track!
What’s the difference between pruning and trimming?
While often used interchangeably, pruning is intentional, structured removal of branches to improve health, shape, or encourage blooms (e.g., cutting back dead wood or thinning crowded stems). Trimming is usually lighter maintenance—like snipping off spent flowers or shaping hedges—to keep plants neat. Think of pruning as a health spa and trimming as a haircut!
How do I prune in extreme weather (heatwaves, frost, or rain)?
Wait for mild, dry conditions—ideally a cool, overcast day. Avoid pruning during heatwaves (stresses plants) or frost (can damage exposed cuts). If you must prune in rain, do so early in the day so wounds dry quickly. Never prune wet wood—it’s harder to see clean cuts, and excess moisture invites disease. Pro tip: Sterilize tools with rubbing alcohol before and after to prevent spreading pathogens.
What should I do with the pruned branches?
Don’t toss them! Use pruned branches for compost, propagation (root cuttings in water or soil), or even mulch. If your branches are disease-free, they’re great for firewood or craft projects. For large quantities, check local community gardens or compost programs—they often welcome free plant clippings!
Wrapping up and next steps
Pruning isn’t just about trimming—it’s a love language for your plants! 🌿 With the right tools, timing, and technique, you’ll unlock bushier growth, vibrant blooms, and healthier foliage all year round. Whether you’re a seasoned gardener or just starting, every snip is a step toward a thriving green space.
Ready to take the next step? Grab your pruners, pick a plant, and start snipping! 🌱 For extra confidence, revisit our FAQs or explore seasonal pruning guides tailored to your climate. Your garden’s transformation begins with one cut at a time.