
Pruning
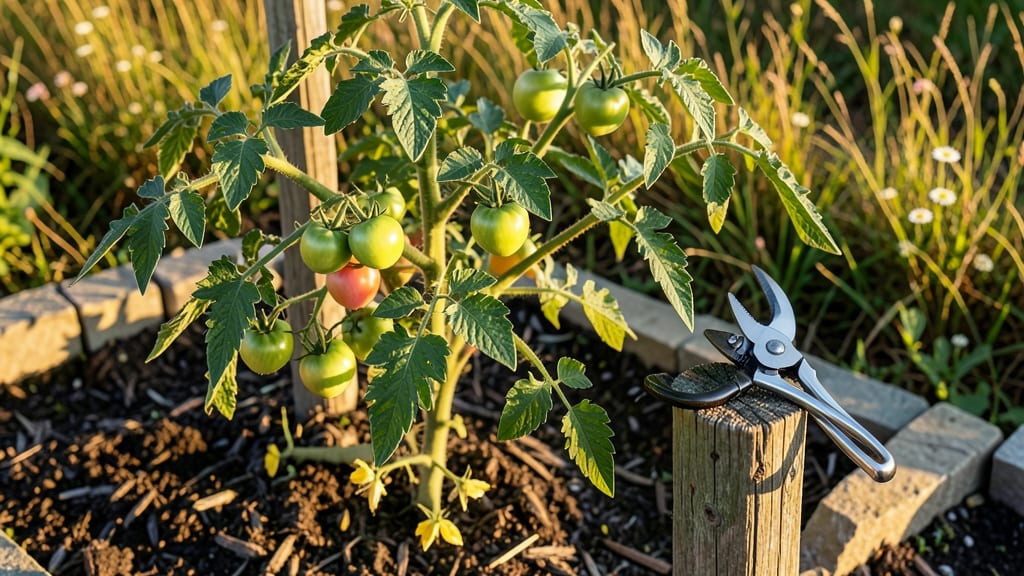
Pruning vegetable plants isn’t just about trimming—it’s the secret to doubling your harvest and keeping plants healthy all season long. 🌱 I learned this the hard way after letting my tomato plants grow wild, only to end up with fewer, smaller fruits.
The right cuts redirect energy where it matters most, whether that’s more blooms or thicker stems.
You’ll need sharp pruners (or clean scissors in a pinch), gloves, and a clear day to work—no soggy soil or sticky hands. The key is knowing when to prune: early in the season for shape and airflow, mid-season to boost fruit production, and occasionally to remove diseased leaves.
Even beginners can master this with just a few simple rules.
By the time summer peaks, you’ll see the difference: bushier plants, heavier fruit loads, and fewer pests sneaking in through dense foliage. Tomatoes stay upright, cucumbers vine longer, and beans produce straighter poles. The best part? It takes less than 30 minutes per plant once you get the rhythm down.
Works for almost any vegetable—just adjust the approach. Let’s get those shears ready and turn your garden into a high-yield machine. You’ll wonder how you ever grew without it.
📚 In This Guide
- What you need
- Instructions
- Tips and common mistakes
- Wrapping up and next steps
What you need
- ● Pruning shears or scissors: Sharp, clean bypass pruners (for small stems) or secateurs (for thicker branches). Size: 5–7 inches for precision.
- ○ Gloves: Heavy-duty gardening gloves (cut-resistant for thorny plants like raspberries). Optional: Nitrile-coated for grip.
- ● Disinfectant (70% isopropyl alcohol or bleach solution): 1 part bleach to 9 parts water to sterilize tools between cuts.
- ● Compost bin or bag: For collecting pruned debris (avoid composting diseased plants).
- ● Sharp knife or razor blade: For snipping small stems (e.g., basil or herbs). Safety note: Use with caution!
- ● Hand pruners with ergonomic grips: Reduces hand strain for long pruning sessions.
- ● Loppers: For larger plants (e.g., squash vines) with stems up to 1.5 inches thick.
- ● Plant markers: Label pruned sections if experimenting with training techniques (e.g., "pinch here for bushier growth").
- ● Hose or spray bottle: To rinse tools and plants post-pruning (prevents disease spread).
Step-by-Step guide to pruning vegetable plants for healthier growth
Pruning isn’t just about shaping—it’s how you coax vegetables into producing bigger, tastier yields. Here’s my go-to method for trimming without stressing your plants.
🌱 Step 1: Identify What to Prune and When
Start by examining your plants for three key targets: dead or yellowed leaves, overcrowded stems, and excessive foliage blocking sunlight. For example, with tomatoes, I always remove suckers—those small shoots growing between the main stem and branches—because they drain energy from fruit production. Do this early in the morning when plants are hydrated and temperatures are cooler.
For leafy greens like kale or Swiss chard, I focus on outer leaves that are large but tough. These leaves won’t contribute much to flavor but rob nutrients from the inner, tender growth. Prune them before they bolt (send up a flower stalk), usually in late spring or early summer for a second harvest.
✂️ Step 2: Use the Right Tools and Technique
Grab your clean, sharp pruning shears—dull tools crush stems and invite disease. I like to sterilize my shears with rubbing alcohol between plants to prevent spreading pathogens. For larger stems, like those on indeterminate tomatoes, I make cuts just above a leaf node (the bump where leaves grow) at a 45-degree angle. This encourages new growth and reduces water pooling.
When trimming, never remove more than 1/3 of the plant’s foliage at once. For instance, if you’re pruning cucumbers to improve airflow, I limit myself to removing only the largest, most sprawling vines—never the main runners. This keeps the plant strong enough to support future fruit.
☀️ Step 3: Focus on Airflow and Sunlight
Prune to open up the plant’s canopy so sunlight and air circulate freely. I often see gardeners skip this, and their plants develop powdery mildew or blossom end rot from trapped humidity. For bush beans, I pinch off flower buds during the first few weeks to encourage bushier growth—this means more pods later. For vining crops like peas, I trim back excessive side shoots to direct energy toward pod production.
Watch for shady spots where leaves overlap. If you notice yellowing between veins (a classic mildew sign), that’s your cue to prune aggressively. I aim to create a dome shape for tomatoes and a pyramid shape for peppers—this maximizes sun exposure to the lower fruit.
🌿 Step 4: Prune for Harvest and Regrowth
Some vegetables respond well to harvest pruning. For example, with basil, I snip the top set of leaves right above a pair of lower leaves to encourage bushier growth. This same technique works for cilantro, dill, and parsley—always cut just above a leaf node to promote branching. For herbs like rosemary or thyme, I trim back 1/3 of the oldest growth in early spring to stimulate fresh, tender shoots.
For root vegetables like carrots or beets, thin seedlings to 2-3 inches apart once they’re 2 inches tall. This prevents overcrowding and ensures larger, straighter roots. I use my fingers to gently pull excess seedlings, being careful not to disturb the remaining plants’ roots.
⏰ Step 5: Time Your Pruning for Seasonal Success
Prune leafy greens in early spring to jumpstart growth, and late summer to encourage a fall harvest. For fruiting plants like tomatoes and peppers, I do most of my pruning throughout the growing season, focusing on removing suckers every 2-3 weeks. The goal is to balance growth and fruit production—too much pruning late in the season can stunt harvests.
In late fall, I clean up all dead or diseased foliage and dispose of it in the trash (not compost) to prevent next year’s problems. For perennial vegetables like asparagus, I cut back all foliage to ground level after harvest to redirect energy into root storage for next season.
Tips & tricks for perfect vegetable pruning
These simple strategies will help you prune like a pro and get the biggest, healthiest harvests from your garden.
The Right Time of Day: I can't stress this enough—always prune in the early morning. Plants are fully hydrated and the cooler temperatures reduce stress. I've seen gardeners skip this and end up with wilted plants by afternoon. Plus, the morning light makes it easier to spot what needs trimming.
Tool Sanitation is Non-Negotiable: Between each plant, I wipe down my pruning shears with rubbing alcohol. This prevents spreading diseases like bacterial leaf spot or powdery mildew between plants. I keep a small bottle of alcohol in my gardening tool caddy for quick cleanups. Don't make my mistake of skipping this—it saved my tomato plants last summer!
Shape Matters for Different Crops: Remember those dome shapes for tomatoes and pyramid shapes for peppers from Step 3? This isn't just aesthetic—it's about directing energy where you want it. For tomatoes, the dome shape helps prevent sunscald on lower fruit, while the pyramid shape for peppers maximizes sun exposure to all fruit. I sketch quick diagrams in my gardening journal to visualize the ideal shapes before I start pruning.
Seasonal Pruning Calendar: Create a simple calendar marking early spring, late summer, and late fall as your key pruning windows. For leafy greens, early spring jumpstarts growth, while late summer encourages fall harvests. I use colorful sticky notes on my greenhouse door to remind myself when to focus on different crops. This prevents me from over-pruning at the wrong times.
Pro Tips for Prune Vegetable Plants
- These simple strategies will help you prune like a pro and get the biggest, healthiest harvests from your garden.
- The Right Time of Day: I can't stress this enough—always prune in the early morning.
- Tool Sanitation is Non-Negotiable: Between each plant, I wipe down my pruning shears with rubbing alcohol.
Frequently asked questions
Got questions about pruning your vegetable plants? You’re not alone! Pruning can feel tricky, but with the right know-how, you’ll be trimming like a pro in no time. Here are some of the most common questions—and straightforward answers—to help you grow a thriving garden.
When is the best time to prune vegetable plants?
The ideal time depends on the plant! For leafy greens like lettuce or kale, prune in early spring or after harvest to encourage regrowth. For fruit-bearing plants (tomatoes, peppers, cucumbers), prune in the morning when plants are hydrated and avoid pruning late in the season—it can stunt growth before winter. Always use clean, sharp tools to prevent disease.
How do I know which parts to prune?
Focus on dead, yellow, or diseased leaves first—they sap energy from healthy growth. For determinate plants (like tomatoes that grow to a fixed size), prune suckers (side shoots) to improve airflow and fruit quality. For indeterminate plants (like vining tomatoes), prune aggressively to direct energy to fruit production. Avoid over-pruning—leave enough leaves to photosynthesize!
Can I prune vegetable plants in hot or cold weather?
Prune on cool, cloudy days to reduce stress on plants. Avoid extreme heat (above 90°F) or frost, as these conditions can shock plants. If you must prune in hot weather, do it early in the morning or late evening, and water plants thoroughly before and after to help them recover faster.
What if I prune too much? Will my plants recover?
Over-pruning can stress plants, but many vegetables are resilient! If you’ve gone overboard, don’t panic—focus on watering deeply and fertilizing lightly (with a balanced formula) to help them bounce back. For heavy pruners like tomatoes, you may see a temporary slowdown, but they’ll often rebound with even more vigorous growth. Prevention is key: start small and observe your plants’ response!
Are there any vegetables I should never prune?
Some veggies hate pruning! Avoid trimming root vegetables (carrots, beets, potatoes) or leafy greens like spinach—pruning can stunt their growth or reduce harvest size. For herbs like basil or cilantro, prune only to encourage bushiness, but never more than ⅓ of the plant at once. When in doubt, research your specific variety!
Wrapping up and next steps
Pruning your vegetable plants might seem like extra work, but it’s a game-changer for healthier growth and bigger harvests! 🌱 By removing dead leaves, encouraging airflow, and directing energy to where it matters, you’re setting your garden up for success.
Whether you’re trimming tomatoes, peppers, or herbs, the key is to work with nature—not against it.
Ready to give it a try? Start small—pick one plant or section of your garden—and observe how pruning transforms it over time. Before you know it, you’ll be a pruning pro, reaping the rewards of your efforts! 🌟