Pruning
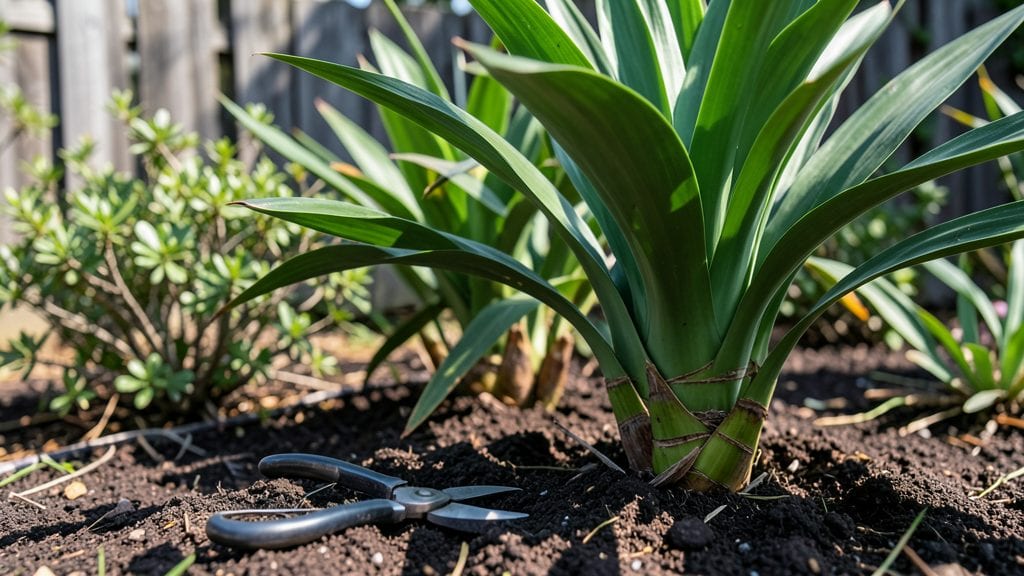
Trimming cordyline plants keeps them vibrant and full of life—something I learned the hard way after letting mine turn into lanky, bare stalks. ✨ The right cuts make all the difference, transforming those straggly stems into dense, colorful clumps that brighten your garden year-round.
This isn’t just about hacking away at the tops; it’s about understanding growth patterns and timing to encourage bushier, healthier plants.
The secret starts with the right tools—a sharp pair of pruners or shears (for thicker stems, a saw might be needed) and gloves if you’re working with spiky varieties like Cordyline australis.
Timing matters too: the best time to trim is right after flowering or in early spring, when new growth is about to kick in. Avoid cutting back too aggressively in fall, as the plant needs energy to store for winter.
With each precise cut, you’ll see the plant respond almost immediately—new shoots emerge from the base, and the foliage thickens. For leggy plants, focus on cutting just above a leaf node or side branch, which signals the plant to grow outward instead of upward.
Within weeks, your cordyline will look fuller, more compact, and ready to show off its striking colors all season long.
Different varieties need slightly different approaches, but the core principles stay the same. Cordyline fruticosa thrives with regular trimming to maintain its bushy shape, while Cordyline australis might need a little more patience due to its spikier nature.
Just remember: a little trimming goes a long way, and over-pruning can set your plant back. Let’s get those shears ready!
📚 In This Guide
- What you need
- Instructions
- Tips and common mistakes
- Wrapping up and next steps
What you need
- ● Pruning shears or secateurs – Choose sharp, bypass-style shears (4-6 inches) for clean cuts. Disinfect blades with rubbing alcohol before and after use to prevent disease spread.
- ● Garden gloves – Opt for cut-resistant, breathable gloves (size medium/large) to protect your hands from thorns and sap.
- ● Ladder or step stool – A stable, 6-8 ft tall ladder (or a sturdy stool) if your Cordyline is over 5 feet tall. Safety first!
- ● Disposable pruning bags or bucket – A 10-15 gallon bag or bucket to collect trimmings for composting or disposal.
- ● Rubbing alcohol (70% isopropyl) or bleach solution – For sterilizing tools between cuts (1 part bleach to 9 parts water).
- ● Sharpie or permanent marker – To mark 1/3 of the stem height as a reference point for pruning.
- ● Hand pruners (for smaller stems) – Ergonomic 5-inch pruners for delicate trimming of thinner branches.
- ● Hose with nozzle – To rinse off sap and debris after pruning for a cleaner workspace.
- ● Plant food or fertilizer – A balanced, slow-release fertilizer (10-10-10 ratio) to nourish your Cordyline post-prune.
- ● Mulch or compost – To replenish nutrients in the soil after trimming.
- ● Camera or phone – Capture before/after shots to track your plant’s progress!
Step-by-Step instructions for trimming Cordyline plants
Revitalize your cordylines with these sharp, strategic cuts that keep them lush and vibrant.
✂️ Step 1: Gather the Right Tools
Start with a clean, sharp pair of pruning shears or bypass pruners—dull blades tear stems and invite disease. I also grab a pair of heavy-duty gloves (cordylines have tough leaves that can scratch) and a bucket with soapy water to collect clippings. A small spray bottle with 70% isopropyl alcohol works too—just spray the blades before and after trimming to sterilize them.
Here's the thing—if you're working with mature plants, you might need a small handsaw for thicker stems. But for most trimming, your pruners will handle it perfectly. Just make sure they're sharp enough to cut through the stem with one smooth motion.
✂️ Step 2: Identify Dead or Damaged Growth
Scan your cordyline from top to bottom, looking for leaves that are brown, mushy, or completely dried out. These are your first targets—they're not coming back, and they're just weighing down the plant. Use your fingers to gently tug on any suspicious leaves; if they pull away easily, they're ready to go.
Next, check for stems that are hollow, cracked, or showing signs of rot at the base. These are weak points that can spread disease to healthy growth. Mark them with a small piece of tape or a stick if you're unsure—you'll want to remove these too. Remember, cordylines are tough, but even they can't recover from severe damage.
✂️ Step 3: Make Clean Cuts for Healthy Regrowth
For dead leaves, grasp the base of the leaf stem and pull firmly upward—it should come away cleanly. If it resists, use your pruners to make a diagonal cut just above the point where the leaf meets the stem. Diagonal cuts prevent water from pooling on the stem, which can cause rot.
For thicker stems or branches, cut at a 45-degree angle, about ½ inch above a leaf node (the bump where leaves grow out). This encourages new growth to sprout from that node. Avoid cutting directly above a node—you'll end up with a stub that won't heal properly. Work your way from the bottom up to keep the plant balanced.
☀️ Step 4: Shape for Balance and Airflow
Step back and assess the plant's overall shape. Cordylines grow in a natural tiered form, so aim to preserve that layered look. Remove any stems that are growing inward or crossing over others—this improves airflow and reduces the risk of fungal issues. You'll notice the plant's natural growth pattern as you trim; follow that instead of forcing a perfect symmetry.
If your cordyline is getting too tall, you can cut the entire top off just above a leaf node to encourage bushier growth. This is called "heading back," and it works wonders for plants that have grown leggy. Just be prepared for a temporary setback—the plant will focus energy on regrowing from the cut point before it puts out new leaves.
💧 Step 5: Post-Trimming Care
After trimming, give your cordyline a deep watering to help it recover. Water until you see excess moisture draining from the bottom of the pot or soil, but don't let it sit in standing water. This is especially important if you've made several large cuts—your plant will need extra hydration to support new growth.
Place the plant in a spot with bright, indirect light for the first week after trimming. Avoid direct sunlight, which can stress the plant as it recovers. You'll see new growth emerging from the leaf nodes within 4-6 weeks, depending on your climate and the time of year. Watch for fresh, vibrant leaves pushing through—this is your sign that the trimming was successful.
Tips & tricks for perfect Cordyline plant trimming
Here's what I've learned after years of bringing my cordylines back to life—these tricks make all the difference between a sad, leggy plant and a vibrant showstopper.
The Tool Factor: Never skip sterilizing your tools between cuts! After trimming each section, wipe your pruners with that 70% isopropyl alcohol—even if you're just working with one plant. I learned this the hard way when a small fungal spot spread to my entire collection. Sterilizing between each cut prevents cross-contamination that can turn your revival project into a disaster.
Diagnostic Tip: When checking for dead growth in Step 2, run your finger along the stem—healthy leaves should feel firm with a slight give, while dead ones will feel papery or brittle. If you're unsure about a leaf, do the "tug test": pull gently. If it comes away easily, it's dead; if it resists, it's still alive. This simple test saves you from accidentally removing healthy foliage.
Cutting Precision: That ½-inch above the leaf node in Step 3 is non-negotiable for new growth. I measured this after seeing my plants struggle with stubby regrowth—always cut at that precise angle to encourage strong new shoots. Pro tip: Use a ruler or even a business card to mark your ½-inch measurement before making the cut. The angle matters too: a 45-degree cut prevents water from pooling, which would rot the stem.
Seasonal Timing: The best time to trim is actually in late winter or early spring, just as new growth begins. This gives your plant the entire growing season to recover before winter dormancy. If you must trim in summer, do it in the morning when temperatures are cooler—this reduces stress on the plant. I've found that summer trims can sometimes shock the plant if done in peak heat.
Pro Tips for Trimming Cordyline Plants
- Here's what I've learned after years of bringing my cordylines back to life—these tricks make all the difference between a sad, leggy plant and a vibrant showstopper.
- The Tool Factor: Never skip sterilizing your tools between cuts!
- Diagnostic Tip: When checking for dead growth in Step 2, run your finger along the stem—healthy leaves should feel firm with a slight give, while dead ones will feel papery or brittle.
Frequently asked questions
Got questions about keeping your Cordyline plants looking their best? Here are some common concerns—and their answers—to help you trim with confidence!
When is the best time to trim Cordyline plants?
The ideal time to trim is late winter or early spring (just before new growth starts). You can also do light trims to shape or remove dead fronds anytime, but avoid heavy cuts during extreme heat or cold. Pro tip: If your plant looks leggy, a mid-season trim can encourage bushier growth!
How do I know which leaves to cut?
Focus on dead, yellowed, or brown fronds first—they drain energy from the plant. Next, trim any overly long or straggly leaves to maintain a balanced shape. Leave the healthiest, innermost leaves intact; they’re the plant’s energy producers! Warning: Never cut more than 1/3 of the plant at once.
Can I propagate my Cordyline from trimmings?
Healthy stems or leaf cuttings
(with at least 2–3 nodes) can root in water or soil. Dip the cut end in rooting hormone for faster success. Place in bright, indirect light and keep soil moist. Bonus: Propagating is a great way to share free plants with friends!
What should I do if my Cordyline looks sad after trimming?
If your plant seems stressed (drooping, sparse growth), it might need time to recover. Ensure it’s in well-draining soil and water only when the top inch is dry. Avoid fertilizing for 4–6 weeks post-trim—let it focus on regrowth. Sunlight tip: Too much direct sun after a big trim can scorch new leaves; ease it in gradually.
How can I keep my Cordyline from getting too leggy?
Leggy growth happens when the plant stretches for light. Prevent it by:
- Placing it in bright, indirect light (but no harsh afternoon sun).
- Trimming back overly long stems to encourage branching.
- Fertilizing lightly in spring/summer with a balanced, diluted fertilizer.
Wrapping up and next steps
Trimming your Cordyline plants isn’t just about keeping them neat—it’s a rewarding way to boost their health, encourage vibrant growth, and enjoy year-round color. 🌿 With the right tools, timing, and techniques, you’ll turn pruning into a simple yet satisfying task that transforms your garden.
Now that you’re armed with expert tips, grab those shears and get pruning! For extra flair, experiment with shaping or propagate cuttings to share with fellow plant lovers.