Transplanting
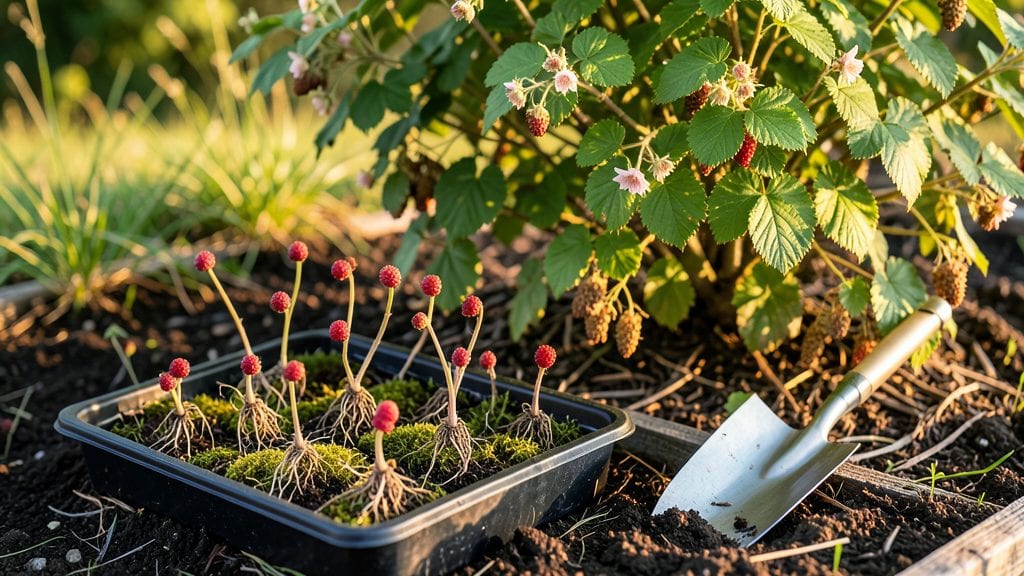
Planting Willamette raspberries means getting canes that thrive in our damp, mild Pacific Northwest climate—something I learned after my first batch of floppy, disease-prone plants. These berries aren’t just hardy; they’re designed for our region’s challenges, from winter rains to summer humidity.
The key starts with the right spot: partial shade in hot afternoons keeps the fruit from sunscalding while letting the canes soak up morning sun for energy.
You’ll need healthy bare-root plants from a reputable nursery, a shovel, and a mix of compost to sweeten your native soil—Willamettes hate soggy roots but love rich, well-draining earth. Space them 3-4 feet apart in rows 6 feet apart to give those canes room to spread without crowding.
Plant them just deep enough so the soil line on the roots sits 1-2 inches below the surface, then water deeply to settle everything in. That first drink helps wash away air pockets that could strangle new roots.
Within 4-6 weeks, you’ll see fresh green growth pushing through the soil, a sure sign your canes are settling in. The real magic happens in year two when those canes establish strong roots and start producing sweet, firm berries that ripen in late summer.
Prune out the weakest canes now to focus energy on the strongest, and mulch heavily to keep roots cool and moist—this variety rewards patience with bold, flavorful fruit that outshines store-bought any day.
Here’s the secret: Willamettes handle our wet springs better than most varieties, but they still need good air circulation. Avoid planting in low spots where water pools, and consider a north-south trellis to keep canes upright and berries off the damp ground.
Once established, these plants will fruit for 10+ years with minimal fuss—just annual pruning and a little TLC. Let’s get those canes in the ground right.
📚 In This Guide
- What you need
- Instructions
- Tips and common mistakes
- Wrapping up and next steps
What you need
- ● Willamette raspberry canes: 3–5 healthy, dormant canes (bare-root or potted). Look for certified disease-free stock!
- ● Shovel or trowel: For digging planting holes (12–18" deep). A transplant spade works best.
- ● Compost or well-aged manure: 2–3 gallons per plant to enrich soil. Aim for organic matter (50–70% compost).
- ● Balanced fertilizer: 10-10-10 or 5-10-10 (1–2 tbsp per plant). Slow-release options are ideal.
- ● Mulch: 2–3 inches of straw, wood chips, or pine needles to retain moisture and suppress weeds.
- ● Drip irrigation or hose: For consistent watering (1–2 gallons per plant, 2–3x/week after planting).
- ● Pruning shears: Sharp, clean shears (sterilize with rubbing alcohol between cuts).
- ○ Garden twine & stakes (optional but helpful): 4–6 ft wooden stakes + twine for trellising (Willamettes are floricane types—support is key!).
- ● Soil test kit: Check pH (6.0–7.0 is ideal). Amend with lime or sulfur if needed.
- ● Epsom salt: 1 tbsp per plant (annually) for magnesium boosts—great for Pacific Northwest clay soils.
- ● Row cover or netting: To protect from birds and late frosts (April–May in the PNW).
- ● Organic pest control: Neem oil or insecticidal soap for aphids/spider mites.
- ● Garden gloves: For comfort (raspberry thorns are no joke!).
Step-by-step instructions for planting Willamette raspberries
Here’s how to establish a productive raspberry patch tailored to the Pacific Northwest’s climate and soil.
Select and Prepare the Planting Site
Willamette raspberries thrive in full sun to partial shade, with at least 6 hours of direct sunlight daily. Choose a location with well-draining soil—these canes despise soggy roots, which is common in the PNW’s rainy season. If your soil feels compacted or heavy, amend it with 2-3 inches of compost mixed into the top 12 inches of soil. This improves drainage and provides nutrients for strong root development.
Test your soil’s pH—Willamette raspberries prefer a slightly acidic range of 5.5 to 6.5. If your soil tests higher, incorporate sulfur or peat moss to lower the pH gradually. Avoid fresh manure, which can burn young roots. Instead, use well-aged compost or a balanced organic fertilizer at planting time. Space rows 6-8 feet apart to allow for airflow and future maintenance.
Plant Bare-Root Canes at the Right Time
Plant bare-root canes in early spring, once the soil has warmed to at least 45°F and the threat of hard frosts has passed. This timing ensures roots establish before summer heat arrives. Soak the canes in lukewarm water for 2-3 hours before planting to rehydrate them—dried roots take longer to revive. Dig a trench 12-18 inches wide and 12 inches deep, placing canes 18-24 inches apart along the trench’s length.
Position the roots so they spread naturally downward, with the crown (the swollen area where roots meet the cane) sitting just above soil level. Burying the crown too deeply suffocates the plant, while leaving it exposed invites disease. Backfill the trench with soil, firming it gently around the roots to eliminate air pockets. Water deeply to settle the soil and remove any air gaps.
Mulch and Protect Newly Planted Canes
Apply a 3-inch layer of organic mulch, such as straw or wood chips, around the base of the canes. Mulch conserves moisture, suppresses weeds, and regulates soil temperature—critical in the PNW’s cool, wet springs. Keep the mulch 2-3 inches away from the crown to prevent rot. Willamette raspberries are hardy but benefit from light frost protection in their first year, especially if planted late. Use row covers or frost cloth on cold nights until canes are 3-4 feet tall, which improves their resilience.
Water newly planted canes once a week during the first growing season, providing 1 inch of water per week. Let the top 2 inches of soil dry slightly between waterings—overwatering in the PNW’s damp climate leads to root rot. Avoid wetting the leaves when watering, as this encourages fungal diseases like cane blight, which is common in humid Pacific Northwest summers.
Prune and Train Canes for Maximum Yield
Willamette raspberries are floricane-bearing, meaning they produce fruit on second-year canes. In their first year, focus on establishing strong primocanes (current year’s growth). Once canes reach 5-6 feet tall, trim the tips to encourage thicker, bushier growth. Remove any weak, spindly, or diseased canes at the base to redirect energy to healthier growth. In late fall or early winter, cut all primocanes back to the ground—this prevents disease spread and prepares the plant for spring regrowth.
After the first fruiting season, prune in late winter or early spring before new growth begins. Remove all old canes (floricanes) that have produced fruit, as they won’t fruit again. Thin remaining canes to 6-8 per plant, spacing them 6-8 inches apart for optimal airflow. This pruning strategy ensures larger, higher-quality berries and reduces the risk of pests and diseases that thrive in dense foliage.
Fertilize and Monitor for PNW-Specific Challenges
Apply a balanced organic fertilizer (such as 10-10-10) in early spring once new growth appears. Follow package instructions for application rates, but reduce by half if your soil is already rich in compost. Willamette raspberries are relatively low-maintenance but benefit from additional nitrogen in early summer to support fruiting. Use a slow-release fertilizer or fish emulsion to avoid overfeeding, which can lead to excessive leafy growth at the expense of fruit production.
Watch for spotted wing drosophila, a common PNW pest that lays eggs in ripening raspberries. Use row covers during flowering to prevent infestations, and hand-pick any overripe berries that attract pests. Also, keep an eye out for cane borers—small holes or sawdust-like frass at the base of canes signal an infestation. Treat with beneficial nematodes or neem oil as a preventative measure. With proper care, your Willamette raspberries will thrive in the Pacific Northwest’s climate, producing sweet, firm berries for years to come.
Tips & tricks for planting Willamette raspberries
These practical insights will help you navigate the unique challenges of growing Willamette raspberries in the Pacific Northwest's climate, ensuring your canes establish strong roots and thrive for years.
Soil Preparation Strategy: When amending your soil with 2-3 inches of compost, focus on the top 12 inches of soil to create a deep, well-draining root zone. In the PNW's rainy climate, this is particularly important—consider adding perlite or coarse sand if your soil feels particularly dense. I've found that adding a handful of mycorrhizal fungi to the planting hole can significantly boost root development, especially in the first critical weeks after planting.
Timing is Everything: The 45°F soil temperature threshold is crucial for planting bare-root canes. Use a soil thermometer to confirm this temperature—early spring can be deceptive with cool mornings and warm afternoons. I've learned that planting too early when soil temps fluctuate can stress the canes. If you're unsure, wait until forsythia bushes bloom in your area, which typically coincides with the right soil temperature for raspberries.
Mulching for Moisture Control: The 3-inch layer of organic mulch serves multiple purposes beyond moisture retention. In the PNW's wet springs, it prevents soil compaction from heavy rains while keeping roots consistently moist. I recommend using straw rather than wood chips for the first year, as it breaks down more slowly and maintains better insulation against temperature swings. Keep that 2-3 inch clearance from the crown to prevent rot—this is where many gardeners make mistakes.
Pruning Precision: When trimming primocanes at 5-6 feet tall, use clean, sharp pruners to make cuts just above a leaf node. This encourages bushier growth and stronger canes for next year's fruiting. In late fall, when you cut back all primocanes to the ground, mark the planting location with stakes—it's easy to forget where you planted in the winter months, and you don't want to accidentally dig up your new canes when preparing for spring planting.
Pro Tips for Willamette Raspberry Planting
- These practical insights will help you navigate the unique challenges of growing Willamette raspberries in the Pacific Northwest's climate, ensuring your canes establish strong roots and thrive for years.
- Soil Preparation Strategy: When amending your soil with 2-3 inches of compost, focus on the top 12 inches of soil to create a deep, well-draining root zone.
- Timing is Everything: The 45°F soil temperature threshold is crucial for planting bare-root canes.
Frequently asked questions
Got questions about planting and growing Willamette raspberries? You’re not alone—this hardy Pacific Northwest variety has its own quirks! Here are some of the most common queries to help you get started on the right foot.
When is the best time to plant Willamette raspberries?
The ideal window for planting is late winter to early spring (February–March) or early fall (September–October). This gives roots time to establish before summer heat or winter frost. Avoid planting in extreme heat—bare roots dry out quickly! For container-grown plants, you can extend the window slightly, but spring remains the safest bet.
How far apart should I space Willamette raspberry plants?
Space plants 2–3 feet apart in rows, with rows 6–8 feet apart to allow for airflow and easy maintenance. Willamette raspberries thrive in wide rows, reducing competition for sunlight and water. If space is tight, opt for trellising to save room while keeping canes upright and productive.
What’s the biggest challenge when growing Willamette raspberries?
The biggest hurdle is disease prevention, especially cane blight and spotted wing drosophila. To combat this:
- Plant in full sun (6+ hours/day) for better airflow.
- Remove old canes after harvest to reduce fungal spores.
- Use organic mulch (straw or wood chips) to deter pests.
- Monitor for Japanese beetles—handpick or use row covers if needed.
Can I grow Willamette raspberries in containers?
Yes! Use a large container (at least 18–24 inches deep and wide) with drainage holes. Fill with a mix of potting soil and compost, and choose a location with morning sun and afternoon shade to prevent overheating. Container-grown plants may need more frequent watering and fertilizer (every 4–6 weeks in growing season).
Do Willamette raspberries need winter protection?
These raspberries are hardy to USDA Zone 5, but young plants or harsh winters may need help. Mound 6–12 inches of straw or mulch around the base after the first frost to insulate roots. For extreme cold (<0°F), wrap canes loosely in burlap or use a frost blanket. Prune dead canes in early spring to encourage new growth.
How long does it take for Willamette raspberries to produce fruit?
Be patient! Primocanes (first-year canes) typically won’t fruit, but floricanes (second-year canes) will produce sweet, large berries by late summer of the following year. With proper care, you’ll enjoy a heavy harvest for 3–5 years before replanting becomes necessary.
Wrapping up and next steps
Planting Willamette raspberries in your Pacific Northwest garden is a rewarding journey that blends resilience with delicious results! 🌱 These hardy canes thrive with the right soil, spacing, and care—plus, their adaptability makes them a standout choice for local growers.
Whether you're a seasoned gardener or a beginner, your effort will soon be rewarded with juicy, flavorful berries.
Ready to take the next step? Start by prepping your soil this season, then plant your canes in early spring or fall for the best success. Happy growing—your taste buds (and future raspberry jam!) will thank you!