
Pruning
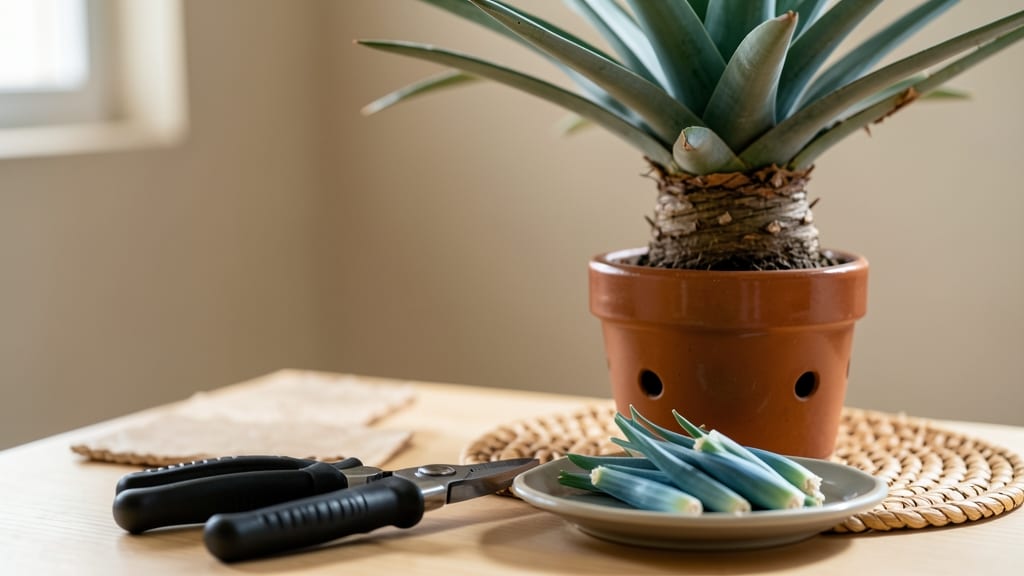
Yucca plant trimming keeps your plant looking sharp and encourages that jewel-toned regrowth year-round. I’ve trimmed my yucca three times now, and each time, it bounces back with thicker stems and brighter foliage—no over-trimming drama.
The key is timing: late winter or early spring, right after flowering, or when you spot leggy growth reaching for the sky.
You’ll need just three tools: sharp pruners (clean and sanitized), gardening gloves (yucca has spines!), and rubbing alcohol to wipe down cuts. Start by snipping off dead leaves at the base—those brown, papery fronds are just deadweight.
Next, cut back spent flower stalks where they meet the main stem, and finally, trim leggy growth back to a healthy node.
The results? Within 4-6 weeks, you’ll see fresh, vibrant growth pushing from those trimmed spots. The plant redirects energy to new shoots, giving you a fuller, bushier yucca. Just avoid cutting into the thick, woody center—this is where the plant stores energy, and you don’t want to starve it.
This method works for both indoor and outdoor yuccas, whether you’re dealing with a 10-foot-tall desert specimen or a compact container plant. The secret is patience—yuccas grow slowly, but with the right cuts, you’ll have a thriving plant that’s the envy of the neighborhood. Ready to get started?
📚 In This Guide
- What you need
- Instructions
- Tips and common mistakes
- Wrapping up and next steps
What you need
- ● Pruning shears or hand pruners – Choose bypass pruners (sharp, clean blades) for precision cuts; sterilize with rubbing alcohol before and after use.
- ● Garden gloves – Opt for cut-resistant, breathable gloves (e.g., nitrile-coated) to protect against jagged edges and sap irritation.
- ● Disinfectant (70% isopropyl alcohol or bleach solution) – 1 part bleach to 9 parts water for cleaning tools between cuts (prevents disease spread).
- ○ Pruning saw (optional but helpful for thick stems) – A folding pruning saw with a fine-tooth blade (for stems thicker than 1 inch).
- ● Sharpie or permanent marker – For marking cuts if you’re experimenting with propagation or shaping.
- ● Newspaper or drop cloth – Lay down to catch debris and protect surfaces (especially indoors).
- ● Small bucket or trash bag – For collecting pruned material (compost or dispose of diseased parts immediately).
- ● Horticultural sealant (e.g., pruning wax) – Apply to large cuts to prevent sap oozing and speed up healing.
- ● Rooting hormone – If propagating from cuttings, use a gel or powder to boost success rates.
- ● Spray bottle with water – Keeps leaves dust-free and helps reduce stress on the plant during trimming.
- ● Ladder or step stool – For tall yuccas (ensure it’s stable and non-slip!).
- ● Camera or phone – Snap before/after photos to track your yucca’s progress over time!
Instructions for strategic yucca plant trimming
Here's how to keep your yucca thriving with just three precise cuts—no complicated pruning required.
Identify and Remove Dead or Damaged Growth
Start by inspecting your yucca for any brown, crispy, or mushy stems. These are your first targets—they won’t recover and will only drain energy from healthy growth. Use clean, sharp pruners to cut 1-2 inches below the damaged area, making sure the cut is straight and clean. This prevents water from pooling and causing rot.
You’ll know you’ve cut correctly when the exposed area looks fresh and pale green, not yellowed or blackened. Remove any leaves that are completely brown or have holes from pests. These cuts should be done anytime you notice damage, but spring is the best season to tackle this first.
Prune Overcrowded or Leggy Stems
Yuccas grow new shoots from the base, and over time, these can become crowded or stretch too tall and thin—what gardeners call "leggy." To fix this, look for stems that are growing too close together or have elongated without new leaves. Cut these back to just above a healthy leaf node, where a new branch can sprout.
Leggy stems are usually the tallest ones with sparse leaves. By removing them, you encourage the plant to focus energy on shorter, bushier growth. Make your cuts at a 45-degree angle to allow water to run off and prevent rot. This step is best done in early spring when the plant is just waking up from dormancy.
Shape the Plant for Fullness and Airflow
Yuccas thrive when they have good airflow, so thinning out the center is key. Look for stems that are growing inward or crossing over others—these create shaded spots where moisture lingers and pests hide. Trim back any stems that are rubbing against each other or growing in an unnatural direction, cutting them back to a healthy node.
This is also your chance to shape the plant. If your yucca is getting too wide or top-heavy, you can lightly trim the outer edges to encourage a more balanced shape. Just remove a few leaves or small stems at a time—yuccas are forgiving, but drastic changes can stress the plant. Do this in late summer or early fall to avoid disturbing new growth.
Harvest and Repurpose Cuttings (Optional)
If you’ve removed healthy stems during trimming, you can propagate them into new plants. Let the cuttings dry out for 1-2 days in a shady spot so the ends callous over. Then, plant them in well-draining soil and keep them lightly moist until roots form, which usually takes 4-6 weeks. This is a great way to expand your yucca collection without spending money.
Don’t worry if not all cuttings take—yuccas are resilient. Focus on keeping the mother plant healthy, and you’ll have plenty of opportunities to grow new ones. This step works best in spring or early summer when the plant is actively growing.
Tips & tricks for perfect yucca plant trimming
Mastering these three strategic cuts will transform your yucca from overgrown to thriving—here's how to avoid common mistakes and maximize results.
Clean Tools Are Non-Negotiable: Before you make any cuts, disinfect your pruners with rubbing alcohol or soapy water. Yuccas have open wounds after trimming, and bacteria can easily infect them. I've seen too many plants develop rot simply because the tools weren't clean. Sterilizing takes just 30 seconds but prevents weeks of frustration. Remember, the cut area should look fresh and pale green, not yellowed or slimy.
The Angle Matters More Than You Think: When trimming in Step 2 and Step 3, that 45-degree angle isn't just decorative—it's functional. The angled cut prevents water from pooling in the wound, which is how rot starts. I learned this the hard way after watching several cuttings develop blackened edges from sitting water. For the optional propagation cuttings in Step 4, let them dry completely for those 1-2 days before planting to form a natural seal.
Season Timing Makes All the Difference: The instructions mention specific seasons for each step, and that's not arbitrary. Early spring (Step 2) gives your plant energy to recover before summer heat. Late summer/early fall (Step 3) allows time for new growth before winter dormancy. I've noticed my yuccas recover fastest when trimmed just before their natural growth spurts. If you must trim outside these windows, do it during mild weather to reduce stress.
Don't Overdo It with the Outer Edges: When shaping in Step 3, resist the urge to dramatically reduce the plant's size all at once. Yuccas are tough, but they're not indestructible. I've seen gardeners take off too many leaves at once, which can shock the plant. Instead, make small adjustments—remove just a few leaves or small stems at a time. Think of it like haircuts: subtle changes create the best results without stressing your plant.
Pro Tips for Yucca Plant Trimming
- Mastering these three strategic cuts will transform your yucca from overgrown to thriving—here's how to avoid common mistakes and maximize results.
- Clean Tools Are Non-Negotiable: Before you make any cuts, disinfect your pruners with rubbing alcohol or soapy water.
- The Angle Matters More Than You Think: When trimming in Step 2 and Step 3, that 45-degree angle isn't just decorative—it's functional.
Frequently asked questions
Got questions about keeping your yucca plant looking sharp? Here are answers to the most common queries—so you can trim with confidence!
When is the best time to trim a yucca plant?
Trim your yucca anytime it’s overgrown, but aim for early spring (just before new growth) for the cleanest results. Avoid heavy pruning in winter—this plant is dormant and needs time to recover. Light maintenance cuts (like removing dead leaves) can happen year-round!
How do I trim a yucca plant without killing it?
Use sterilized pruners and cut just above a leaf node (the bump where leaves grow). Never trim more than 1/3 of the plant at once, and avoid cutting into the thick, woody stem—this can harm the plant. Let cuts heal for a few days before watering heavily.
Can I propagate my yucca plant from trimmings?
After trimming, let cuttings dry for 1–3 days** to callus over. Plant in well-draining soil, water lightly, and place in bright, indirect light. Roots typically form in 4–6 weeks. Skip fertilization until new growth appears!
Why is my yucca plant turning brown after trimming?
Brown tips or leaves after pruning? It’s usually normal stress—just reduce watering and give it time. If large sections die back, check for over-trimming or fungus (like root rot). Ensure your yucca has full sun and dry soil to bounce back faster.
Do I need special tools to trim a yucca?
Nope! Basic tools work: sharp pruners (for leaves), loppers (for thicker stems), and rubbing alcohol (to sterilize tools). Skip dull blades—they crush stems and invite disease. A glove helps too (yucca spines are sneaky!).
Wrapping up and next steps
Trimming your yucca plant isn’t just about aesthetics—it’s a year-round game-changer for healthier growth and stunning blooms! 🌿 With the right tools, timing, and techniques (like the three strategic cuts we covered), you’ll keep your plant thriving while shaping it to perfection.
Whether you’re a seasoned gardener or a newbie, a little pruning goes a long way.
Ready to level up your yucca care? Grab your gloves and shears, and give your plant the TLC it deserves. Start small, stay consistent, and watch your yucca flourish! 🌟