
Orchid Care
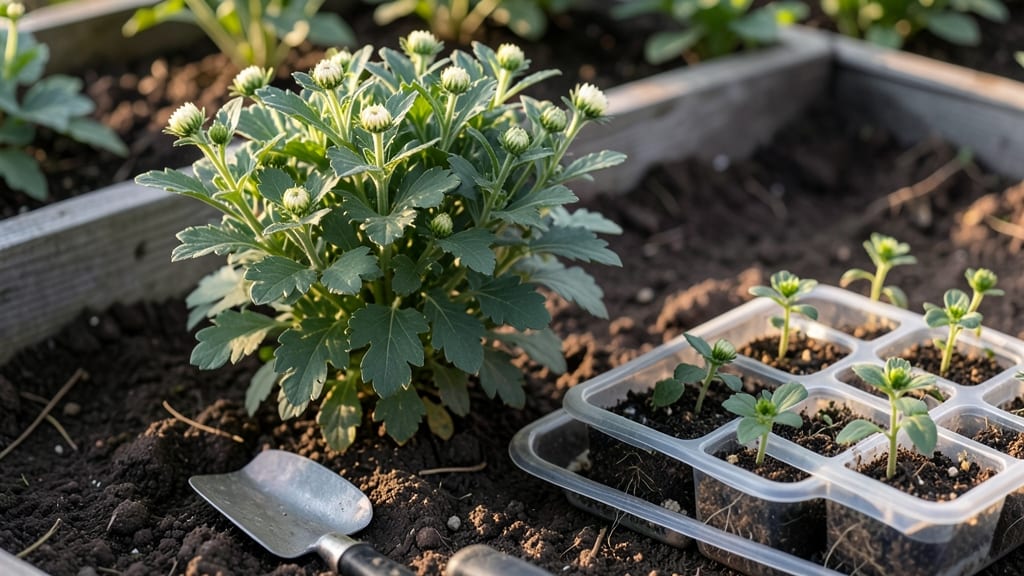
Planting chrysanthemums outdoors transforms any garden into a late-season showstopper with their bold blooms and surprising cold tolerance. I’ve planted these hardy perennials for five years now, and they never fail to deliver vibrant color when most flowers have called it quits for the season.
The secret lies in timing—wait until after your last frost when soil temperatures hit at least 60°F, and you’ll set them up for a season of effortless beauty.
You’ll need well-draining soil enriched with compost, a sunny spot with at least 6 hours of light daily, and space to let them spread—about 18-24 inches apart for full-size varieties. Dig holes twice as wide as the root ball but only as deep, then water thoroughly before planting.
These plants thrive when their roots establish quickly, so don’t skip this step. My first batch struggled until I learned this simple trick.
Once planted, keep the soil consistently moist but never soggy—chrysanthemums hate wet feet. Within 6-8 weeks, you’ll see lush green foliage pushing upward, followed by those signature blooms in shades of pink, purple, or white.
The best part? They’ll keep flowering until frost, giving you 3-4 months of color with minimal care. Even my black thumb can’t kill these.
For year-round success, cut back dead foliage in late fall and mulch heavily to protect roots through winter. In spring, they’ll bounce back stronger than ever. Whether you’re a first-time gardener or a seasoned pro, these plants deliver foolproof results—just give them sunlight, patience, and a little space to shine.
📚 In This Guide
- What you need
- Instructions
- Tips and common mistakes
- Wrapping up and next steps
What you need
- ● Chrysanthemum plants: Choose between potted transplants (6–8 weeks old) or seeds (if starting early). Aim for 3–5 plants per square yard for a lush display.
- ● High-quality potting soil or garden soil: Well-draining, loamy soil with a pH of 6.0–7.0. Mix in 2–3 inches of compost for nutrients.
- ● Organic fertilizer: A balanced 10-10-10 or slow-release granular fertilizer (e.g., 1 tbsp per plant). Avoid high-nitrogen blends—chrysanthemums thrive on phosphorus and potassium!
- ● Mulch: 2–3 inches of organic mulch (e.g., straw, shredded bark, or pine needles) to retain moisture and regulate soil temperature.
- ● Garden trowel or hand shovel (for digging holes 2–3 times wider than the root ball).
- ● Gloves (to protect hands from thorns on some varieties).
- ● Watering can or hose with a gentle spray nozzle (chrysanthemums hate soggy roots!).
- ● Pruning shears (for trimming dead foliage post-planting or shaping mature plants).
- ● Measuring tape or ruler (to ensure proper spacing—12–24 inches apart for most types).
- ● Sunlight: Full sun (6–8 hours daily) for optimal blooming. Partial shade (4–6 hours) works for cooler climates.
- ● Climate timing: Seeds: Start indoors 8–10 weeks before your last frost date.
- ● Transplants: Plant outdoors 2–4 weeks after the last frost (when soil temps reach 50°F+).
- ● Drainage: Avoid low-lying areas where water pools. Elevate beds if needed.
- ● Epsom salt (1 tbsp dissolved in water monthly) for magnesium boosts.
- ● Slow-release stakes or cages (to support tall varieties like ‘Mammoth’ or ‘Daisy’ types).
- ● Drip irrigation system for consistent moisture (especially in dry climates).
- ● Plant markers (to track varieties and bloom times).
Step-by-Step instructions for planting chrysanthemums outdoors
Here's how to establish hardy chrysanthemums that thrive through seasons with minimal fuss.
Choose the Right Location and Timing
Chrysanthemums thrive in full sun—select a spot receiving at least 6 hours of direct sunlight daily. They tolerate partial shade but produce fewer blooms. I always plant mine in late summer or early fall, about 6-8 weeks before the first frost, to allow roots to establish before winter. This timing ensures strong growth next spring.
Test your soil's drainage by digging a 6-inch hole—if water pools after 30 minutes, amend with 2-3 inches of compost to improve aeration. Chrysanthemums hate soggy roots, so raised beds or mounds work well in heavy clay soils. Mark the planting area with stakes to avoid overcrowding; mature mums need 18-24 inches of space between plants.
Prepare the Soil for Optimal Growth
Work the top 12 inches of soil with a garden fork, loosening compacted layers without disturbing deeper roots. Chrysanthemums prefer slightly acidic to neutral soil with a pH of 6.0-7.0. If your soil tests outside this range, mix in sulfur (for alkaline soils) or lime (for acidic soils) according to package instructions.
Incorporate 2-3 inches of well-aged compost into the planting hole to provide organic matter and nutrients. Avoid fresh manure—it can burn tender roots. For container-grown plants, gently tease apart roots if they're circling the pot before placing them in the hole. This encourages outward growth rather than a root-bound clump.
Plant with Proper Spacing and Depth
Dig a hole twice as wide as the root ball but no deeper. Position the plant so the top of the root ball sits 1 inch below soil level—this prevents stem rot while keeping the plant stable. Gently backfill with native soil, pressing lightly to eliminate air pockets but not compacting the mix.
Water deeply immediately after planting to settle the soil and remove air gaps. Use a hose with a gentle spray nozzle to avoid displacing the plant. Mulch around the base with 2-3 inches of shredded bark or straw, leaving a 2-inch gap around the stem to prevent rot. This conserves moisture and regulates soil temperature, which is crucial for cold-hardy varieties.
Establish Watering and Maintenance Routine
Water newly planted chrysanthemums once every 2-3 days until they show new growth, keeping the soil evenly moist but not waterlogged. After establishment, reduce frequency to once weekly, adjusting for rainfall. Deep watering—1 inch per week—encourages strong root development. Avoid overhead watering after 4 PM to prevent fungal diseases like powdery mildew.
Fertilize 4-6 weeks after planting with a balanced, slow-release fertilizer (10-10-10 ratio). Sprinkle granules around the drip line, 3-4 inches from the stem, and water thoroughly to activate them. Deadhead spent blooms regularly to encourage continuous flowering. In fall, reduce watering as temperatures drop to harden off plants for winter.
Winterize for Cold-Hardy Resilience
Once frost threatens, cut back stems to 2-3 inches above the ground to reduce winter damage. Apply a 3-4 inch layer of mulch over the root zone, extending it beyond the plant's drip line. I use straw or shredded leaves—they insulate roots while allowing water penetration. In zones with severe winters (below 0°F), add an extra layer of burlap or frost cloth over the crown for protection.
Spring care begins in early March when new shoots emerge. Remove winter mulch gradually to avoid shocking the plant, and resume watering as soil thaws. You’ll see fresh growth within 2-3 weeks—this is your cue to fertilize lightly and monitor for pests like aphids or spider mites. Prune leggy stems in early spring to encourage bushier, more compact growth for the season ahead.
Tips & tricks for perfect chrysanthemum planting
These insights will help you establish vibrant, resilient chrysanthemums that reward you with seasonal blooms year after year.
Timing is Everything: The 6-8 week window before your first frost is non-negotiable for cold-hardy varieties. I've learned this the hard way—planting too early can lead to weak root systems that struggle through winter, while planting too late means plants won't establish before cold sets in. Check your local frost dates and mark your calendar accordingly. For northern climates where winters dip below 0°F, this timing becomes even more critical as plants need maximum growing time before dormancy.
Soil Preparation Secrets: When working the top 12 inches of soil in Step 2, focus on creating a loose, crumbly texture rather than turning it into powder. The goal is to improve aeration without creating a dusty environment that can compact again when wet. For heavy clay soils, consider creating raised beds or planting mounds—this simple elevation can prevent the very soggy conditions chrysanthemums despise. I've seen plants in poorly drained areas develop root rot within weeks, so don't skip this assessment step.
Planting Depth Precision: Positioning the root ball just 1 inch below soil level in Step 3 might seem minor, but this small detail prevents two common problems: stem rot from buried stems and weak anchoring from stems sitting too high. After backfilling, press the soil gently with your fingers—you should feel slight resistance but not hardness. This creates the perfect balance between stability and breathability for new roots.
Winter Protection Layering: The 3-4 inch mulch layer recommended in Step 5 is your plant's thermal blanket, but the technique matters more than the thickness. Spread mulch in even layers, avoiding piles that can create moisture pockets against stems. For zones below 0°F, I've found that combining straw with burlap creates a more effective insulating sandwich than either material alone. This layered approach can mean the difference between winter survival and spring disappointment.
Pro Tips for Planting Chrysanthemums Outdoors
- These insights will help you establish vibrant, resilient chrysanthemums that reward you with seasonal blooms year after year.
- Timing is Everything: The 6-8 week window before your first frost is non-negotiable for cold-hardy varieties.
- Soil Preparation Secrets: When working the top 12 inches of soil in Step 2, focus on creating a loose, crumbly texture rather than turning it into powder.
Frequently asked questions
Got questions about planting chrysanthemums outdoors? You’re not alone—these hardy beauties spark curiosity! Here are answers to the most common queries to help you grow confidently.
When is the best time to plant chrysanthemums outdoors?
For spring planting, aim for early spring (4–6 weeks before your last frost date) once soil warms to 60°F (15°C). If planting in fall, do so 6–8 weeks before your first frost for established roots. Chrysanthemums thrive with gradual temperature shifts—avoid extreme heat or cold!
Can I plant chrysanthemums in containers or do they need garden beds?
Both work! Garden beds offer long-term stability, but containers are great for patios or small spaces. Use well-draining soil with a 12–15" pot diameter per plant. Add mulch to retain moisture. Just ensure containers get 6+ hours of sunlight—chrysanthemums are sun-worshippers!
What pests or diseases should I watch for with outdoor chrysanthemums?
Keep an eye out for aphids, spider mites, and slugs. Yellowing leaves? Check for powdery mildew or root rot (overwatering culprit!). Prevention tip: Space plants 12–18" apart for airflow, and prune regularly to boost circulation. Neem oil sprays deter pests naturally.
Do chrysanthemums survive winter outdoors, or should I dig them up?
Most varieties are cold-hardy to USDA Zone 5 (or lower with protection). Cut back foliage to 2–3" above ground, mulch heavily (4–6" of straw or leaves), and cover with burlap in harsh winters. Pro tip: Hardy types like ‘Hardy Yellow’ or ‘Dwarf Indica’ often return year after year!
How can I encourage bigger, showier blooms?
Bloom size hinges on three factors: sunlight, fertilization, and pruning. Feed with a balanced 10-10-10 fertilizer every 4–6 weeks, and pinch back tips when plants hit 6" tall. Deadhead spent blooms to redirect energy. Bonus: Morning sun + afternoon shade in hot climates keeps flowers vibrant!
Still stumped? Drop your question in the comments—we’re happy to help your chrysanthemums thrive!
Wrapping up and next steps
Planting chrysanthemums outdoors is a rewarding way to bring vibrant color to your garden—even as the seasons change! 🌸 With the right location, soil prep, and care, these cold-hardy beauties will thrive year after year. Now that you’re equipped with the know-how, roll up your sleeves and get growing!
Ready to take the next step? Start by marking your garden spots—then dig in and enjoy the process. Your future blooms will thank you! 🌱