Shrubs
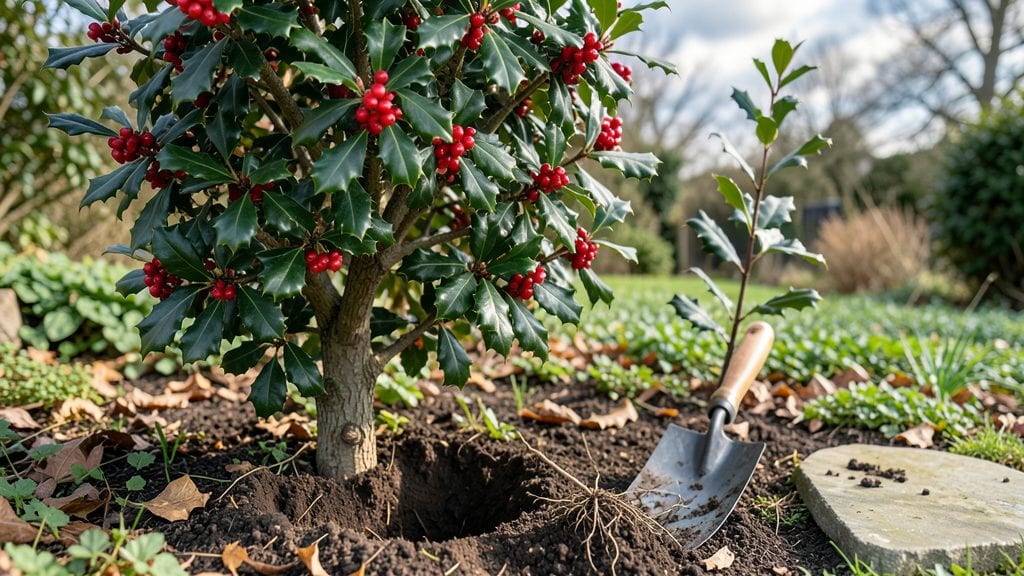
Planting holly bushes transforms your yard into a lush, year-round green sanctuary with those signature red berries. 🌿 I’ve planted hollys in every season—spring, fall, even winter—and the key to success isn’t timing alone, but knowing how to prep the soil and handle those spiky leaves without getting pricked.
The right spot and a little patience mean your holly will thrive for decades, outlasting most other shrubs.
Start with healthy nursery stock—look for bushes with firm stems and vibrant green leaves, not yellowing or wilted ones. You’ll need well-draining soil (amend heavy clay with compost), a sunny to partially shaded site, and enough space: hollys need 3-6 feet between plants, depending on the variety.
Dig a hole twice as wide as the root ball but no deeper, then mix in a slow-release fertilizer to give them a strong start.
Watering is where most people go wrong. After planting, keep the soil consistently moist (not soggy) for the first 6-8 weeks, then taper off to weekly deep waterings once established. Mulch around the base to retain moisture and suppress weeds—just keep it a few inches away from the trunk.
Within a year, your holly will reward you with dense growth and those classic berries, making every winter season feel festive.
For cold climates (zones 5-9), winter care is minimal—just avoid heavy snow buildup on branches. In warmer zones, watch for spider mites and scale insects, but a strong, healthy holly rarely struggles.
The best part? Once planted, hollys need little maintenance beyond an annual pruning to shape them. That’s a shrub you can plant once and enjoy for life.
📚 In This Guide
- What you need
- Instructions
- Tips and common mistakes
- Wrapping up and next steps
What you need
- ● Holly bushes: 3–5 healthy nursery-grown plants (choose Ilex opaca for classic holly or Ilex crenata for dwarf varieties).
- ● Garden soil: Well-draining, slightly acidic mix (pH 5.0–6.0). Amend with peat moss or compost if your soil is heavy clay or alkaline.
- ● Organic mulch: 2–3 inches of pine straw, wood chips, or shredded bark to retain moisture and regulate temperature.
- ● Fertilizer: Slow-release acid-loving plant fertilizer (e.g., 10-10-10 or holly-specific blend).
- ● Watering can or hose: With a gentle spray nozzle for deep but even watering.
- ● Garden shovel or trowel: For digging holes (12–18 inches wide and deep).
- ● Pruning shears: Sharp, clean pair for trimming roots or shaping after planting.
- ● Measuring tape or ruler: To ensure proper spacing (6–10 feet apart for standard holly; 3–5 feet for dwarf varieties).
- ● Gloves: Heavy-duty for protection (holly leaves can be prickly!).
- ○ Optional but helpful: Soil pH test kit (to confirm acidity).
- ● Plant support stakes (if planting in windy areas).
- ● Epsom salt (for magnesium boost in yellowing leaves).
- ● Sunlight: Choose a spot with full sun to partial shade (6+ hours of light daily for best berry production).
- ● Spacious site: Avoid planting near large trees (competition for water/nutrients).
- ● Timing: Plant in early spring or fall (avoid extreme heat or frost).
- ● Drainage: Ensure the area isn’t soggy—holly hates waterlogged roots!
Step-by-Step instructions for planting holly bushes
Here's how to plant holly bushes like a pro—lush, healthy shrubs that stay vibrant all year.
🌱 Step 1: Choose the Perfect Location and Dig the Hole
Holly bushes thrive in full sun to partial shade, with at least 6 hours of sunlight daily for best berry production. I always pick a spot with well-draining soil—holly hates soggy roots. Use a shovel to dig a hole twice as wide and just as deep as the root ball of your holly bush. This gives roots room to spread without crowding.
Loosen the sides of the hole with your shovel or hands to remove any compacted soil. If your soil is heavy clay, mix in 2-3 inches of compost or sand to improve drainage. Holly bushes are adaptable, but they’ll reward you with thicker growth if the soil is slightly acidic (pH 5.0-6.0). Test your soil if possible—most garden centers sell simple kits.
🪴 Step 2: Prepare the Bush and Plant It Properly
Gently remove the holly bush from its container and loosen the roots if they’re circling or tightly bound. This prevents root shock and encourages outward growth. Place the bush in the hole so the top of the root ball sits level with the surrounding soil—burying the stem too deep can cause rot, while planting too high stresses the plant. I like to use a level or stick to check alignment.
Backfill the hole with native soil (mixed with any amendments you added earlier) and tamp it down lightly with your hands. Press firmly enough to remove air pockets but not so hard that you compact the soil. Water deeply right away to settle everything and eliminate gaps. You’ll see the soil sink slightly—this is normal, so add a little more if needed.
☀️ Step 3: Mulch and Water for Strong Establishment
Spread 2-3 inches of mulch (like pine straw or shredded bark) around the base of the holly bush, keeping it 3-4 inches away from the stem to prevent rot. Mulch helps retain moisture and regulates soil temperature, which is especially important in hot summers. I always use organic mulch—it breaks down over time and adds nutrients to the soil.
Water the holly bush deeply once a week for the first month, ensuring the soil is moist 6 inches down. Holly bushes are drought-tolerant once established, but young plants need consistent moisture to root well. You’ll know it’s time to water again when the top inch of soil feels dry to the touch. Avoid overhead watering—it can spread disease, so always water at the base.
✂️ Step 4: Prune and Maintain for Year-Round Beauty
Prune holly bushes in late winter or early spring before new growth begins. Remove any dead, damaged, or crossing branches first—this keeps the bush healthy and open. Then, shape the bush by trimming back any overgrown or leggy branches. Holly bushes respond well to pruning, so don’t be afraid to give them a clean shape. Just avoid heavy pruning in fall, as it can stress the plant before winter.
Fertilize holly bushes in early spring with a balanced, slow-release fertilizer (like 10-10-10). Follow the package instructions for application rates—over-fertilizing can burn roots. If your holly isn’t producing berries, it might need more phosphorus (look for a fertilizer with higher middle numbers, like 10-20-10). Berries develop on female bushes, so if you want fruit, plant a male holly nearby for pollination.
Tips & tricks for perfect holly bush planting
Here's what I've learned after planting dozens of holly bushes—these tricks ensure your evergreens thrive for years to come.
Soil Prep Secret: In Step 1, don't just dig the hole—test your soil first. Holly bushes love slightly acidic soil (pH 5.0-6.0). If your soil tests higher, mix in 2-3 inches of peat moss or sulfur to lower the pH before planting. I've seen holly bushes struggle in alkaline soil, even with proper drainage. A simple soil test kit from your garden center solves this before you even plant.
Root Treatment Technique: When loosening those circling roots in Step 2, I like to give them a quick soak in water with a rooting hormone for 10 minutes before planting. This gives your holly bush a head start. Just be sure to plant immediately after—roots dry out fast! The extra step makes a noticeable difference in establishment, especially in hot climates.
Mulching Strategy: For Step 3, I recommend using pine straw mulch over shredded bark—it stays in place better and slowly acidifies the soil over time, which holly bushes love. Keep that mulch 3-4 inches away from the stem to prevent rot, and refresh it every spring. The right mulch makes all the difference in winter protection and summer moisture retention.
Watering Wisdom: That first month is critical—water deeply once a week means the top 6 inches of soil should be moist. I use a moisture meter to check, but if you don't have one, stick your finger in. If the soil feels dry just an inch down, it's time to water. Overhead watering spreads disease, so always water at the base using a soaker hose or drip irrigation.
Pro Tips for Planting Holly Bushes
- Here's what I've learned after planting dozens of holly bushes—these tricks ensure your evergreens thrive for years to come.
- Soil Prep Secret: In Step 1, don't just dig the hole—test your soil first.
- Root Treatment Technique: When loosening those circling roots in Step 2, I like to give them a quick soak in water with a rooting hormone for 10 minutes before planting.
Frequently asked questions
Got questions about planting holly bushes? You’re not alone! Here are some of the most common concerns—plus quick, actionable answers to help you grow lush, thriving holly year after year.
When is the best time to plant holly bushes?
The ideal window is early spring or fall (3–4 weeks before the first frost). These seasons give roots time to establish before extreme heat or cold. Pro tip: Avoid planting in summer—holly hates drought stress!
How far apart should I space holly bushes for full coverage?
Spacing depends on the variety:
- Dwarf holly (e.g., ‘Dwarf Burford’): 3–5 feet apart
- Medium holly (e.g., ‘Sky Pencil’): 6–8 feet apart
- Large holly (e.g., ‘American Holly’): 10–15 feet apart
Why aren’t my holly bushes producing berries?
Holly bushes are dioecious, meaning you need both male and female plants for berries. Plant at least one male for every 5–6 females within 50 feet. Also, ensure full sun (6+ hours/day) and well-draining soil—shady spots or poor soil = fewer berries.
Can I plant holly bushes in containers?
Yes! Use a large container (15+ gallons) with drainage holes and a balanced fertilizer (like 10-10-10). Repot every 2–3 years and overwinter indoors if temps drop below 10°F. Pro tip: Choose compact varieties like ‘Little Gem’ for containers.
Are holly bushes toxic to pets or wildlife?
Holly leaves and berries are mildly toxic if ingested in large amounts, causing stomach upset in pets (especially dogs). The berries aren’t deadly, but remove them if pets nibble. Birds love the berries—just keep an eye on curious pups!
Wrapping up and next steps
Planting holly bushes is a rewarding way to add year-round color, texture, and wildlife appeal to your landscape—whether you’re a beginner or a seasoned gardener. 🌿 With the right location, soil prep, and a few pro tips, these evergreens will thrive and bring joy for decades.
Now that you’re armed with the essentials, roll up your sleeves and start digging!
Ready to take the next step? Pick your favorite holly variety (like Ilex opaca for classic beauty or Ilex crenata for compact charm), check your local nursery, and schedule your planting session. Before you know it, your yard will be a holly haven!