Orchid Care
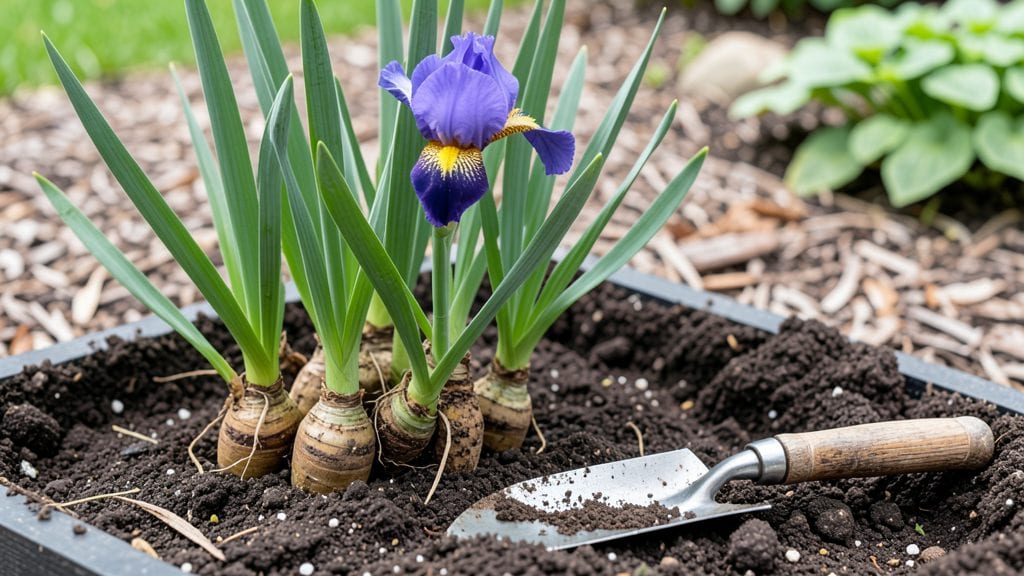
Planting iris roots at the right time and depth turns those knobby rhizomes into a showstopping border that blooms reliably year after year. I’ve learned the hard way—planting too deep or in the wrong season means waiting another year for those dramatic sword-like leaves to finally produce flowers.
The secret isn’t complicated, but timing and soil prep make all the difference between a thriving clump and a struggling one.
You’ll need a sunny spot with well-draining soil—iris roots rot faster than they bloom in soggy ground. Dig a trench about 4 inches deep and twice as wide as your rhizomes, spacing them 12 inches apart. The top third of each root should peek above soil level, never buried completely.
This isn’t rocket science, but getting the depth right means fewer surprises when spring arrives. I’ve even planted mine in containers** on my patio with the same success.
Once planted, water lightly for the first week to help roots settle, then let the soil dry slightly between waterings. No need for fertilizers right away—iris roots store enough energy to fuel their first blooms.
By late spring, you’ll see those signature velvety petals popping up, and the plants will multiply faster than you can dig up extras to share. The key is patience: iris roots take time, but they reward it with decades of color.
Here’s where most gardeners trip up: planting too deep buries the growth points, while shallow planting exposes roots to drying out. And yes, I’ve done both. The fix is simple—adjust your depth and watch those rhizomes spread like they’re on a mission.
Whether you’re tucking them into a garden bed or a container, this method works every time. Let’s get those irises in the ground!
📚 In This Guide
- What you need
- Instructions
- Tips and common mistakes
- Wrapping up and next steps
What you need
- ● Iris rhizomes: Healthy, firm, and free of rot or soft spots. Aim for 3-5 rhizomes per plant (adjust based on desired cluster size).
- ● Well-draining soil: Mix 60% native soil with 30% compost and 10% coarse sand or perlite (irises hate soggy roots!).
- ● Garden fork or trowel: For digging—opt for a sturdy, wide-blade trowel (6-8 inches deep) for precision.
- ● Gloves: Heavy-duty gardening gloves to protect hands from sharp rhizome edges.
- ● Organic mulch: 2-3 inches of pine bark or straw to retain moisture and regulate soil temp.
- ● Watering can or hose with a gentle nozzle: Avoid blasting rhizomes—aim for 1-2 inches of water per week (adjust for climate).
- ● Slow-release fertilizer: 5-10-10 NPK ratio (sprinkle lightly around roots post-planting).
- ● Soil pH test kit: Irises thrive in slightly acidic to neutral soil (pH 6.0-7.0)—adjust with lime or sulfur if needed.
- ● Plant markers: Label rhizomes by variety if you’re testing different types (trust us, you’ll forget!).
- ● Compost tea or mycorrhizal fungi: Boosts root health in poor or compacted soil.
Instructions for planting iris roots with precision
Here’s how to plant iris roots for vibrant blooms year after year—no guesswork involved.
Choose the Right Time and Prepare the Soil
Plant iris roots in early fall, about 6-8 weeks before the first frost, or in late winter just as new growth begins. This timing lets roots establish before summer heat. Avoid planting in extreme heat or cold, which stresses the plant. Work in well-draining soil with a pH between 6.0 and 7.0—iris roots rot easily in soggy conditions.
Loosen the soil to a depth of 12 inches with a garden fork or tiller. Mix in 2-3 inches of compost to enrich the soil without compacting it. If your soil is heavy clay, blend in sand or perlite to improve drainage. Iris roots need room to spread, so avoid amending with heavy organic matter that could suffocate them.
Position the Roots Correctly in the Soil
Dig a hole 3-4 inches deep—this ensures the roots sit just below the soil surface without burying the fleshy rhizomes too deeply. Space plants 12-24 inches apart in rows, depending on the iris variety. Larger types like bearded iris need more space, while dwarf varieties can be closer together.
Place each rhizome horizontally in the hole, with the thicker, fan-shaped top facing upward. The roots should dangle naturally into the soil. If you’re unsure which end is up, look for the small, pointed bud—this is the growing tip and should face upward. Press the rhizome lightly into the soil so it stays in place but doesn’t sink deeper than 1 inch.
Cover and Water Without Overdoing It
Fill the hole with soil, leaving the rhizome barely exposed—just a slight ridge should show above ground. This prevents rot while allowing sunlight to reach the top. Water lightly but thoroughly right after planting to settle the soil around the roots. Avoid deep watering, which can wash soil away or drown the rhizomes.
Keep the soil moist but not soggy for the first 2-3 weeks. Iris roots are drought-tolerant once established, but they need consistent moisture to take root. Mulch lightly with 1-2 inches of organic mulch (like shredded bark) to retain moisture and suppress weeds, but avoid piling mulch directly against the rhizomes.
Provide Sun and Minimal Maintenance
Iris thrives in full sun, with at least 6-8 hours of direct sunlight daily. Choose a spot with well-draining soil—even a slight slope helps prevent water pooling. If your climate is hot and dry, water once a week during the first growing season, but reduce watering once the plant is established.
Fertilize lightly in early spring with a balanced, low-nitrogen fertilizer (like 10-10-10) to encourage blooms without excessive foliage growth. Avoid high-nitrogen fertilizers, which produce lush leaves but fewer flowers. Deadhead spent blooms in late spring to redirect energy into next year’s flowers, but leave the foliage until it yellows naturally in late summer.
Divide and Refresh Every Few Years
Iris roots multiply over time, and crowded rhizomes lead to fewer blooms. Divide clumps in early fall when the foliage turns yellow. Dig up the rhizomes, separate the fans, and discard any that are soft, mushy, or shriveled. Healthy rhizomes feel firm and plump, with 2-3 good-sized fans per section.
Replant the divisions immediately, following the same depth and spacing guidelines. This refreshes the plant and ensures vibrant blooms for years to come. With proper care, your iris will reward you with stunning, long-lasting flowers season after season.
Tips & tricks for planting iris roots with precision
Perfect iris planting doesn't require a green thumb—just these key insights to avoid common pitfalls and ensure vibrant blooms.
The Timing Factor: I learned this the hard way after planting in late spring—those roots need time to establish before summer heat. The 6-8 week window before frost gives them the perfect head start. If you miss fall planting, late winter is your second chance, but only when you see those first green shoots poking through the soil. Mark your calendar now, because timing is everything for iris success.
Soil Preparation Secret: Don't skip the 12-inch soil loosening—this creates the perfect environment for roots to spread. I've seen gardeners rush this step and end up with compacted soil that suffocates the rhizomes. For heavy clay soil, mix in sand or perlite right in the hole rather than amending the entire bed. This targeted approach gives your irises exactly what they need without overdoing it.
Rhizome Orientation: The thicker, fan-shaped top must face upward—this isn't optional! I've seen beginners plant them upside down, and while the plant might survive, you'll get fewer blooms. Look for that small pointed bud on the top—it's nature's arrow pointing you in the right direction. Press them just enough to hold them in place without burying more than 1 inch deep.
Watering Wisdom: Those first 2-3 weeks are critical for root establishment. I've seen many gardeners either drown their irises with deep watering or let them dry out completely. Water lightly but thoroughly right after planting, then maintain consistent moisture without letting the soil become soggy. Think of it like giving your iris a warm bath—not a shower that washes them away.
Pro Tips for Planting Iris Roots
- Perfect iris planting doesn't require a green thumb—just these key insights to avoid common pitfalls and ensure vibra...
- The Timing Factor: I learned this the hard way after planting in late spring—those roots need time to establish befor...
- Soil Preparation Secret: Don't skip the 12-inch soil loosening—this creates the perfect environment for roots to spre...
Frequently asked questions
Got questions about planting iris roots? You’re not alone!
Here are answers to the most common concerns—from timing to troubleshooting—so you can grow stunning irises with confidence.
When is the best time to plant iris roots?
The ideal window is late summer to early fall (August–October in most U.S. zones), when roots are dormant but still active. This gives them time to establish before winter. Pro tip: If you miss this, spring planting (March–April) works too—just water deeply to help roots recover.
How deep should iris roots be planted?
Plant rhizomes (the thick, fleshy roots) with half exposed above soil and half buried. The top should face upward—never cover it completely. This prevents rot while allowing sunlight to dry the rhizome between rains. Troubleshooting: If leaves turn yellow, you’re over-planting!
Can I plant iris roots in containers instead of the ground?
Use a well-draining container (like terracotta) with a mix of potting soil and sand. Ensure the container has drainage holes, and plant rhizomes 1–2 inches deep. Containers work great for small spaces or colder climates—just move them indoors if temps drop below 20°F.
How often should I water iris roots after planting?
Keep soil moist but not soggy for the first 2–3 weeks, then taper off. Irises are drought-tolerant once established—overwatering is their #1 enemy. Water at the base (not the leaves) to avoid fungal issues. Signs of stress: Wilting or mushy rhizomes mean you’re overdoing it!
My iris roots look mushy or slimy—what’s wrong?
This is a red flag for rot, usually from overwatering, poor drainage, or planting too deep. Fix it fast: Dig up the rhizome, trim any soft spots with sterilized scissors, let it dry in shade for 1–2 days, then replant with fresh, gritty soil. Prevent future issues: Space rhizomes 12+ inches apart for airflow.
Will my irises bloom the first year after planting?
Probably not! Irises need 1–2 years to establish strong roots before flowering. Focus on healthy foliage (leave it until it yellows naturally). Boost blooms: Fertilize lightly in early spring with a balanced, low-nitrogen formula (like 5-10-10). Patience pays off—vibrant blooms are worth the wait!
Wrapping up and next steps
Planting iris roots at the right time and depth is your secret to vibrant blooms and thriving plants! 🌸 Whether you’re a seasoned gardener or just starting, these steps ensure your irises take root and flourish.
Now that you’re equipped with the know-how, it’s time to roll up your sleeves and give your garden a stunning upgrade.
Ready to take the next step? Mark your calendar for early fall or late winter—your irises will thank you! For extra confidence, grab a planting guide or join a local gardening group to share your progress. Happy planting! 🌱