Transplanting
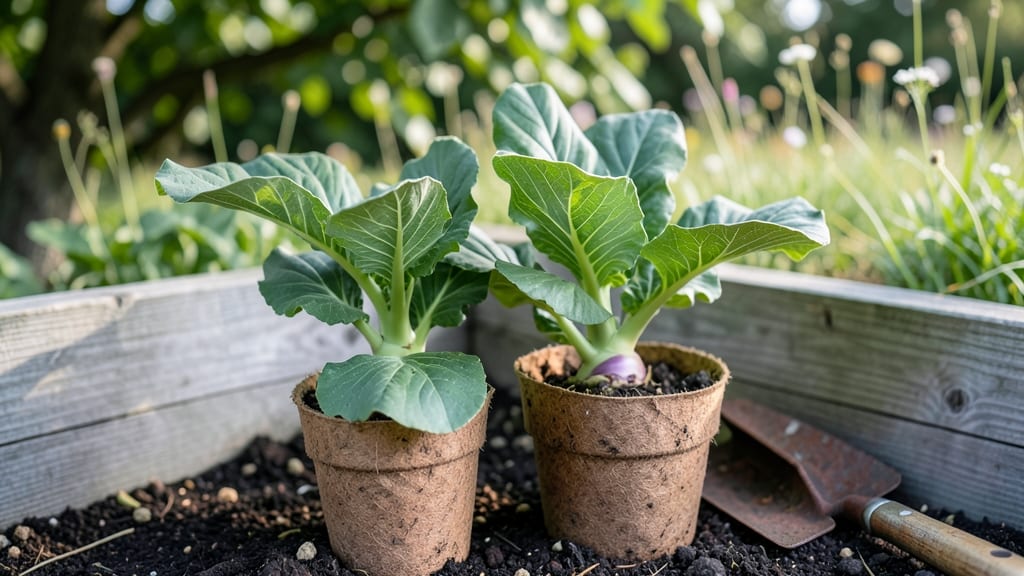
Planting kohlrabi seedlings in cool weather gives you a head start on crisp, nutty harvests. 🌱 I learned the hard way that these little transplants need gentle handling—they bolt fast if stressed, and nobody wants a bitter bulb. The secret is timing, soil, and a little patience.
Start by hardening off seedlings for 7–10 days before transplanting, moving them outdoors gradually to toughen up their stems. You’ll need well-draining soil mixed with compost, spaced 12–18 inches apart in rows 18 inches apart—crowding leads to leggy plants and poor yields.
Plant just deep enough to bury the first true leaves, then water thoroughly to settle the soil.
Once settled, keep the soil consistently moist but not soggy—kohlrabi roots hate drying out. Within 3–4 weeks, you’ll see those familiar rounded bulbs forming, ready to harvest when they’re 2–3 inches wide. The greens stay tender too, so you get double the harvest from one plant.
Works best in cool-season zones (3–8), but even hotter climates can grow kohlrabi successfully with afternoon shade. If your seedlings look wilted after transplanting, don’t panic—just give them a deep watering and some afternoon shade for a few days. They’ll bounce back.
📚 In This Guide
- What you need
- Instructions
- Tips and common mistakes
- Wrapping up and next steps
What you need
- ● Kohlrabi seedlings: 12–24 healthy, hardened-off seedlings (spaced 6–12 inches apart at maturity).
- ● Garden soil: Well-draining, fertile soil (amend with compost if needed). pH 6.0–7.0 is ideal.
- ● Garden gloves: A pair to protect your hands from dirt and sharp edges.
- ● Watering can or hose: With a gentle spray nozzle for hydrating seedlings post-transplant.
- ● Transplanting tool: A small hand trowel or garden fork for digging holes.
- ● Organic fertilizer: Balanced 10-10-10 or compost tea to boost early growth.
- ○ Mulch (optional but recommended): Straw or shredded leaves to retain moisture and suppress weeds.
- ● Row covers or frost cloth: For extra protection if transplanting early in the season.
- ● Plant markers: Labels to track varieties (especially useful if growing multiple types).
- ● Epsom salt: A sprinkle in the planting hole for magnesium boost (great for leafy growth).
- ● Compost tea spray: To strengthen seedlings and deter pests.
Step-by-Step instructions for planting kohlrabi seedlings
Here’s how to get your hardened-off kohlrabi seedlings into the ground with minimal stress and maximum vigor.
🌱 Step 1: Prepare the Planting Site
Kohlrabi thrives in loose, well-draining soil with a pH between 6.0 and 7.0. Before planting, loosen the soil to a depth of 12 inches using a garden fork or tiller. Work in 2-3 inches of compost or aged manure to enrich the bed—this ensures steady nutrient availability without overwhelming the young plants.
Choose a location with full sun to partial shade (4-6 hours of direct sunlight daily). Kohlrabi tolerates cooler temperatures better than many vegetables, so avoid planting in areas that bake in afternoon heat. If your soil feels compacted, mix in 1-2 inches of coarse sand to improve drainage—kohlrabi roots hate soggy conditions.
🪴 Step 2: Space Seedlings Correctly
Dig small holes just deep enough to accommodate the root ball of each seedling, ensuring the top of the root flare sits level with the soil surface. Kohlrabi grows best with 12-18 inches of space between plants in rows spaced 24 inches apart. Crowding leads to competition for nutrients and poor bulb development.
Gently remove each seedling from its container, tease the roots if they’re circling, and place it in the hole. Press the surrounding soil firmly but not tightly around the base—this eliminates air pockets while avoiding root damage. Water immediately after planting to settle the soil and reduce transplant shock.
☀️ Step 3: Provide Immediate Aftercare
Keep the soil consistently moist for the first 7-10 days after transplanting by watering deeply every 2-3 days. Check moisture by inserting your finger 1 inch into the soil—if it feels dry, water until moisture reaches 4 inches deep. Avoid overhead watering, which can spread disease; instead, use a drip irrigation system or water at the base.
Apply a light mulch (like straw or shredded leaves) around each plant to retain moisture and suppress weeds. Kohlrabi is sensitive to fluctuations in soil temperature, so mulch also helps regulate ground heat. Avoid piling mulch directly against the stems—keep it 2 inches away to prevent rot.
✂️ Step 4: Monitor Growth and Harvest Timing
Kohlrabi bulbs form at the stem base and should be harvested when they reach 2-3 inches in diameter—any larger, and they become woody and tough. Watch for first true leaves to develop fully, then begin checking bulbs 3-4 weeks after planting. Harvest in the morning when temperatures are coolest for the best texture.
If you notice leaves yellowing or stunting, increase nitrogen with a balanced fertilizer (10-10-10) applied lightly every 3-4 weeks. Avoid over-fertilizing—too much nitrogen promotes leafy growth at the expense of bulb development. Thin seedlings if overcrowding occurs, leaving the strongest plants to mature.
Tips & tricks for perfectly transplanting kohlrabi seedlings
Transplanting kohlrabi seedlings successfully hinges on a few key details that many gardeners overlook—here's what I've learned the hard way after watching seedlings struggle or fail.
Soil Preparation Secret: In Step 1, when loosening soil to 12 inches, don't just scratch the surface—break up any compacted layers with your garden fork. I've seen kohlrabi roots struggle when they can't penetrate deeper than 4 inches. For even better drainage, mix in a handful of perlite with your compost if your soil tends to stay damp. The roots will thank you by developing properly rather than sitting in soggy conditions.
Root Handling Technique: During Step 2, when teasing roots, be gentle but thorough. I learned this after seeing seedlings wilt dramatically from root damage. If roots are tightly circling, make small cuts with a clean knife to encourage outward growth. This small step prevents transplant shock and gives your seedlings the best chance to establish quickly. Water immediately after planting to help settle the soil around those delicate roots.
Watering Wisdom: The 7-10 day moisture window in Step 3 is critical, but timing matters more than you'd think. Water in the morning so leaves dry before evening—this prevents fungal issues. I've had kohlrabi seedlings develop damping off just because I watered in the evening. Use a moisture meter if you're unsure; aim for soil that feels like a wrung-out sponge at 1 inch depth. Mulch helps maintain this moisture without overwatering.
Harvest Timing: When checking bulbs 3-4 weeks after planting in Step 4, don't wait until they feel firm—they should be tender like a small turnip. I've had kohlrabi turn woody because I waited too long. Harvest in the morning when temperatures are coolest, and use a sharp knife to slice through the stem cleanly. This preserves the plant's energy for any remaining bulbs.
Pro Tips for Planting Kohlrabi Seedlings
- Transplanting kohlrabi seedlings successfully hinges on a few key details that many gardeners overlook—here's what I'...
- Soil Preparation Secret: In Step 1, when loosening soil to 12 inches, don't just scratch the surface—break up any com...
- Root Handling Technique: During Step 2, when teasing roots, be gentle but thorough. I learned this after seeing seedl...
Frequently asked questions
Got questions about planting kohlrabi seedlings?
You’re not alone! Here are answers to the most common queries to help you grow a thriving crop with confidence.
When is the best time to plant kohlrabi seedlings outdoors?
Kohlrabi thrives in cool weather, so plant hardened-off seedlings 2–4 weeks before your last spring frost or 6–8 weeks before your first fall frost. Avoid extreme heat—seedlings struggle above 75°F (24°C). For extended harvests, consider two plantings: early spring and late summer.
How do I harden off kohlrabi seedlings before transplanting?
Hardening takes 7–10 days. Gradually expose seedlings to outdoor conditions: Start with 1–2 hours of shade, then increase time and sun daily. By day 7, they should tolerate full sun and cooler nights. Pro tip: Avoid hardening during windy or rainy days to prevent stress.
What’s the ideal spacing for kohlrabi seedlings in the garden?
Plant seedlings 12–18 inches apart in rows spaced 2–3 feet apart. This gives bulbs room to swell without crowding. If growing for greens, you can space them closer (10–12 inches), but yield may be smaller. Use a shallow trench or hill to improve drainage—kohlrabi hates soggy roots!
Why are my kohlrabi seedlings wilting or turning yellow after transplanting?
Wilting or yellowing often signals transplant shock, overwatering, or pests. Check soil moisture (keep it evenly moist but not soggy) and inspect leaves for aphids or cabbage worms. If roots look mushy, reduce watering. Quick fix: Mulch around seedlings to retain moisture and regulate soil temp.
Can I grow kohlrabi from seeds instead of seedlings?
Yes! Direct-sow seeds ¼-inch deep when soil is 40–85°F (4–29°C). Seedlings emerge in 5–10 days and grow faster than transplanted ones. However, seedlings give you a head start in shorter seasons. For variety, try both methods—just adjust spacing if sowing seeds.
What can I plant alongside kohlrabi to improve growth?
Kohlrabi benefits from companion planting! Try these pairings:
- Herbs: Dill, mint, or thyme deter pests.
- Vegetables: Cabbage, lettuce, or radishes (they share similar growing conditions).
- Avoid: Tomatoes or potatoes (they compete for nutrients).
Wrapping up and next steps
Planting kohlrabi seedlings is a rewarding way to grow a crisp, versatile veggie in your cool-season garden! With the right timing, soil prep, and spacing, you’ll soon enjoy a bountiful harvest. Remember: patience and care during hardening off and transplanting make all the difference.
Now that you’re ready to plant, take the next step—mark your calendar for future harvests and try experimenting with varieties or companion plants. Happy gardening! 🌱